Difference between revisions of "TASS"
Jump to navigation
Jump to search
Jrobertson (talk | contribs) |
|||
| (5 intermediate revisions by 2 users not shown) | |||
| Line 1: | Line 1: | ||
| − | + | TASS setup | |
| − | + | ==To set up TASS SSO== | |
| − | #Log in to TASS.web and go to System Admin > Users > LDAP/SAML Maintenance. | + | #Log in to TASS.web and go to '''System Admin''' > '''Users''' > '''LDAP/SAML Maintenance'''. |
| − | #Click View next to the product/portal you wish to modify. | + | #Click '''View''' next to the product/portal you wish to modify. |
| − | #In the Users tab, check that your mappings between TASS users/entities and users in | + | #In the Users tab, check that your mappings between TASS users/entities and users in Cloudwork are correct. |
#In the LDAP tab, click Edit LDAP, set Enabled to No, then click Save. | #In the LDAP tab, click Edit LDAP, set Enabled to No, then click Save. | ||
#In the SAML tab, click Edit SAML, then: | #In the SAML tab, click Edit SAML, then: | ||
| − | ##Paste in the metadata URL from | + | ##Paste in the metadata URL from Cloudwork(This is found under '''Cloudwork Dashboard'''>'''Single Sign On'''>'''Identity Provider'''>'''Entity ID''').<br>[[File:Entity_id.PNG|300px|centre|frame|Example of Entity ID]] |
##Click Fetch IDP Metadata XML. | ##Click Fetch IDP Metadata XML. | ||
##You’ll see a few prompts about overwriting metadata and generating certificates. Click OK on all of them. | ##You’ll see a few prompts about overwriting metadata and generating certificates. Click OK on all of them. | ||
| Line 14: | Line 14: | ||
##Click Save. | ##Click Save. | ||
##Click Download SP Metadata XML and store the downloaded metadata which you’ll need for the next step. | ##Click Download SP Metadata XML and store the downloaded metadata which you’ll need for the next step. | ||
| − | + | ||
| + | ==To set up Cloudwork SSO== | ||
| + | #Go to the '''Cloudwork Dashboard'''>'''Single Sign On'''>'''Add New Service'''>'''Upload an XML File''' | ||
| + | #Enter under '''Name''', Tass or another suitable name for the SSO service | ||
| + | #In '''Choose an XML File''': Upload the metadata file which was downloaded from TASS | ||
| + | #Click Submit | ||
[[Category:Single Sign On Services]] | [[Category:Single Sign On Services]] | ||
Latest revision as of 04:32, 19 October 2021
TASS setup
To set up TASS SSO
- Log in to TASS.web and go to System Admin > Users > LDAP/SAML Maintenance.
- Click View next to the product/portal you wish to modify.
- In the Users tab, check that your mappings between TASS users/entities and users in Cloudwork are correct.
- In the LDAP tab, click Edit LDAP, set Enabled to No, then click Save.
- In the SAML tab, click Edit SAML, then:
- Paste in the metadata URL from Cloudwork(This is found under Cloudwork Dashboard>Single Sign On>Identity Provider>Entity ID).
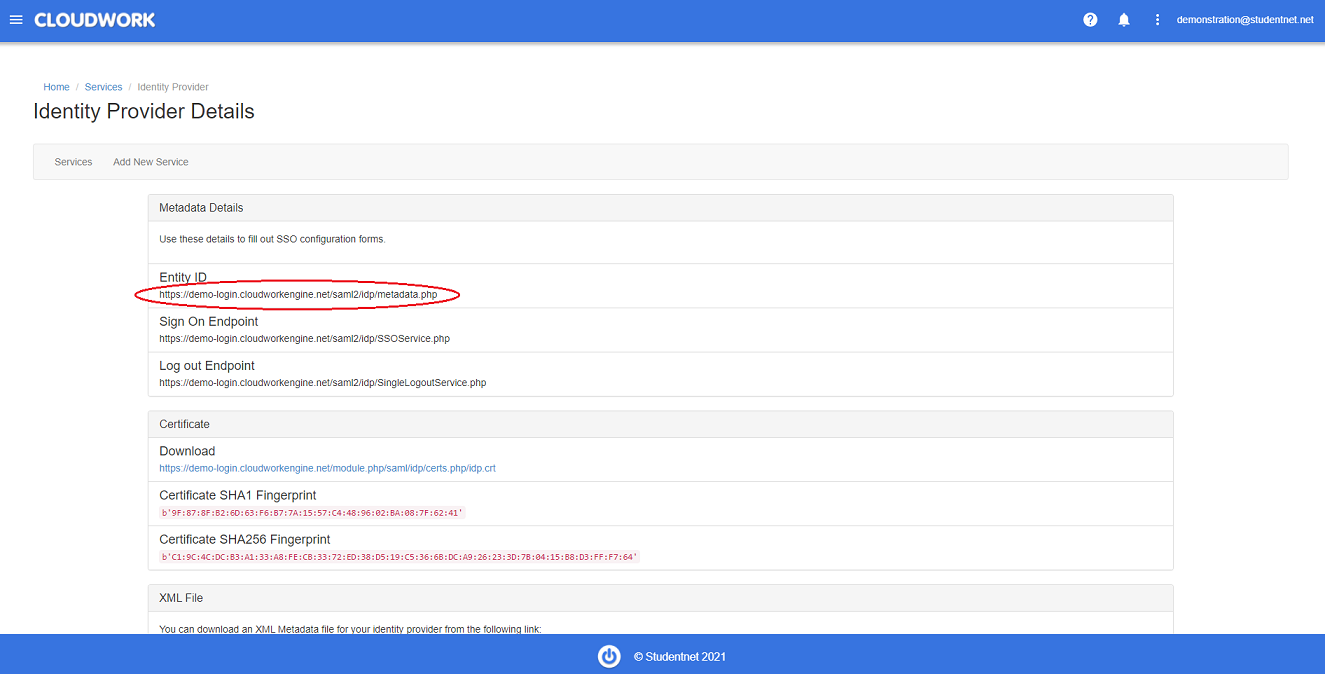 Example of Entity ID
 - Click Fetch IDP Metadata XML.
- You’ll see a few prompts about overwriting metadata and generating certificates. Click OK on all of them.
- Set Enabled to Yes.
- Click Save.
- Click Download SP Metadata XML and store the downloaded metadata which you’ll need for the next step.
- Paste in the metadata URL from Cloudwork(This is found under Cloudwork Dashboard>Single Sign On>Identity Provider>Entity ID).

To set up Cloudwork SSO
- Go to the Cloudwork Dashboard>Single Sign On>Add New Service>Upload an XML File
- Enter under Name, Tass or another suitable name for the SSO service
- In Choose an XML File: Upload the metadata file which was downloaded from TASS
- Click Submit