SynWeb
Jump to navigation
Jump to search
SSO Setup with SynWeb
- Login to your school's Cloudwork dashboard
- Navigate to Single Sign On>Identity provider>Certificate>Download
- Download the certificate on that page.
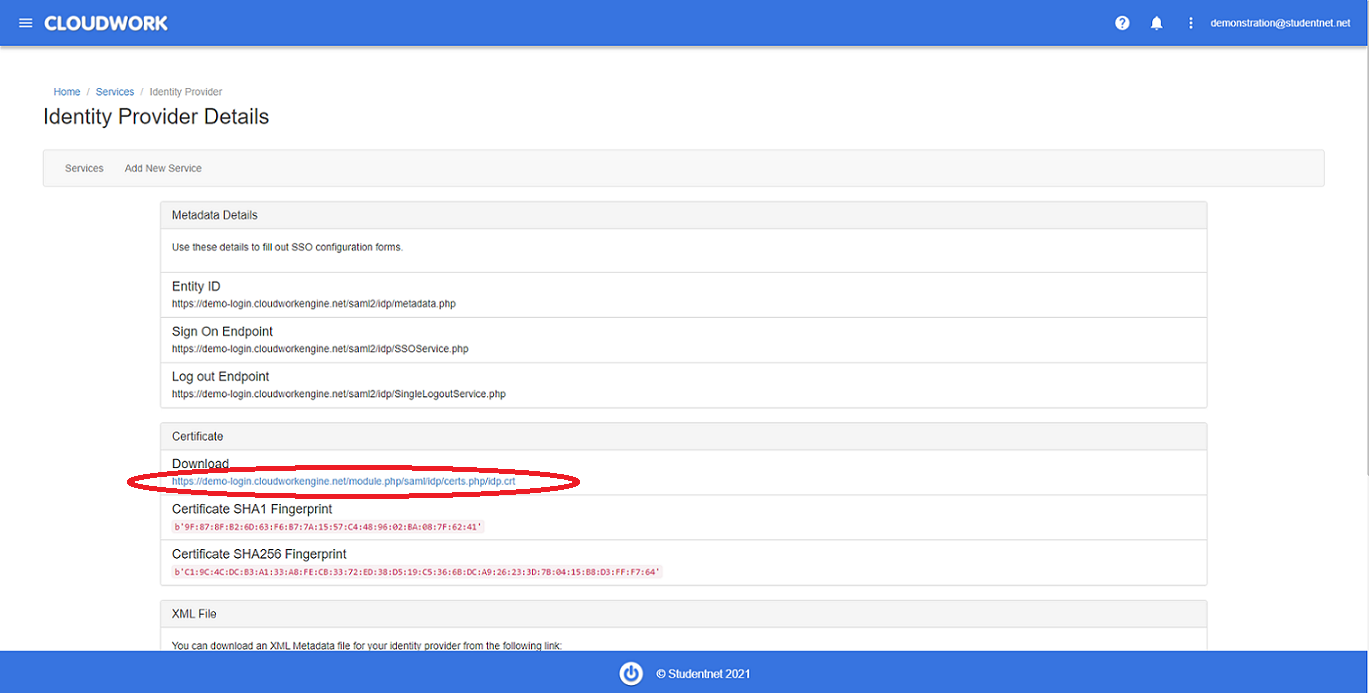 Example Certificate Download
 - Copy that certificate onto the Synergetic machine under <synweb>/Site/Certificates/idp.crt you may need to create this folder
- Log in to SQL Management Studio
- Run this query
- SELECT SynergeticPassword FROM pvSynDatabases WHERE SynergeticUserName = 'zSynergetic_main_dbo'
- On your computer, find your Binconfig folder, where the SynWeb is installed
- Run Synergetic.Application.CreateConfig.exe as an administrator and add the following values to specified fields
- AuthenticationMode = SAML
- OverrideUserName = zSynergetic_main_dbo
- SAMLLoginBinding = POST
- SAMLLogoutBinding = REDIRECT
- SAMLLoginDestination = put in the Sign On Endpoint from your school's dashboard(This is found under Cloudwork Dashboard>Single Sign On>Identity Provider>Metadata Details>Sign On Endpoint)
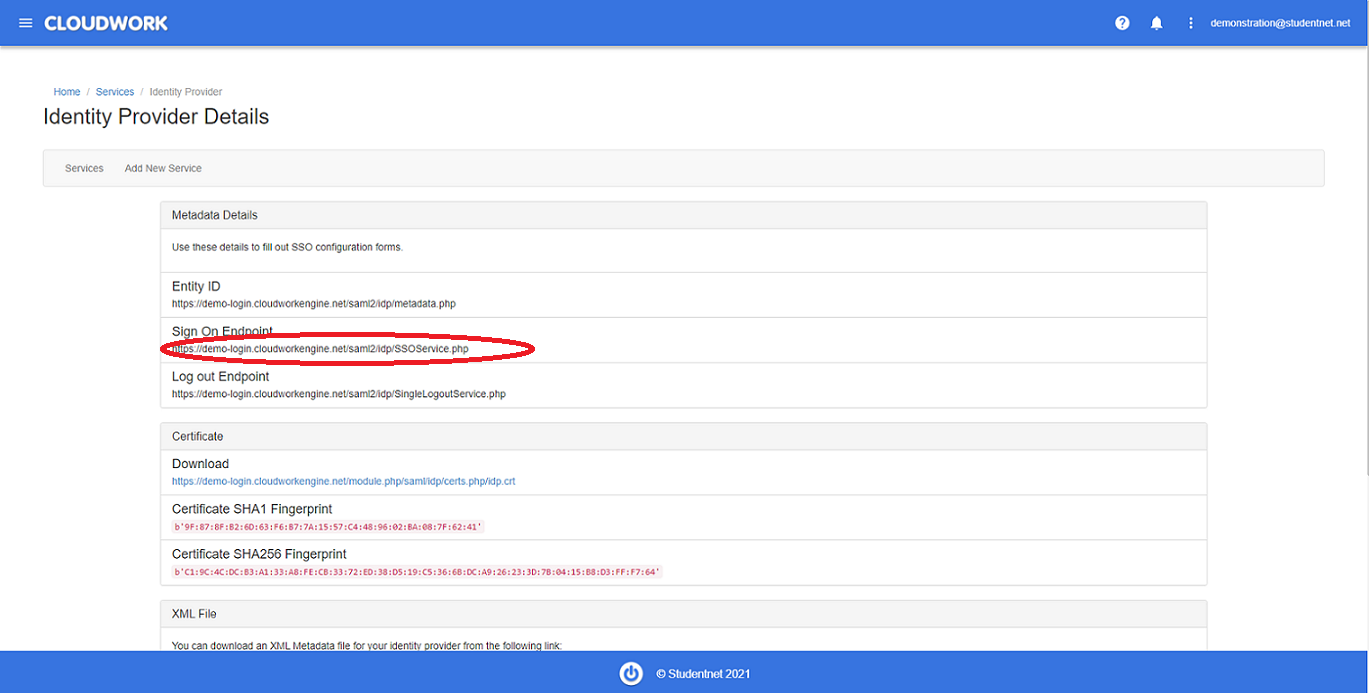 Example of Sign On Endpoint
 - SAMLLogoutDestination = put in the Log Out Endpoint from your school's dashboard (This is found under Cloudwork Dashboard>Single Sign On>Identity Provider>Log out Endpoint)
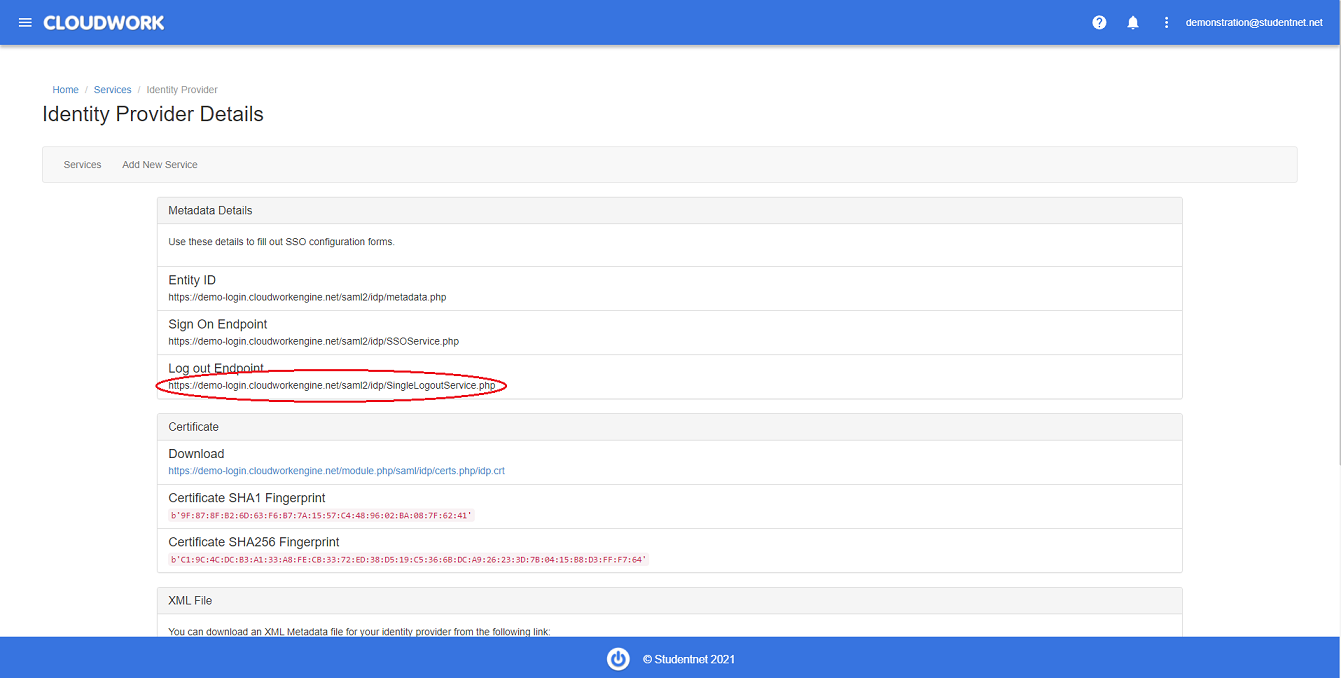 Example of Logout URL
 - SAMLLoginX509CertificatePath = ~\Site\Certificates\idp.crt
- SAMLSPIssuer = <<synergetic URL>>/login.aspx
- SAMLComparisonMode = minimum
- SAMLClaimAttributeName = NameID


Once you have saved this configuration file, open it up in notepad (or Notepad++) and find the OverridePassword key, which should look like the below.
<OverridePassword /> You will now need to remove the close and enter the password, similar to the below.
<OverridePassword>Password from the query</OverridePassword>
SSO setup with Cloudwork
- Login to your school's dashboard
- Navigate to Single Sign On>Add New Service>Synweb
- Enter Your Synergtic URL
- Click Submit