Difference between revisions of "Funnel"
Jump to navigation
Jump to search
(Created page with "==SSO setup on Cloudwork Side== #Contact '''support@digistorm''' and request Single Sign On information for Digistorm Funnel #After receiving reply from DigiStorm #Login to '...") |
|||
| Line 9: | Line 9: | ||
#::'''Entity ID''' ='''Entity ID (Metadata URL)''' from email | #::'''Entity ID''' ='''Entity ID (Metadata URL)''' from email | ||
#::'''ACS''' = '''Assertion Consumer Service (ACS URL)''' from email | #::'''ACS''' = '''Assertion Consumer Service (ACS URL)''' from email | ||
| + | #::'''Single Logout Service''' = '''Single Logout Service (SLS URL)''' from email | ||
#::'''Name ID''' = From the drop down select '''Email''' | #::'''Name ID''' = From the drop down select '''Email''' | ||
#Navigate to '''Single Sign On'''>'''Service'''>'''Digistorm Funnel''' | #Navigate to '''Single Sign On'''>'''Service'''>'''Digistorm Funnel''' | ||
Revision as of 23:29, 14 September 2021
SSO setup on Cloudwork Side
- Contact support@digistorm and request Single Sign On information for Digistorm Funnel
- After receiving reply from DigiStorm
- Login to Cloudwork dashboard
- Navigate to Single Sign On>Add New Service>Custom SAML Service
- Fill out the form:
- Name = Digistorm Funnel
- Entity ID =Entity ID (Metadata URL) from email
- ACS = Assertion Consumer Service (ACS URL) from email
- Single Logout Service = Single Logout Service (SLS URL) from email
- Name ID = From the drop down select Email
- Navigate to Single Sign On>Service>Digistorm Funnel
- Under SAML Config click Edit
- Under Certificate> Content paste the value in x509 Certificate from the email
SSO Setup with Digistorm Funnel
- Go to Cloudwork Dashboard>Single Sign On>Identity Provider>XML file>Download
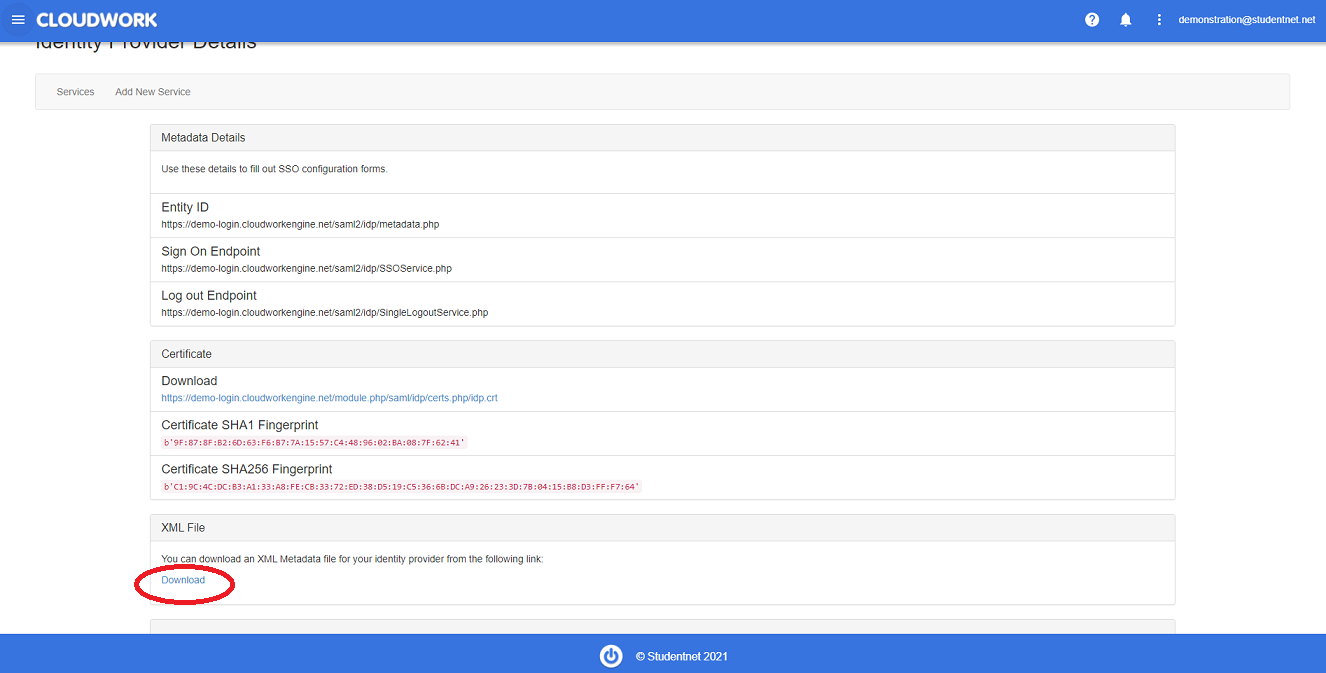 Location of XML File Download
 - Email to support@digistorm.com
