Funnel
Jump to navigation
Jump to search
Contents
SSO setup on Cloudwork Side
- Using the email template below, email support@digistorm and request metadata information for Digistorm Funnel
- After receiving reply from Digistorm you will be assigned a customer representative and given metadata information
- Login to Cloudwork dashboard
- Navigate to Single Sign On>Add New Service>Custom SAML Service
- Fill out the form:
- Name = Digistorm Funnel
- Entity ID = Entity ID (Metadata URL) from email
- ACS = Assertion Consumer Service (ACS URL) from email
- Single Logout Service = Single Logout Service (SLS URL) from email
- NameID Format = select from drop down urn:oasis:names:tc:SAML:1.1:nameid-format:unspecified
- Name ID = From the drop down select Email
- Login URL = Login URL from email
- Navigate to Single Sign On>Service>Digistorm Funnel
- Under SAML Config click Edit
- Under Certificate>Used for Signing check the checkbox
- Under Certificate>Used for Encryption check the checkbox
- Under Certificate> Content paste the value in x509 Certificate from the email
Email Template
Hi Digistorm,
Our school <school name> is wanting to setup SSO for Digistorm Funnel with Cloudwork
Could you please provide Digistorm Funnel's Metadata Information?
SSO Setup with Digistorm Funnel
- Go to Cloudwork Dashboard>Single Sign On>Identity Provider>Entity ID
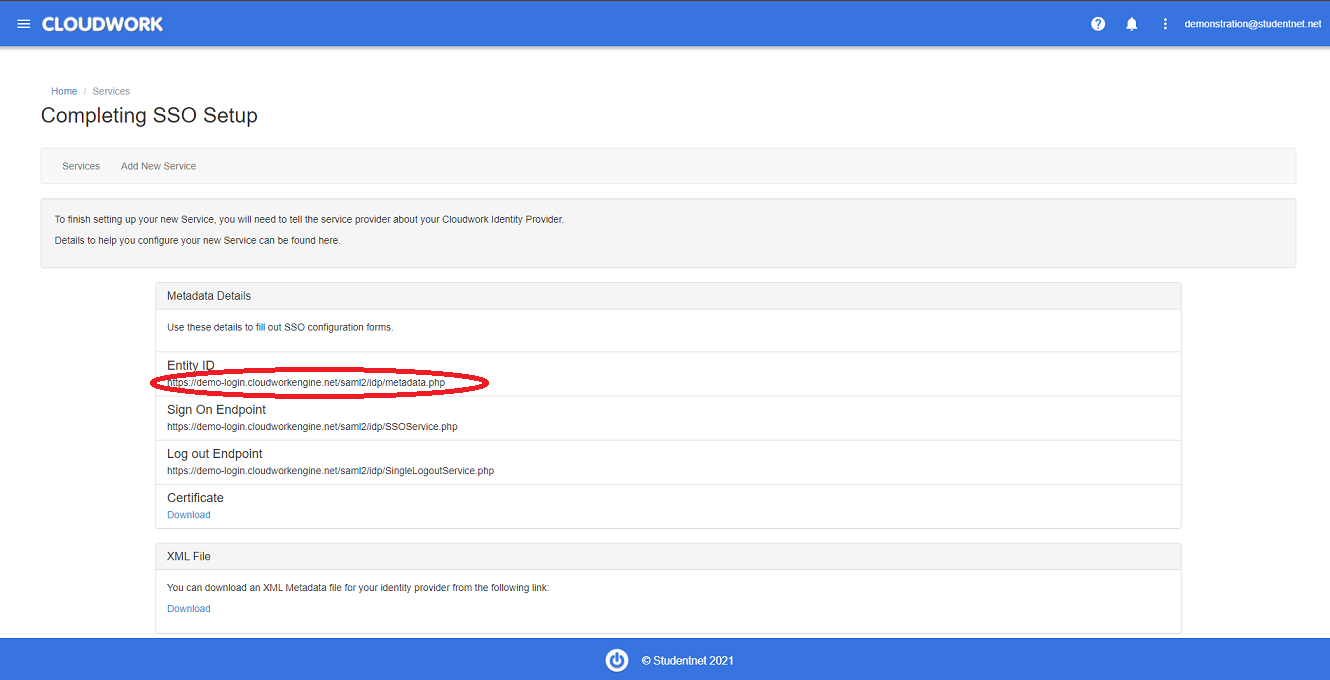 Example of Entity ID
 - Copy the Entity ID
- Email the customer representative, letting them know that setup on Cloudwork's side has been completed and include the Entity ID copied in step 2

Email Template
Hi <customer representative name>,
We have completed the setup on Cloudwork's end.
Attached is our school's Metadata URL
Please let us know when the setup is done on your end so we can begin testing.