Difference between revisions of "Adobe Provisioning: Adding Config and Private Key"
Jrobertson (talk | contribs) |
|||
| (4 intermediate revisions by 2 users not shown) | |||
| Line 1: | Line 1: | ||
| + | This feature is no longer in use and has been deprecated from Adobe's API and has been replaced with OAUTH. This authentication method has been replaced with OAUTH, more details can be found [https://wiki.studentnet.net/index.php/Adobe_Creative_Cloud here] | ||
| + | |||
| + | |||
==Adobe Configuration== | ==Adobe Configuration== | ||
You can either create a project on your own and provide us with the information listed in the following config file example or assign us a role to do so. If you want to create your own project, you can follow the procedure shown below: | You can either create a project on your own and provide us with the information listed in the following config file example or assign us a role to do so. If you want to create your own project, you can follow the procedure shown below: | ||
| Line 60: | Line 63: | ||
[[File:new_adobe_1.png|1100px|Adobe Setup 10]] | [[File:new_adobe_1.png|1100px|Adobe Setup 10]] | ||
| − | Click | + | Click '''Add new Adobe config''' |
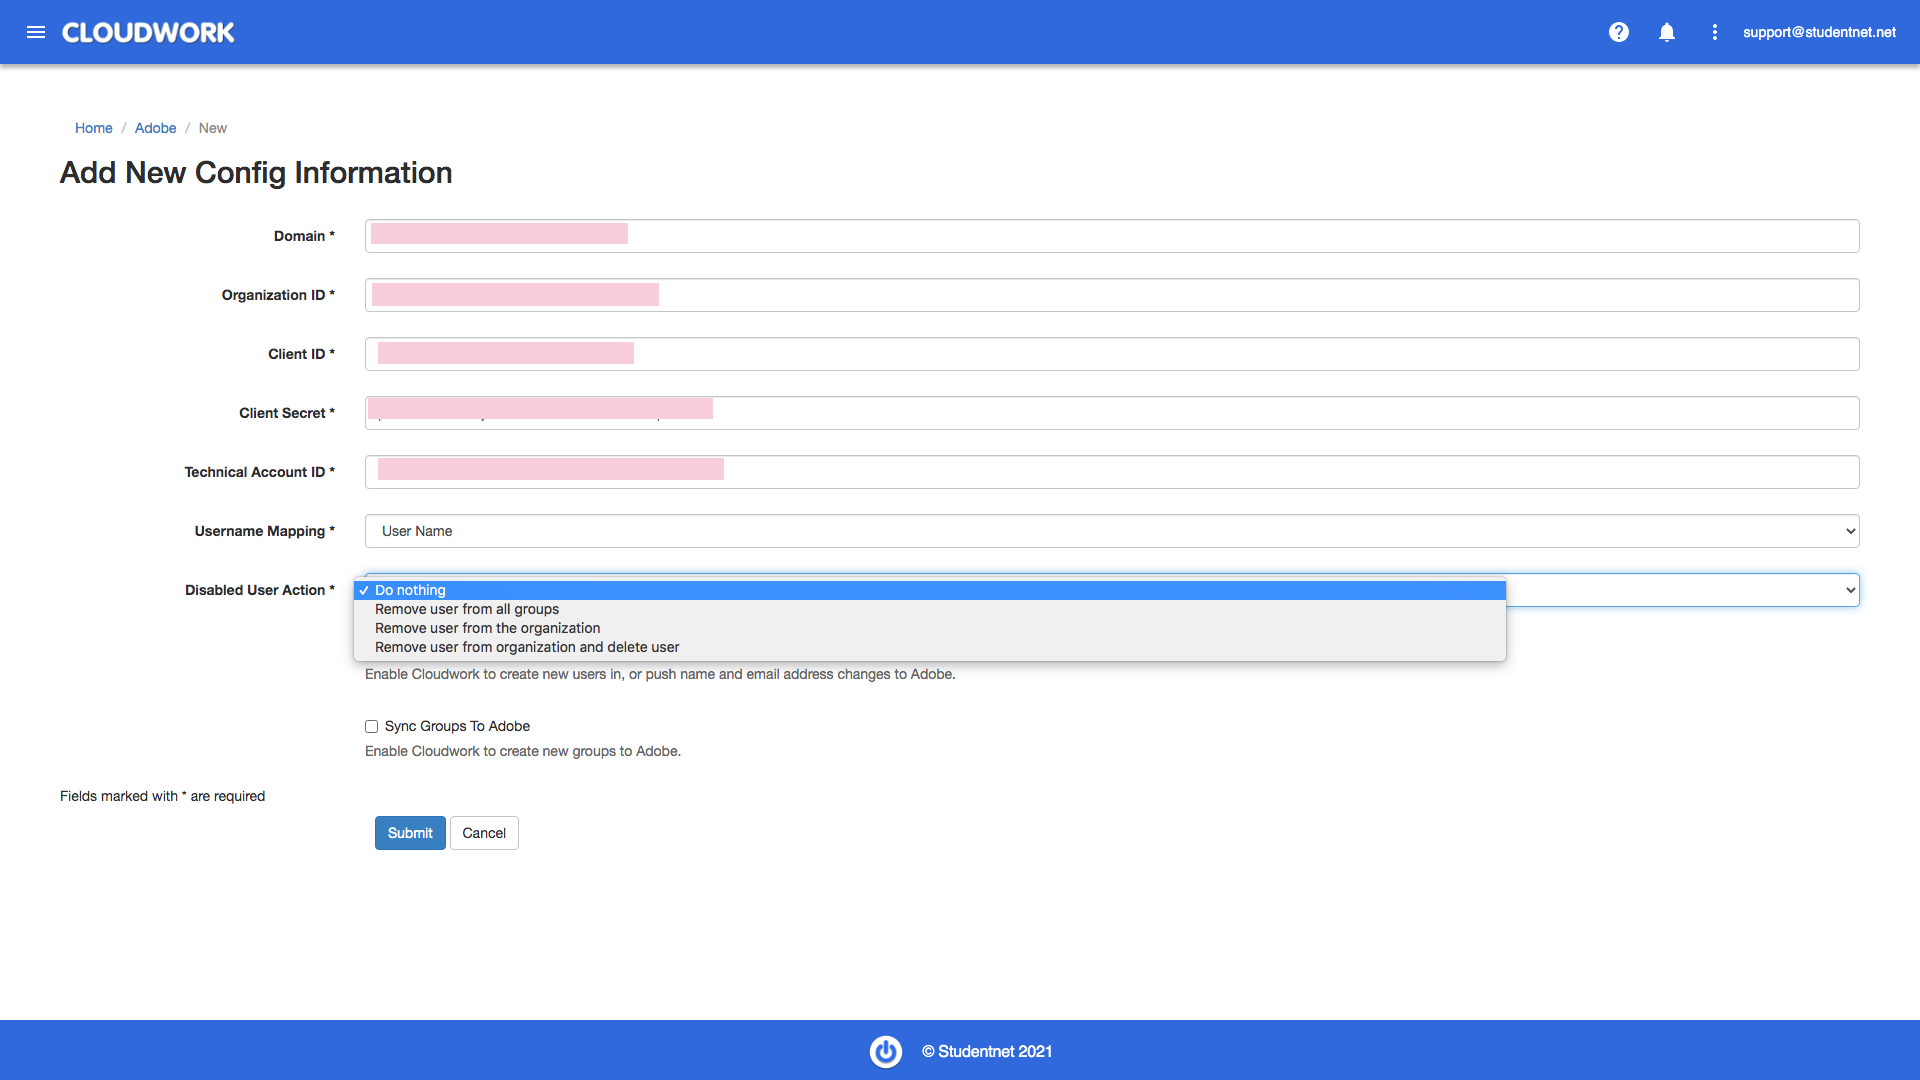
Fill Org Id, Client Id, Client Secret, Tech Acct, and input the school’s domain | Fill Org Id, Client Id, Client Secret, Tech Acct, and input the school’s domain | ||
| Line 73: | Line 76: | ||
[[File:Adobe_Integration_3.6.png|1100px|Adobe Setup 12.6]] | [[File:Adobe_Integration_3.6.png|1100px|Adobe Setup 12.6]] | ||
| − | You can see | + | You can see '''New Config created''', then the next step is to upload the private key. |
| − | Click | + | Click '''Please Upload Private Key Here''' to upload. |
[[File:new_adobe_4.png|1100px|Adobe Setup 13]] | [[File:new_adobe_4.png|1100px|Adobe Setup 13]] | ||
| Line 86: | Line 89: | ||
[[File:new_adobe_6.png|1100px|Adobe Setup 15]] | [[File:new_adobe_6.png|1100px|Adobe Setup 15]] | ||
| − | Click on the domain, you will see the private key uploaded has been changed to | + | Click on the domain, you will see the private key uploaded has been changed to '''yes''' |
[[File:new_adobe_7.png|1100px|Adobe Setup 16]] | [[File:new_adobe_7.png|1100px|Adobe Setup 16]] | ||
| − | If you want to select groups to be synced to Adobe Console, click | + | If you want to select groups to be synced to Adobe Console, click '''Edit''' on '''Group Sync Selections''' table |
[[File:new_adobe_8.png|1100px|Adobe Setup 17]] | [[File:new_adobe_8.png|1100px|Adobe Setup 17]] | ||
| Line 96: | Line 99: | ||
Select groups and submit | Select groups and submit | ||
| − | If you want to select OU to be synced to Adobe Console, click | + | If you want to select OU to be synced to Adobe Console, click '''Edit''' on '''OU Sync Selections''' table |
[[File:new_adobe_9.png|1100px|Adobe Setup 18]] | [[File:new_adobe_9.png|1100px|Adobe Setup 18]] | ||
| Line 102: | Line 105: | ||
Select OU and submit | Select OU and submit | ||
| − | A green flash will indicate the selection succeeds and group names will show in the | + | A green flash will indicate the selection succeeds and group names will show in the '''OU Sync Selections''' table. |
[[File:new_adobe_10.png|1100px|Adobe Setup 20]] | [[File:new_adobe_10.png|1100px|Adobe Setup 20]] | ||
| − | + | ==How does Syncing work== | |
| − | + | If you have allowed the 'Sync User to Adobe' and 'Sync Groups to Adobe': | |
| − | + | Then by selecting OU or Groups under OU Sync Selection and Group Sync Selection respectively, you can select which OUs and Groups get synced. | |
| − | + | *OU syncing: By selecting the OU from Cloudwork's in the Adobe Sync from Cloudwork, users from those OUs will be synced to Adobe. | |
| − | + | *Group Syncing: By selecting groups from Cloudwork's in Adobe sync from Cloudwork, users who are already synced to Adobe will be put into User directories in Adobe. Users who are in the groups but not synced to Adobe will not be synced to Adobe. | |
| − | |||
| − | |||
Latest revision as of 03:56, 21 January 2025
This feature is no longer in use and has been deprecated from Adobe's API and has been replaced with OAUTH. This authentication method has been replaced with OAUTH, more details can be found here
Contents
Adobe Configuration
You can either create a project on your own and provide us with the information listed in the following config file example or assign us a role to do so. If you want to create your own project, you can follow the procedure shown below:
Information needed for configuration:
- Federated domain
- Organization id
- Client id
- Client secret
- Technical account id
- Private key
The information can be obtained from the following steps
Step 1: Create a project in Adobe developer console
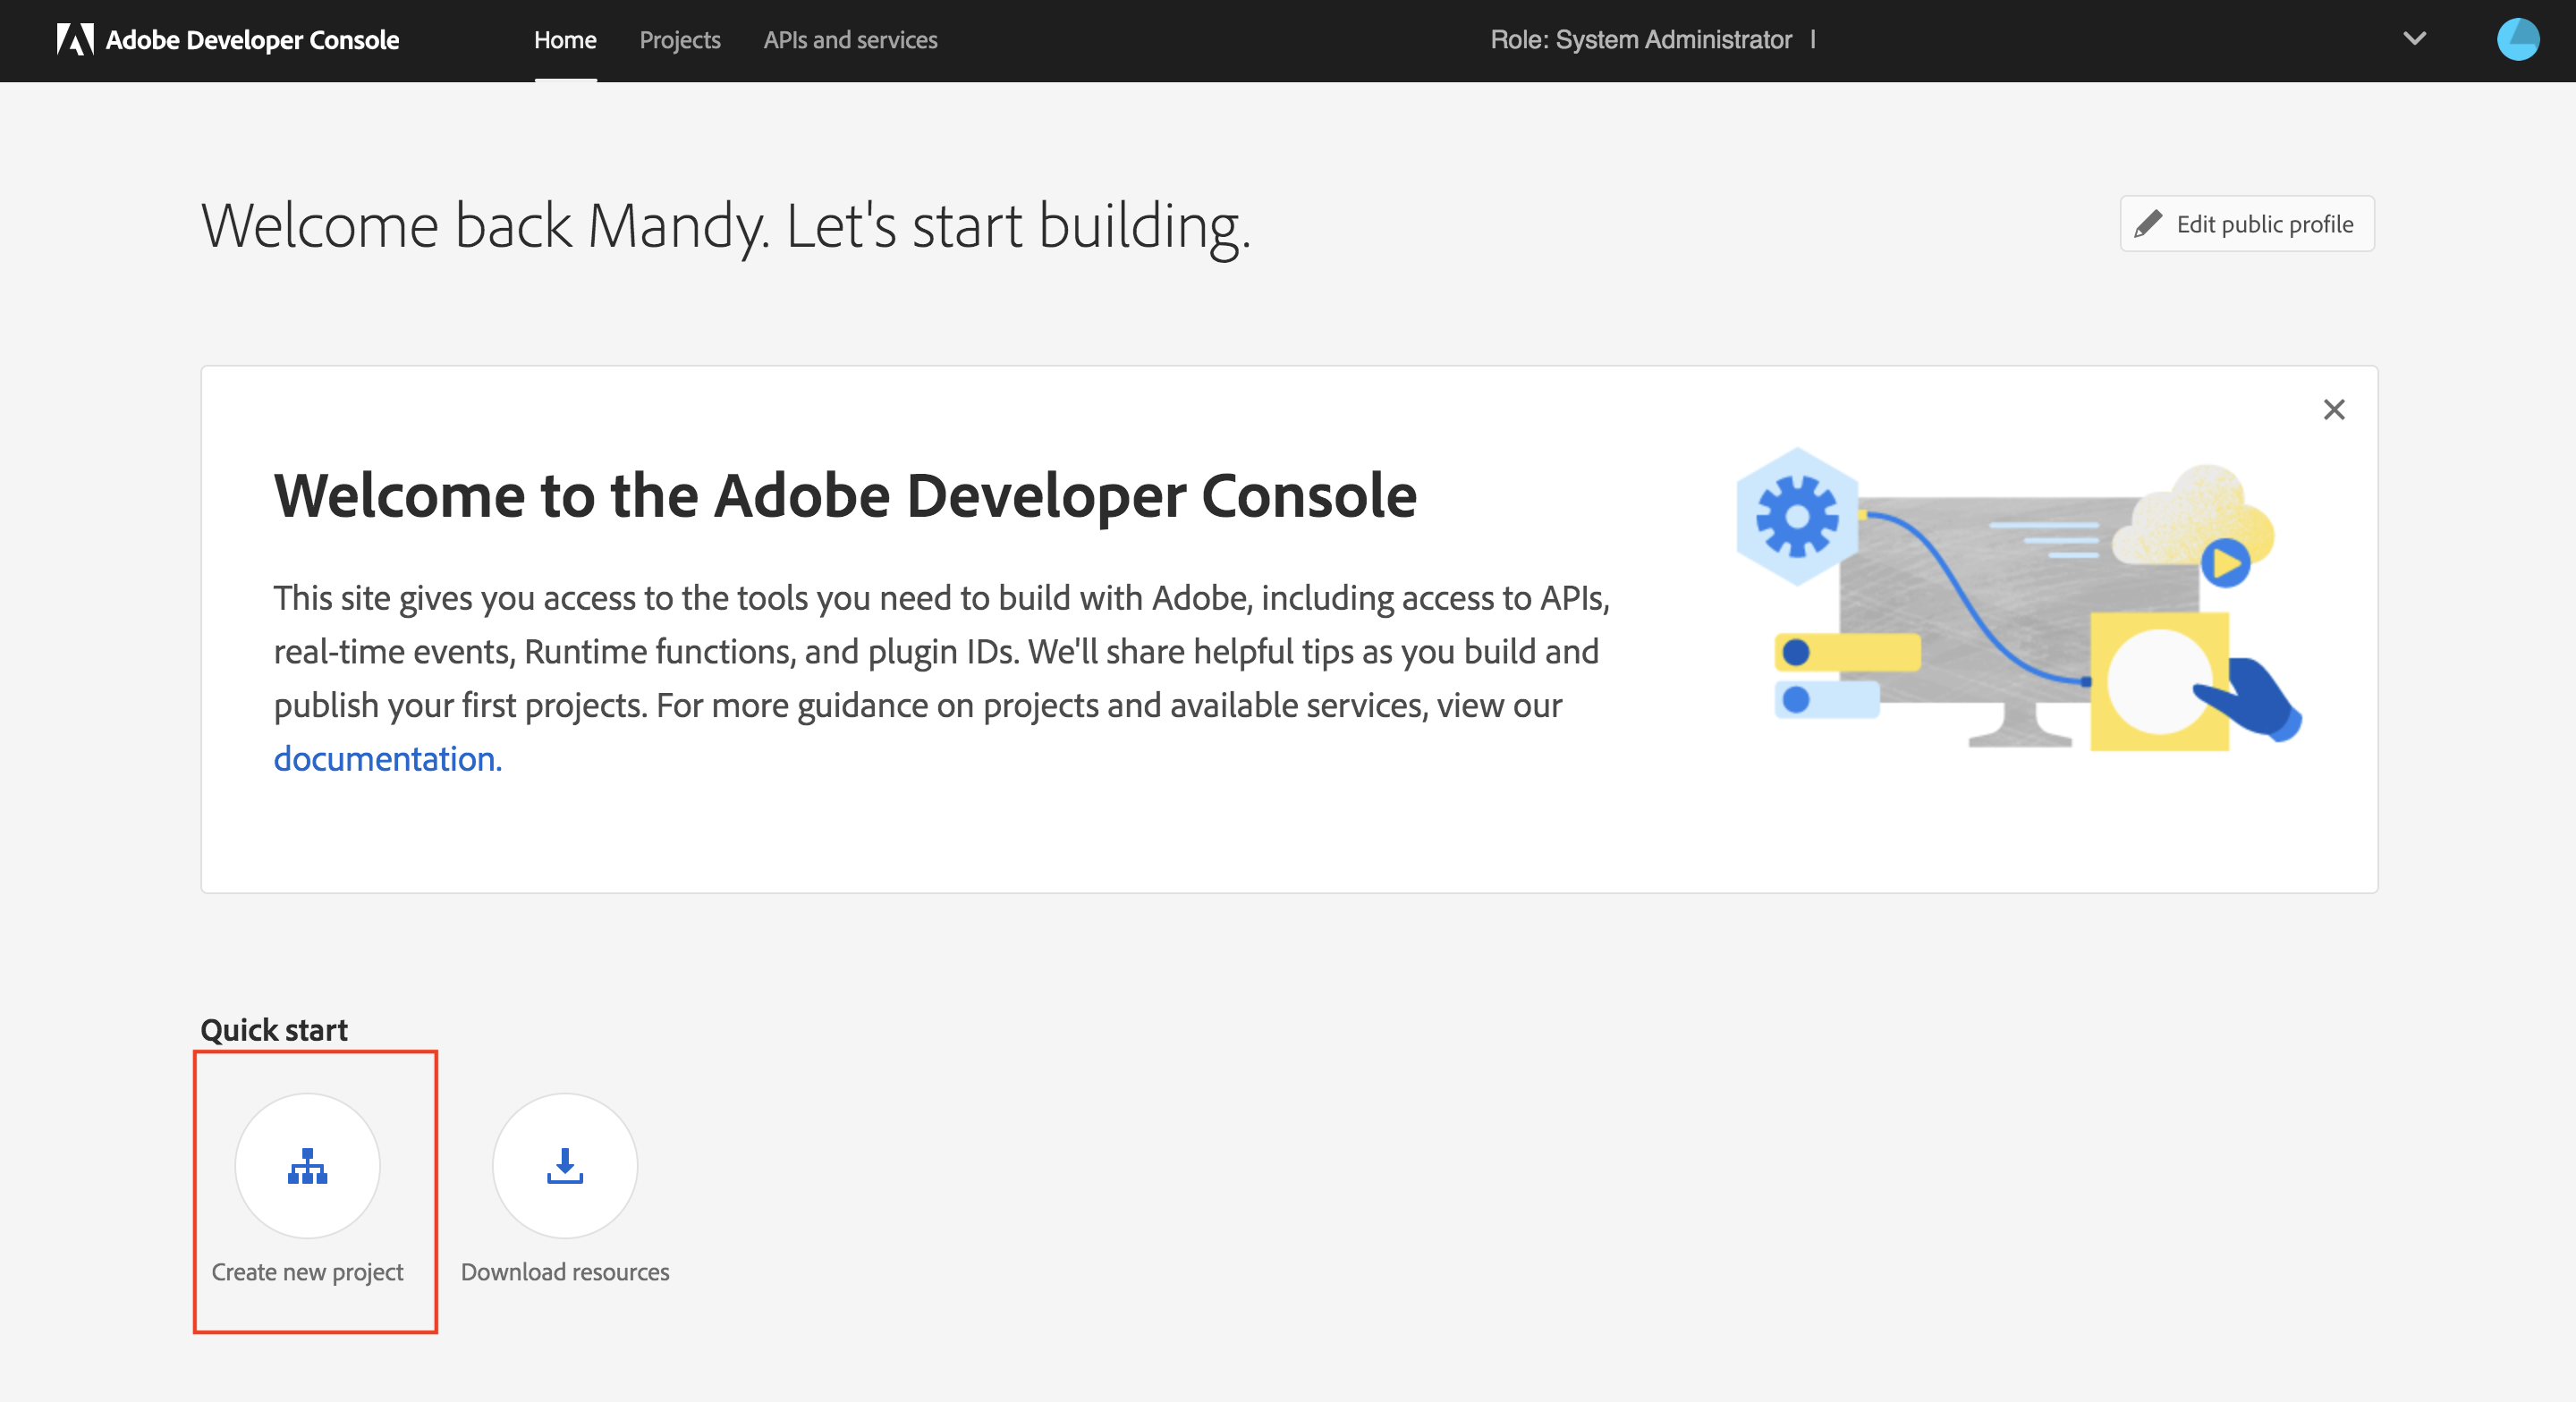
After successfully logging in to Adobe Developer Console, you arrive at the Home screen. This is where you can find quick start links to create a project or download resources, view and edit your public profile, and access the Projects and Downloads screens using the top navigation.
Click “create new project” to start
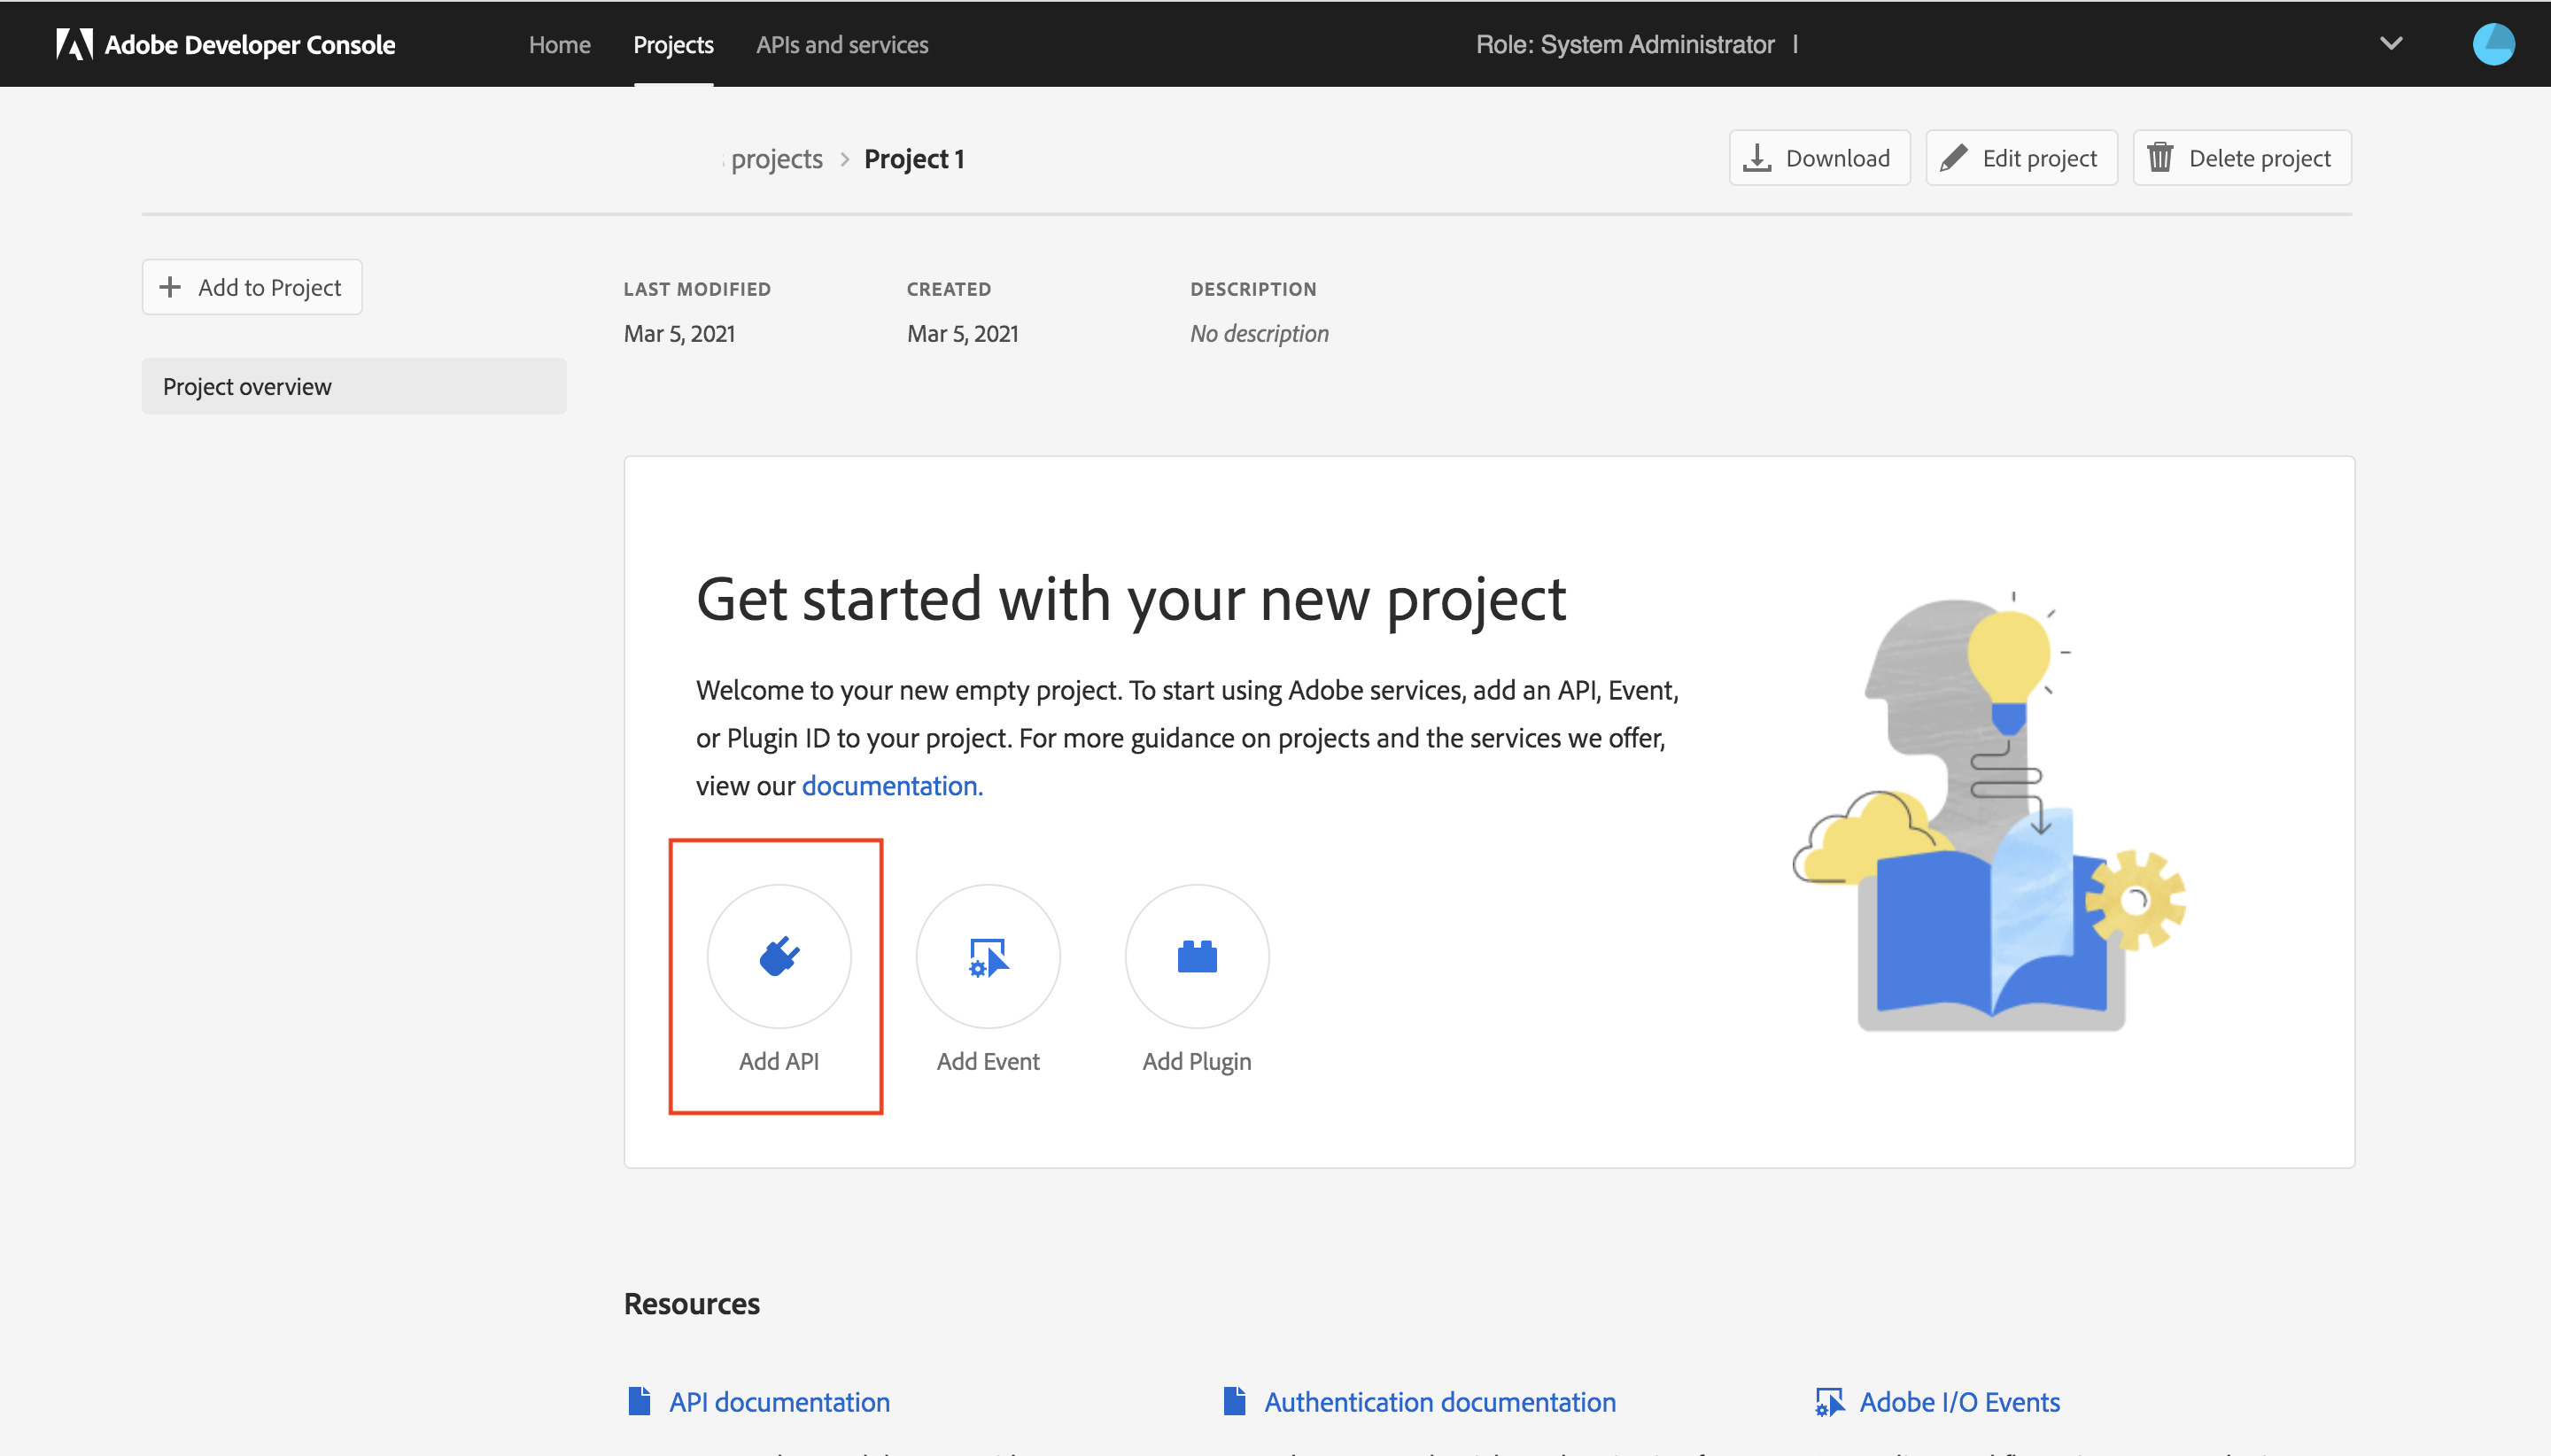
Step 2: Add an API to the project using Service Account (JWT)
Click “Add API”
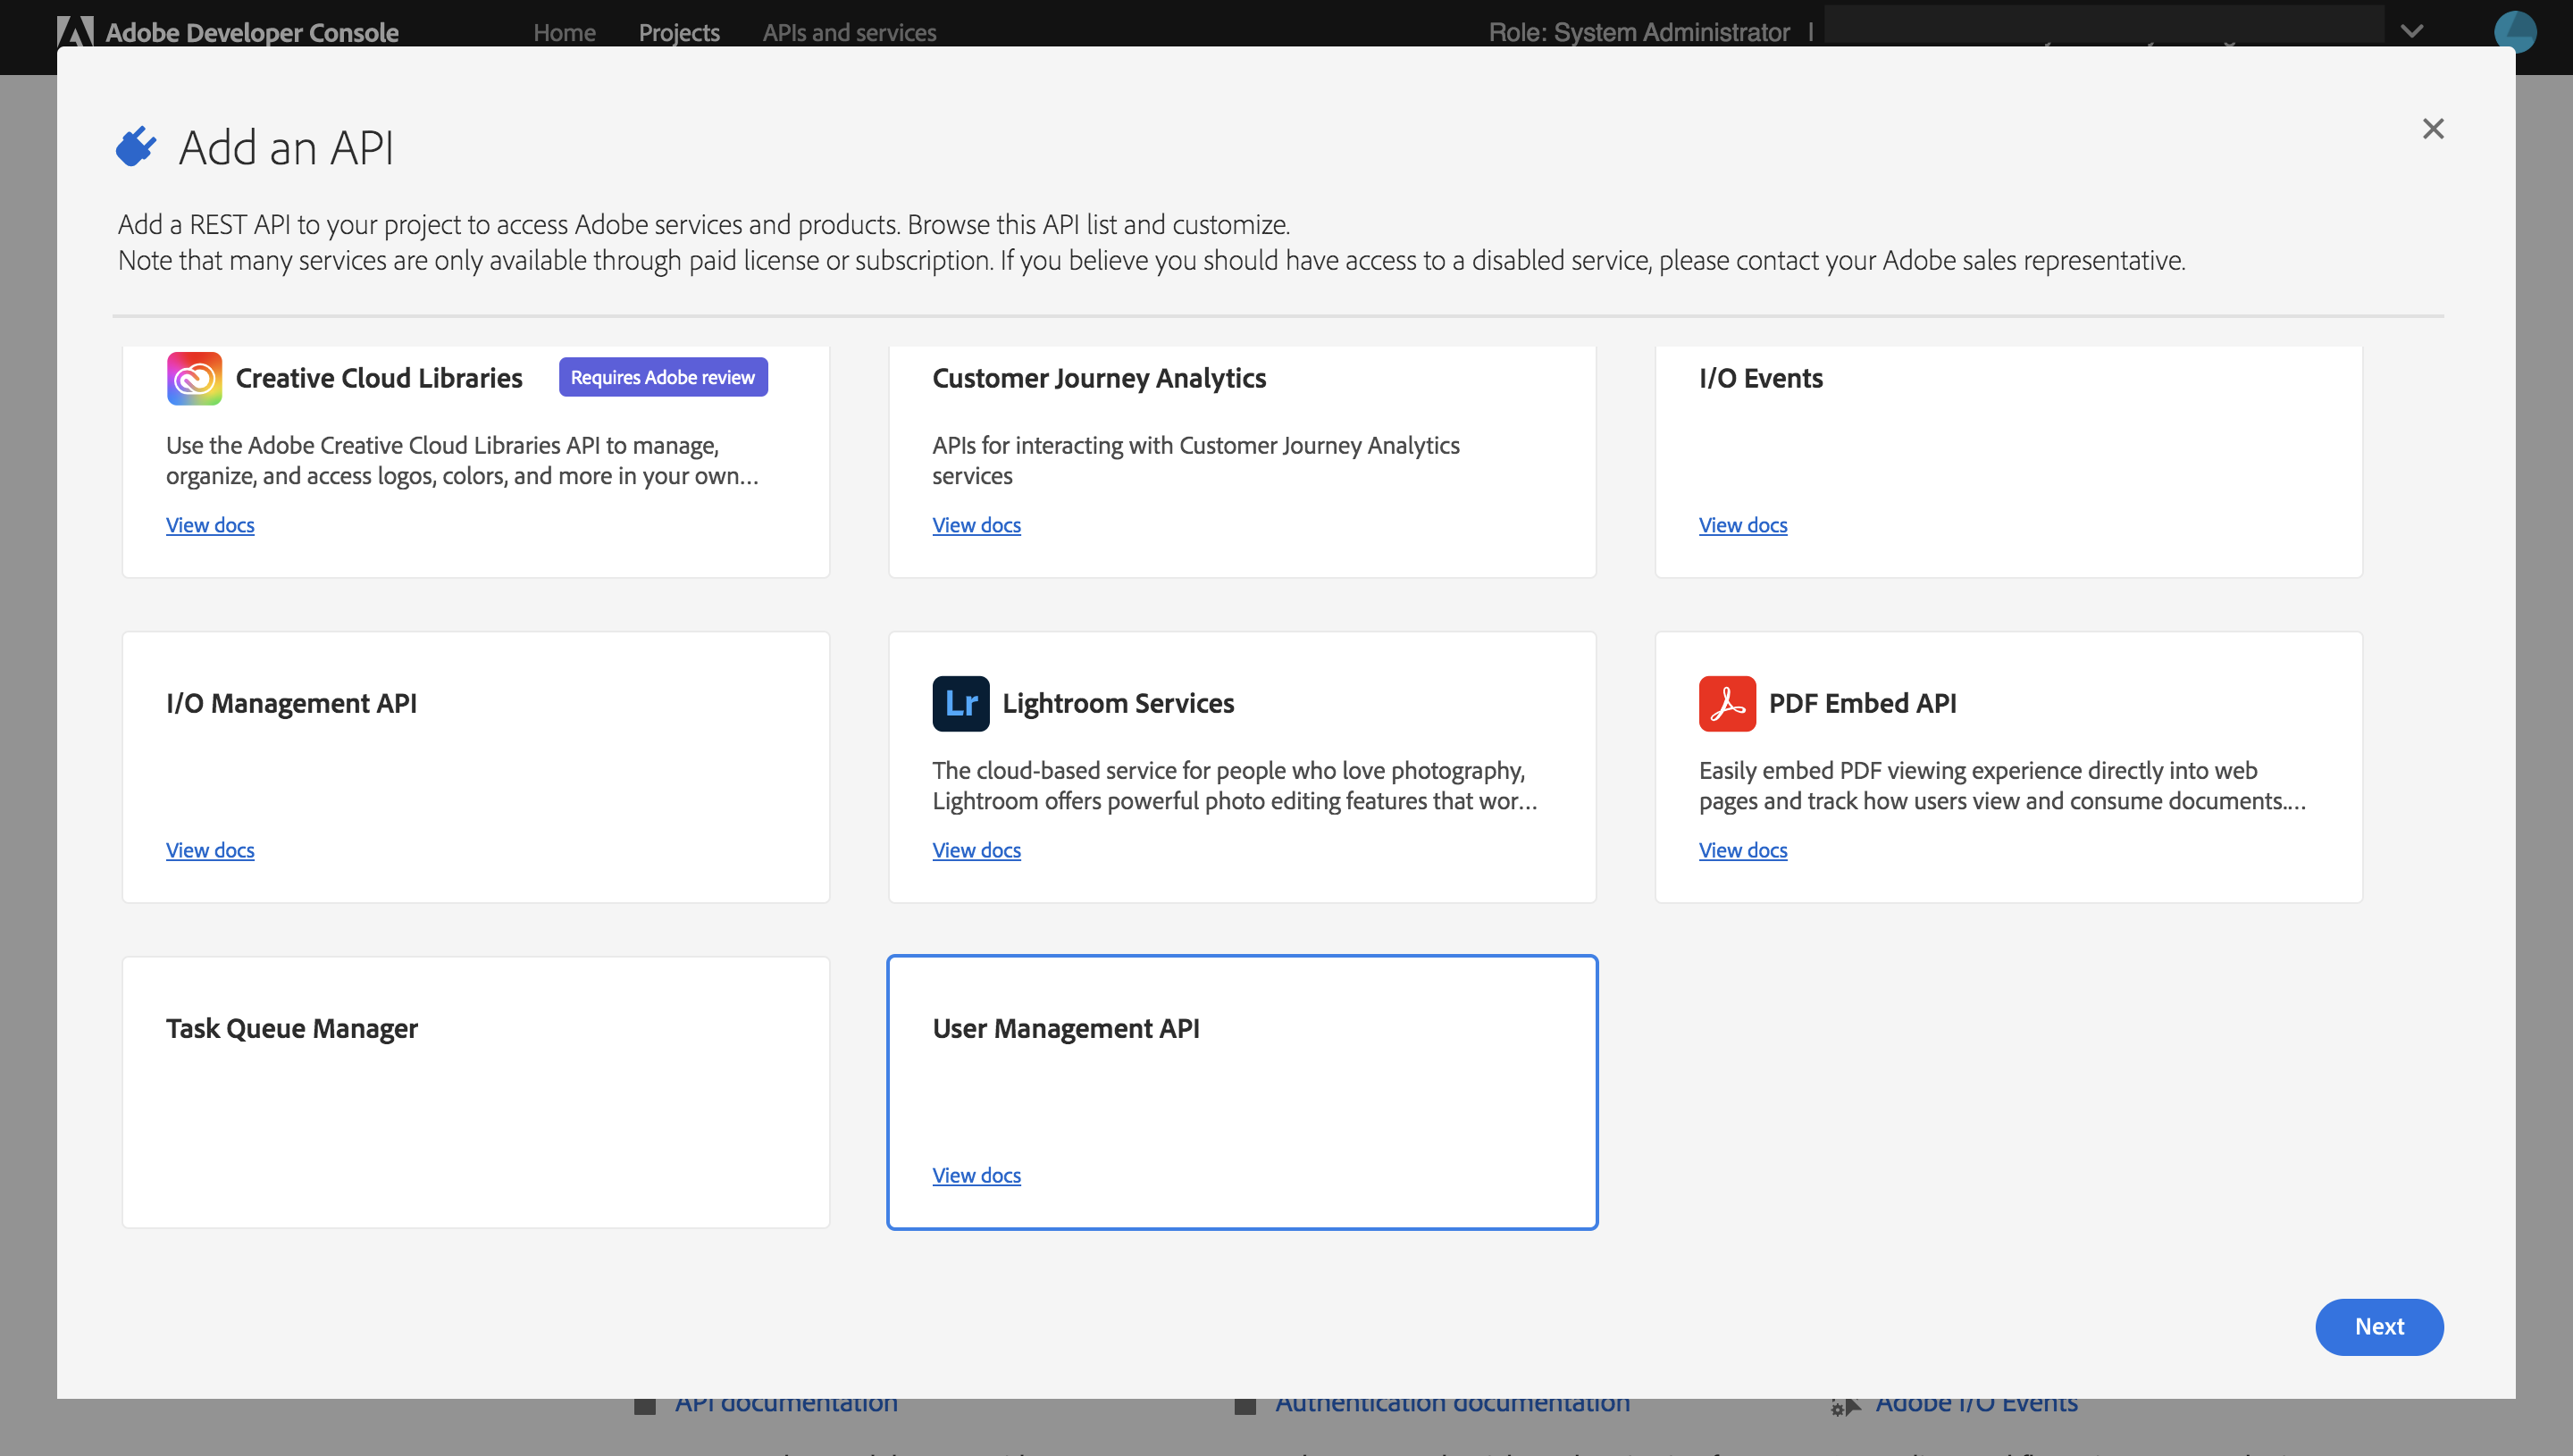
Step 3: Create a User Management API
Scroll down to select User Management API and click Next
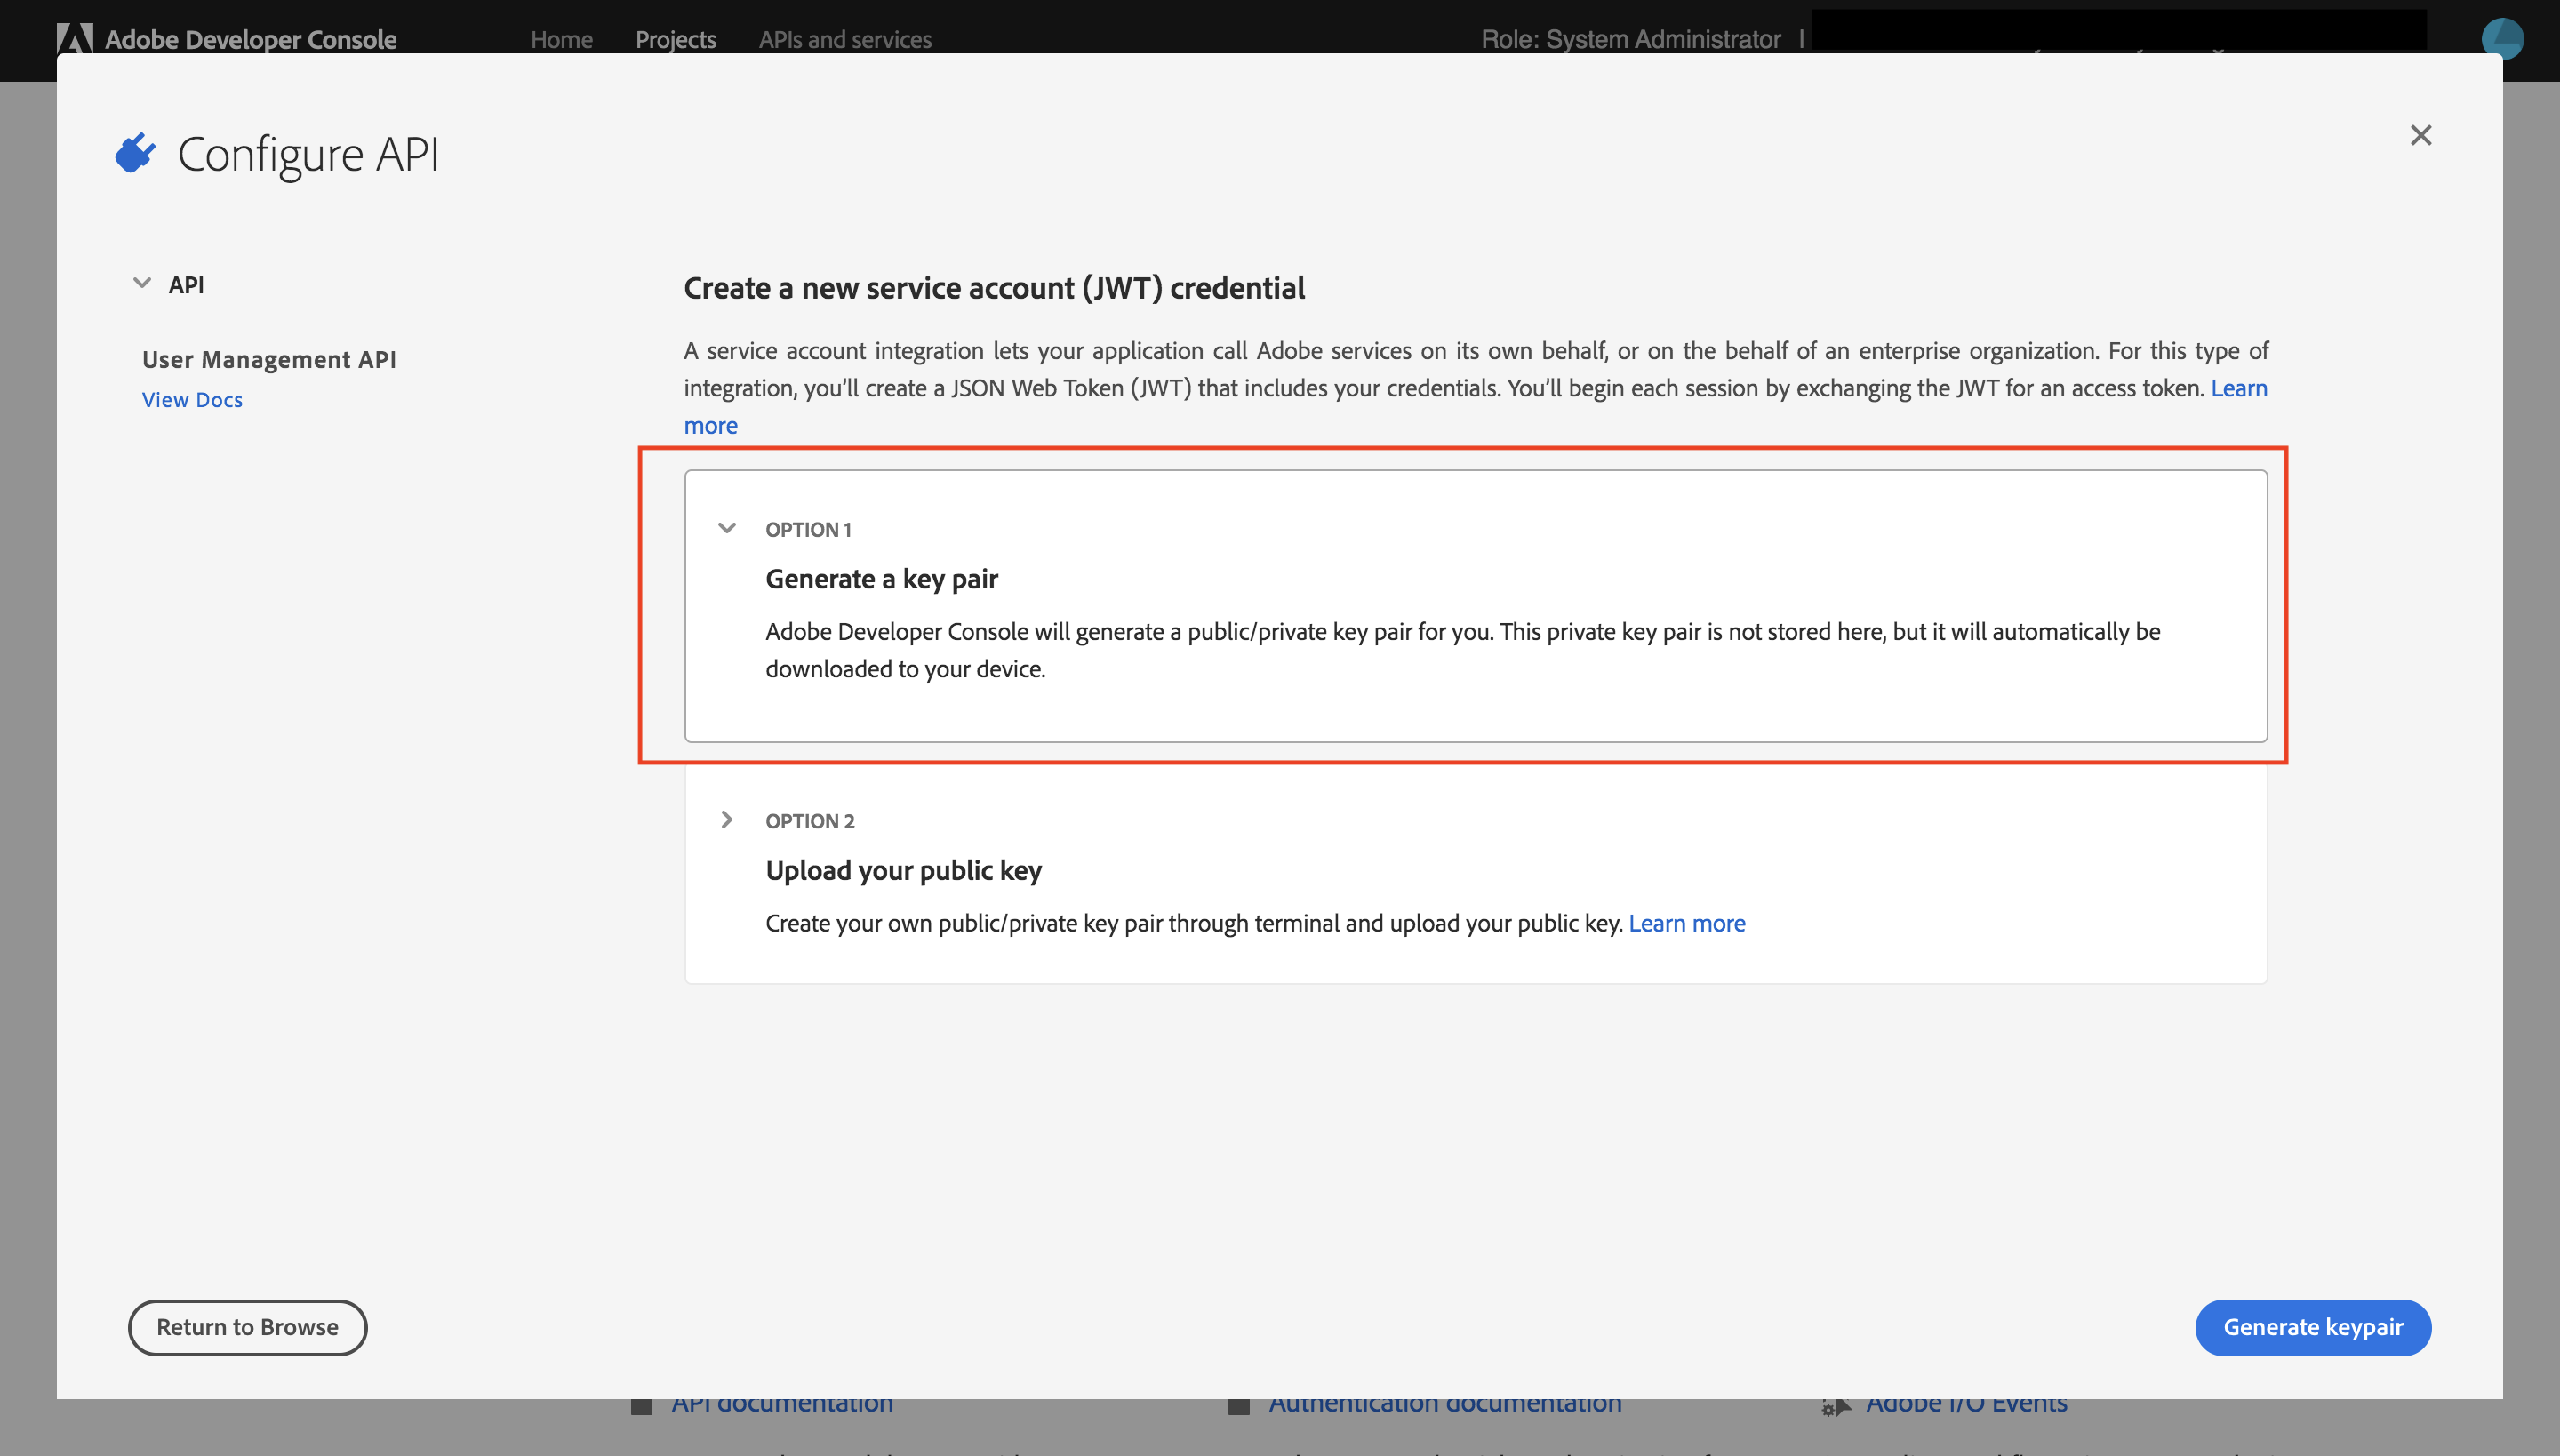
Step 4: Generate a key pair
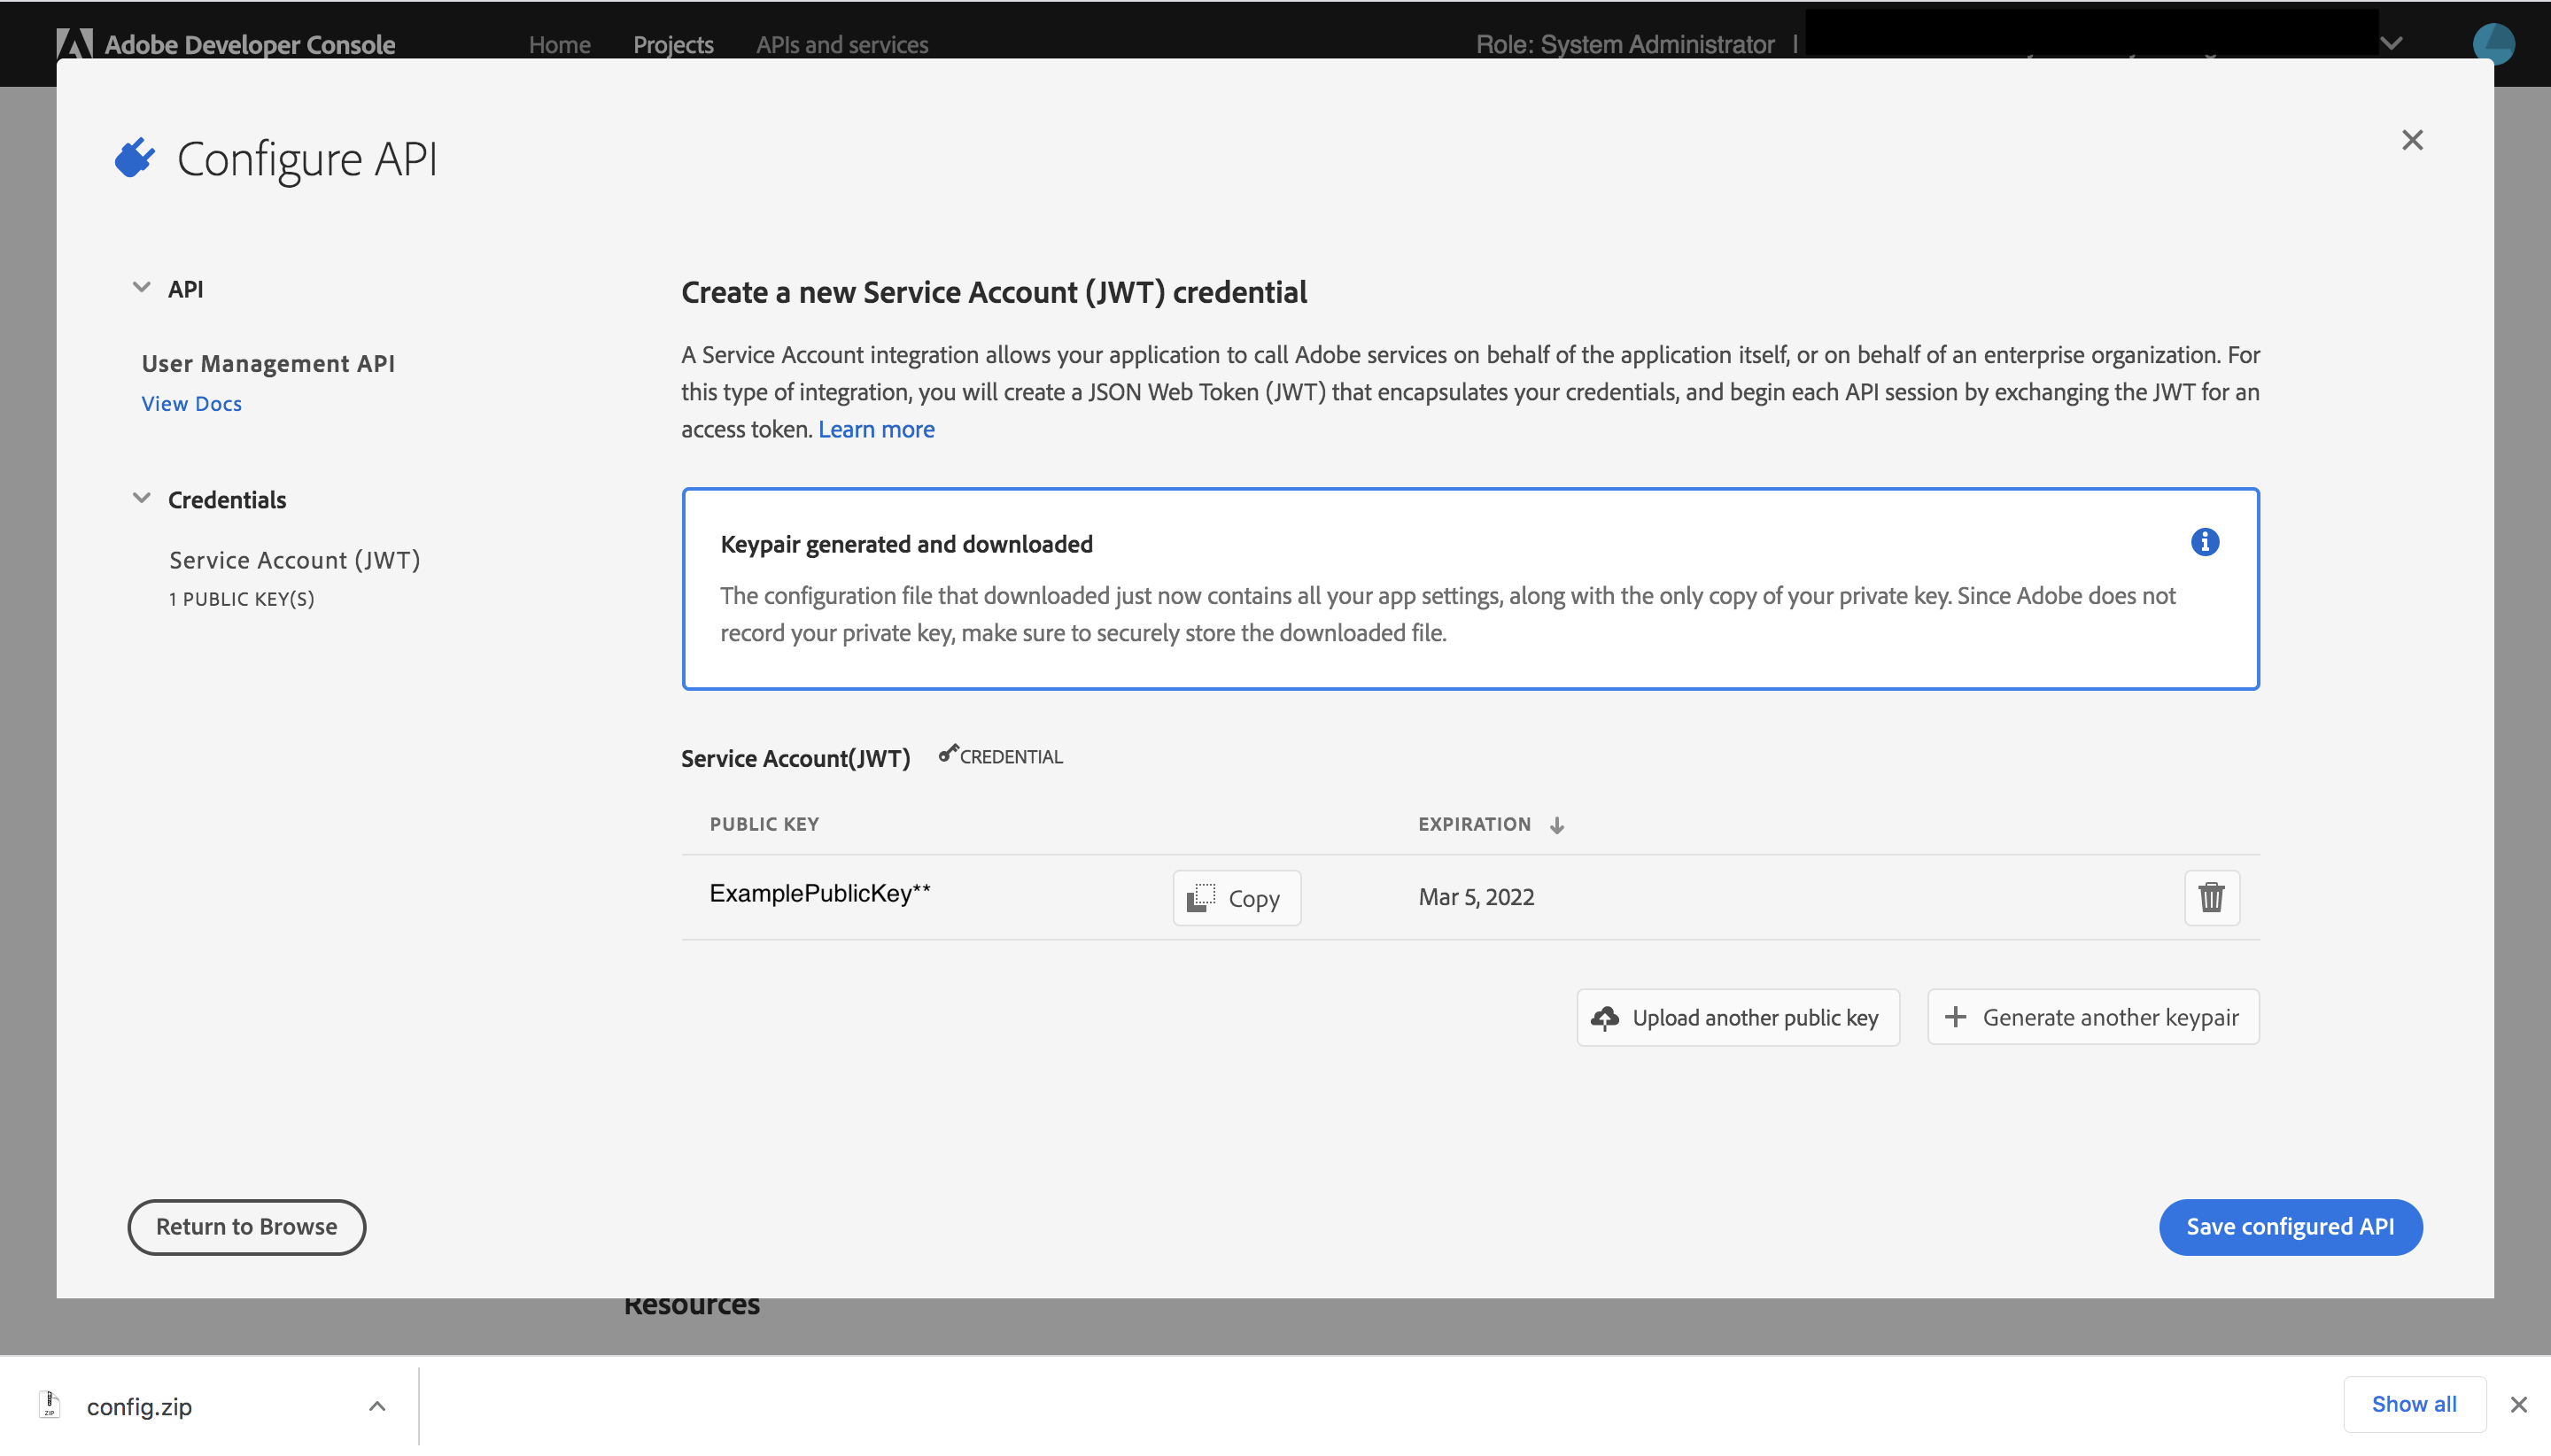
Select OPTION 1 generate a key pair, click Next, and then save the downloaded config.zip (containing the public key and private key) for future use
Step 5: Save API
Click Save configured API
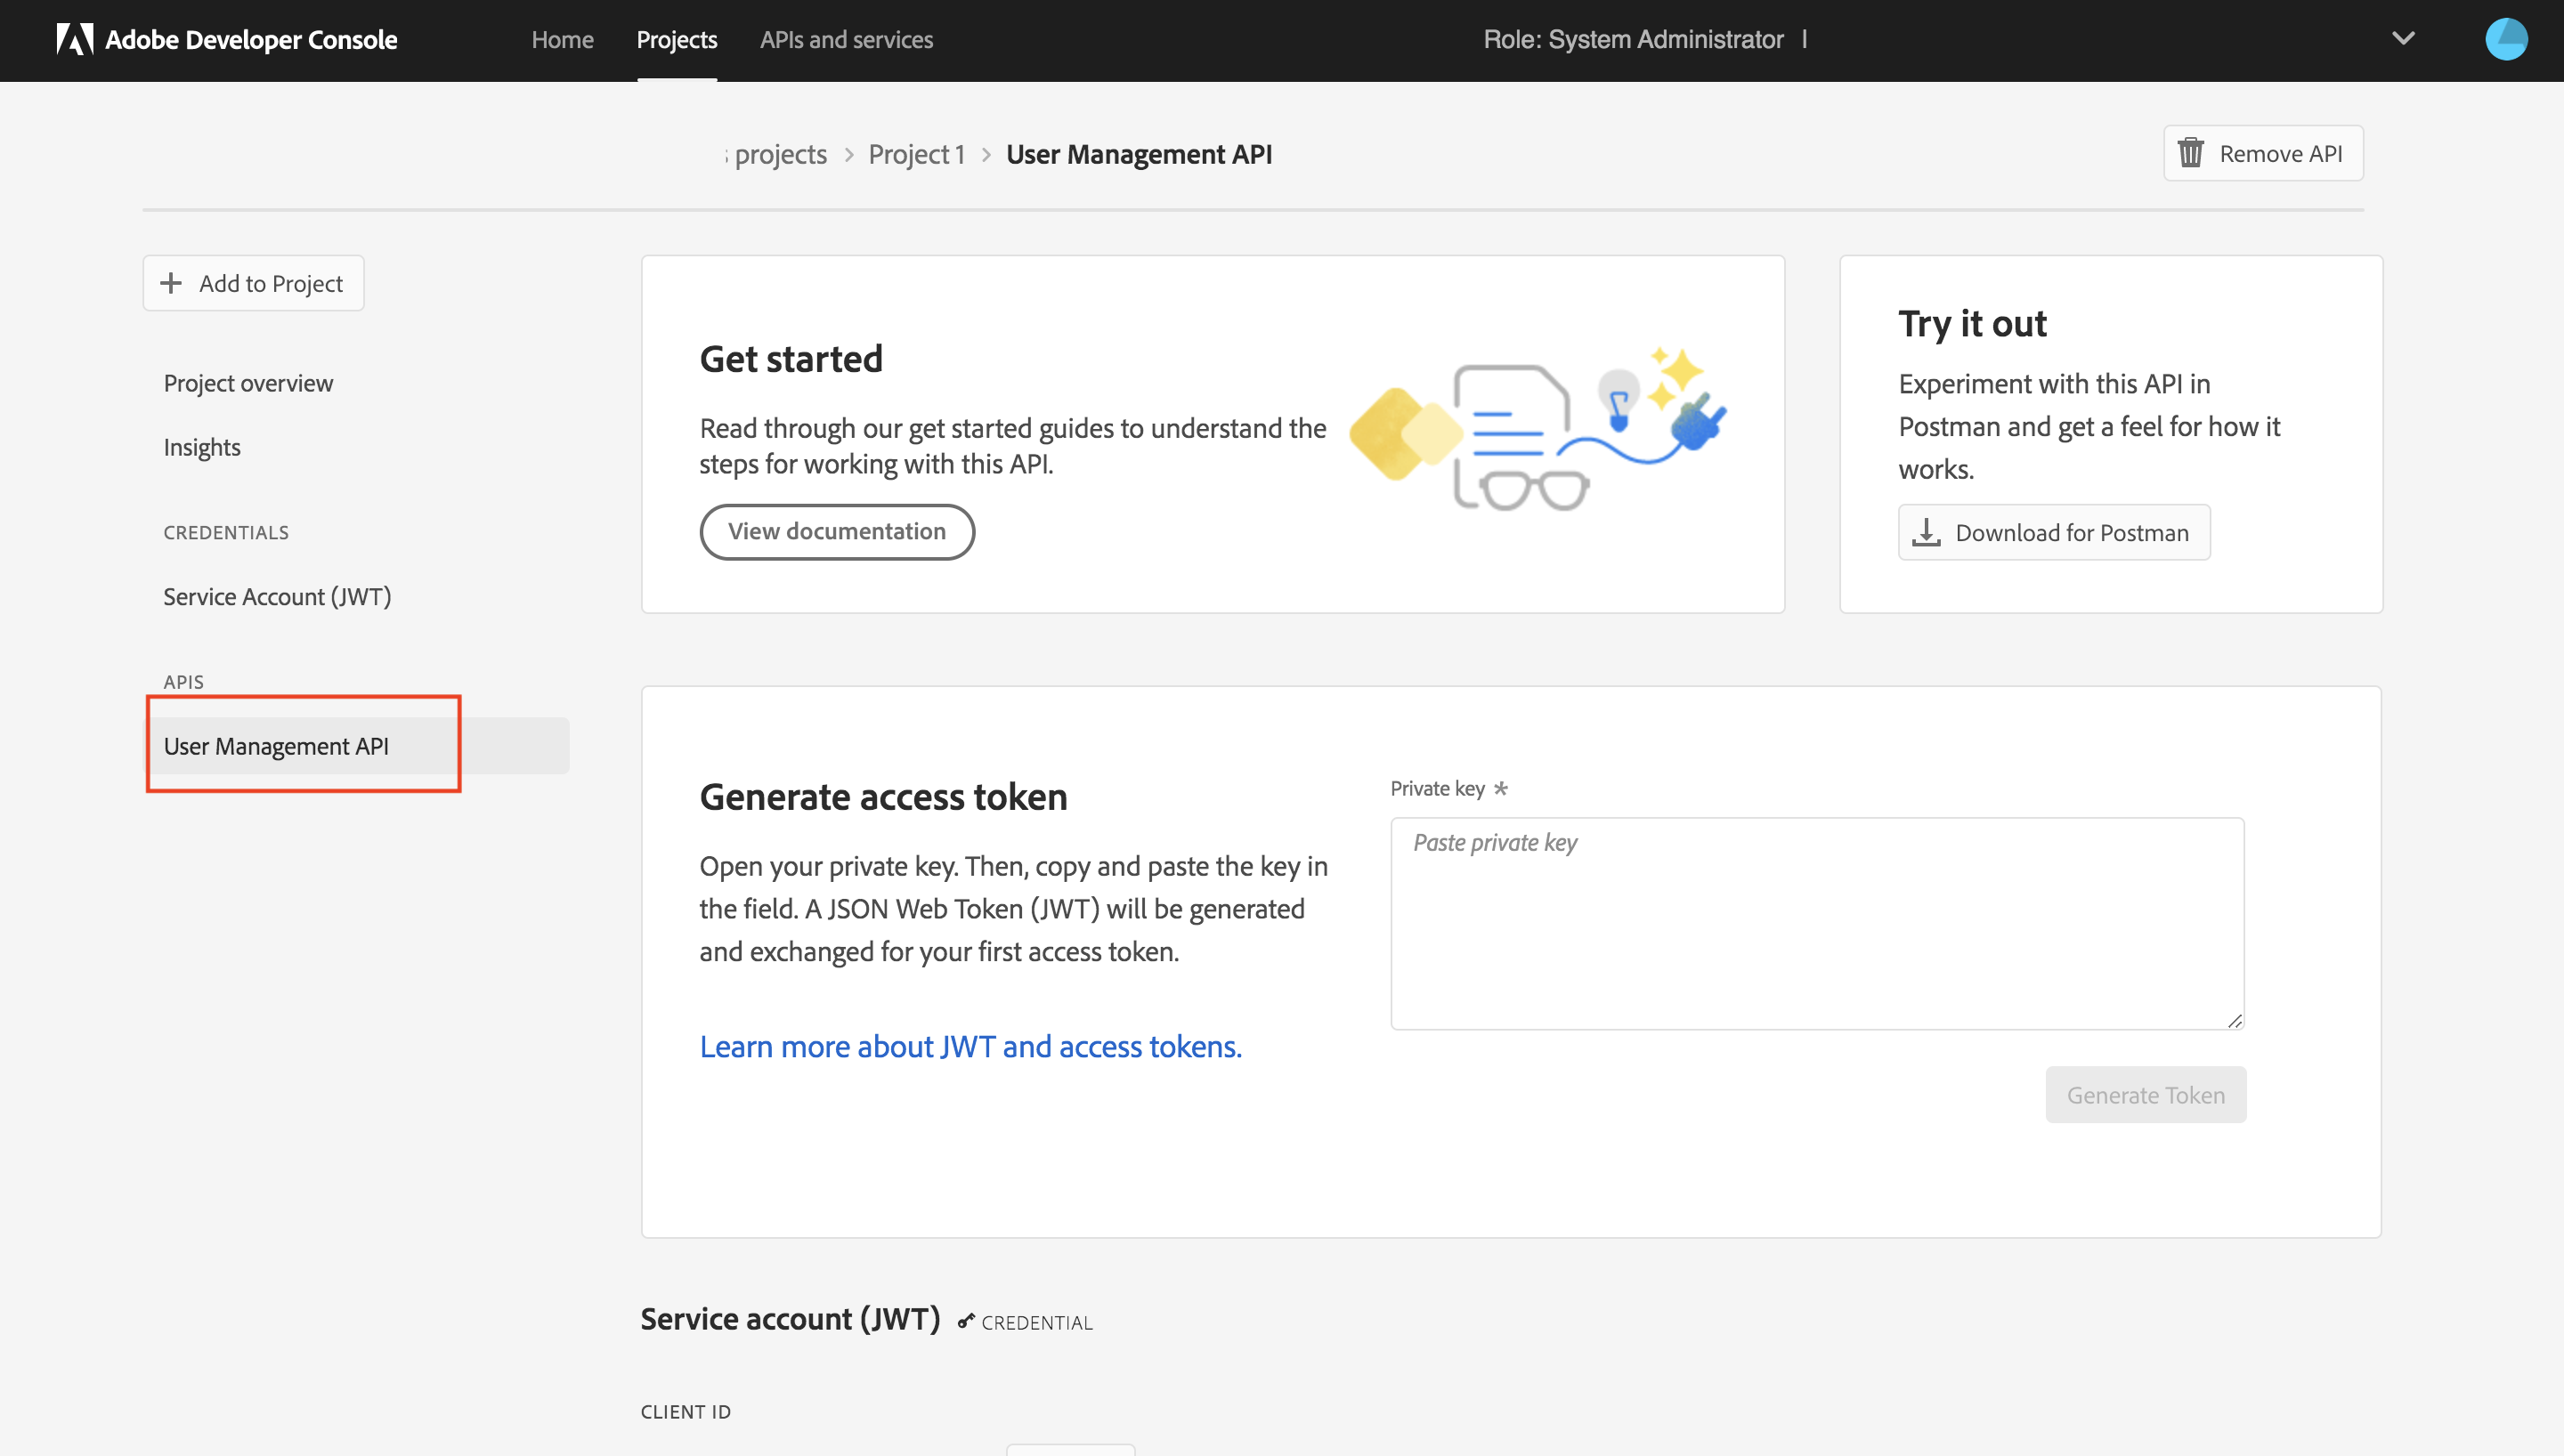
Select User Management API from APIs on the sidebar
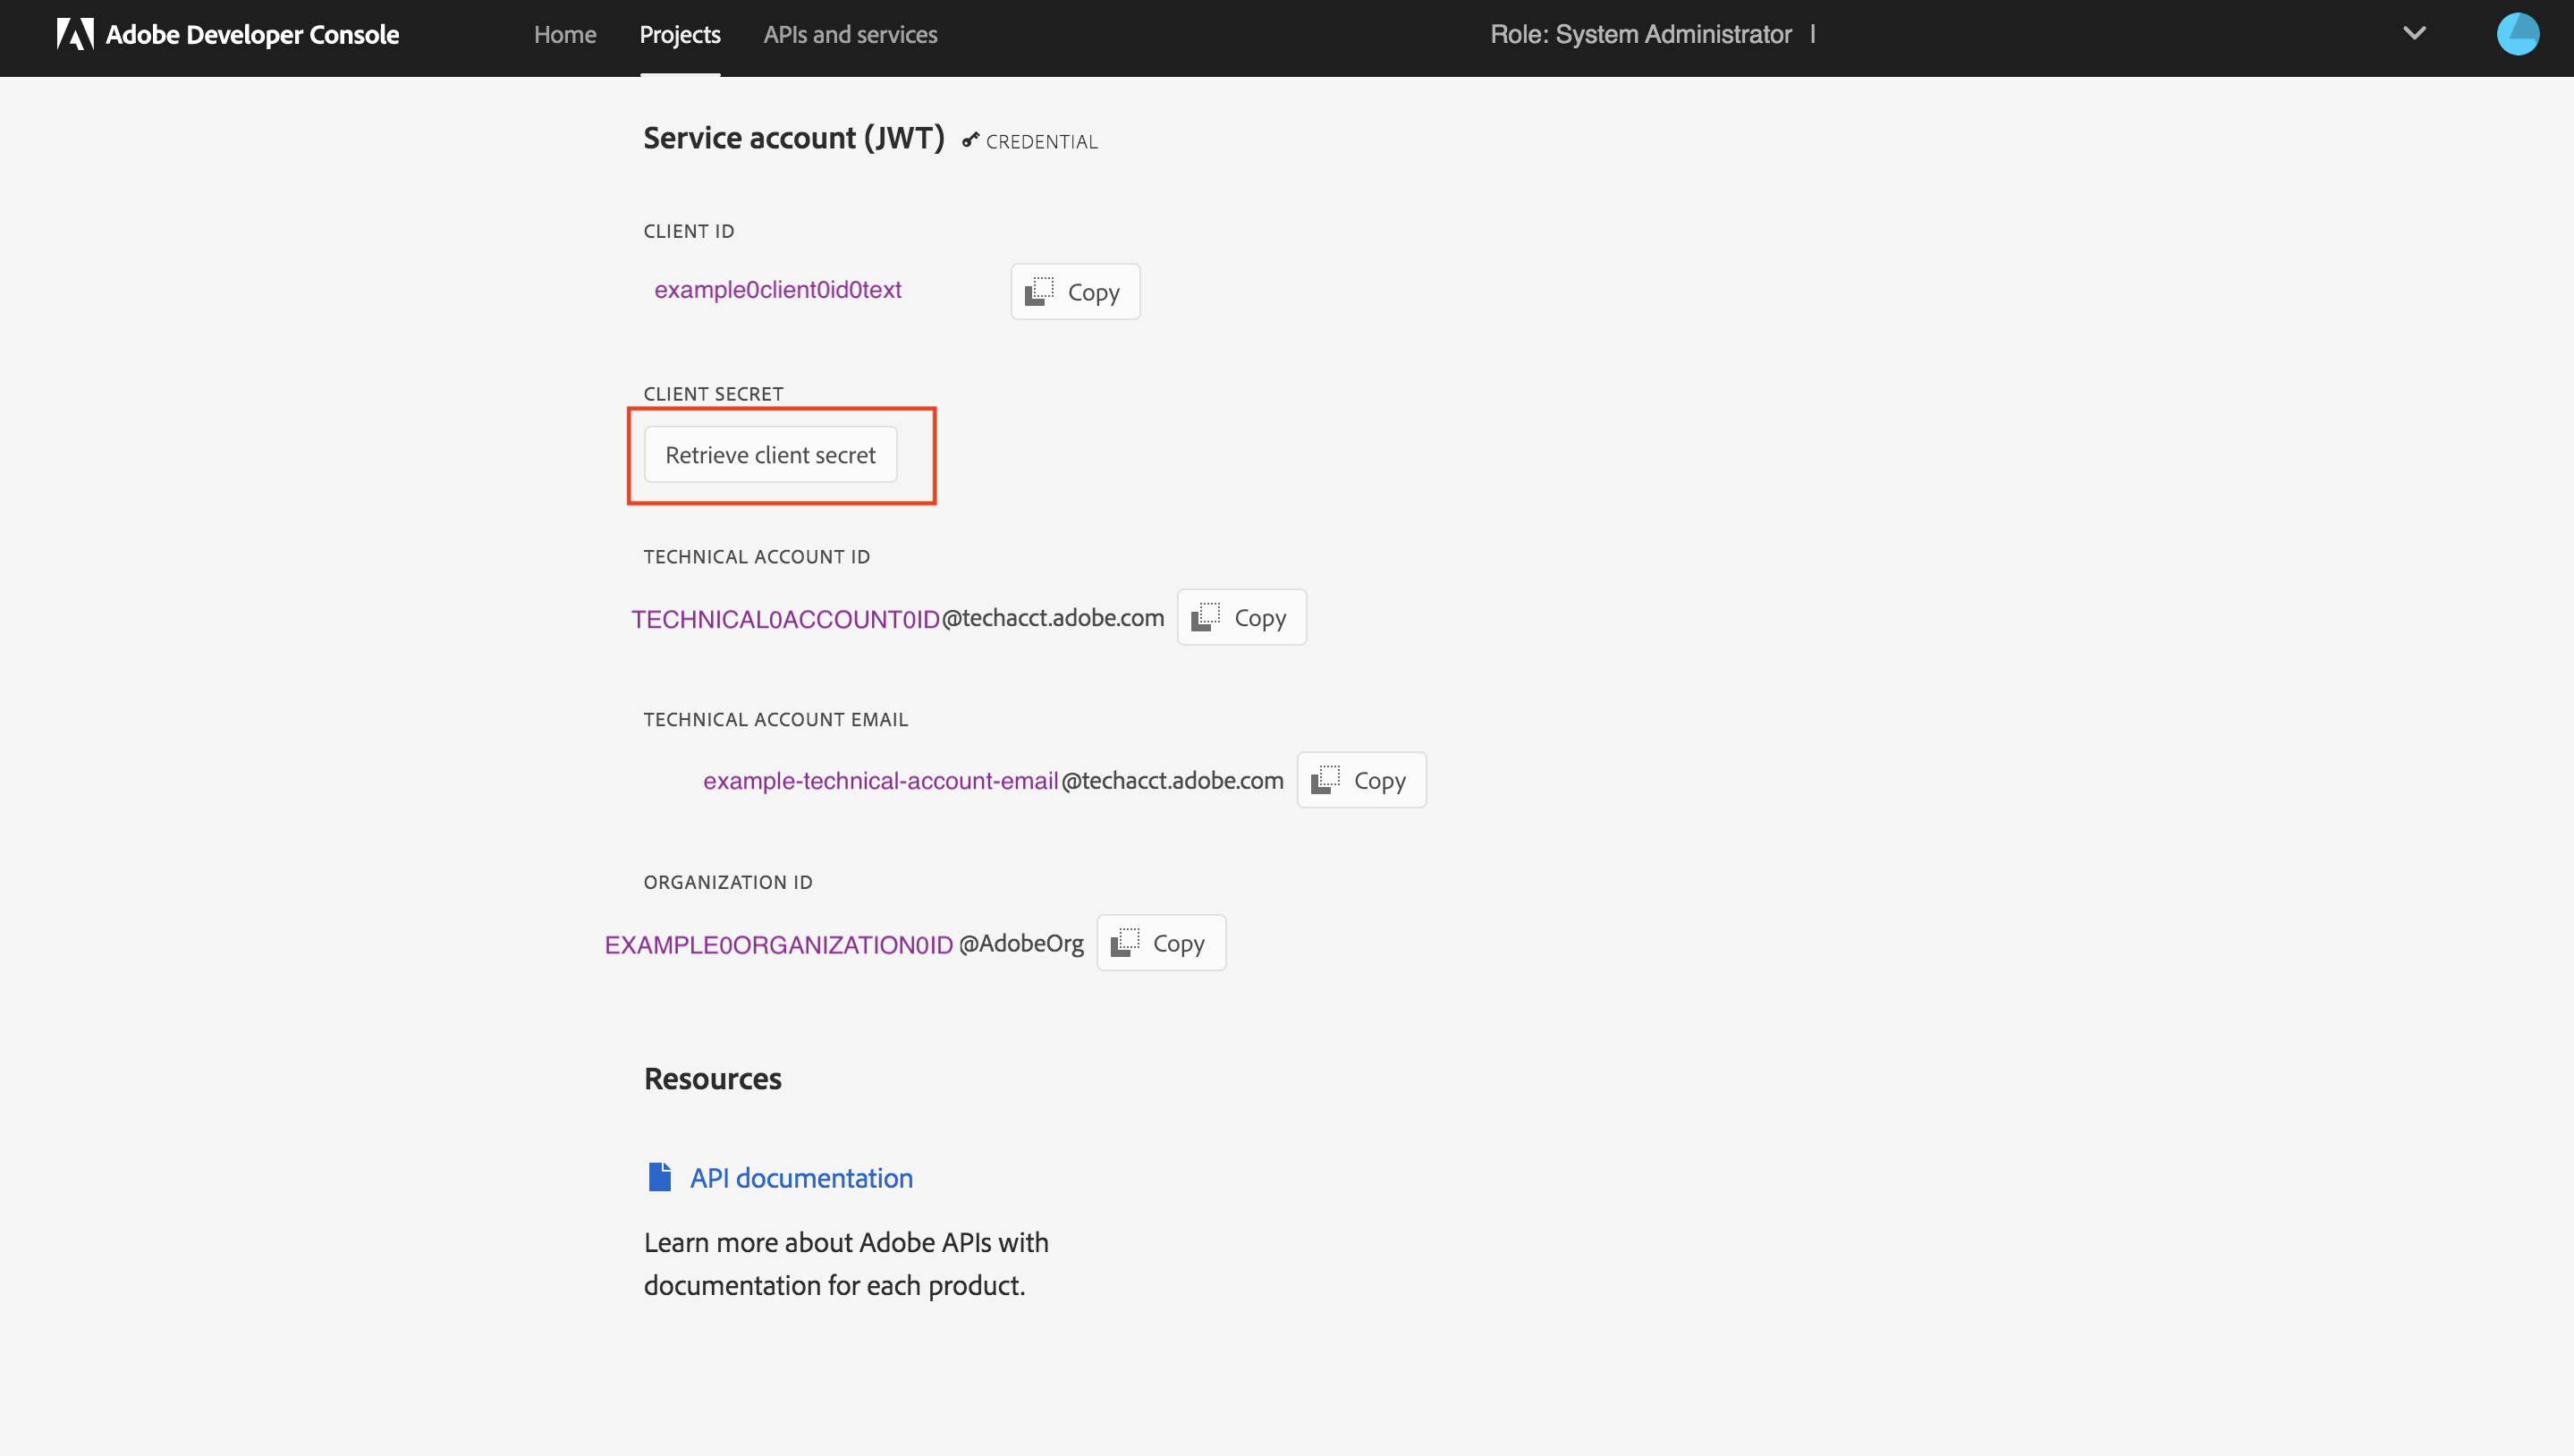
Click Retrieve client secret to get client secret
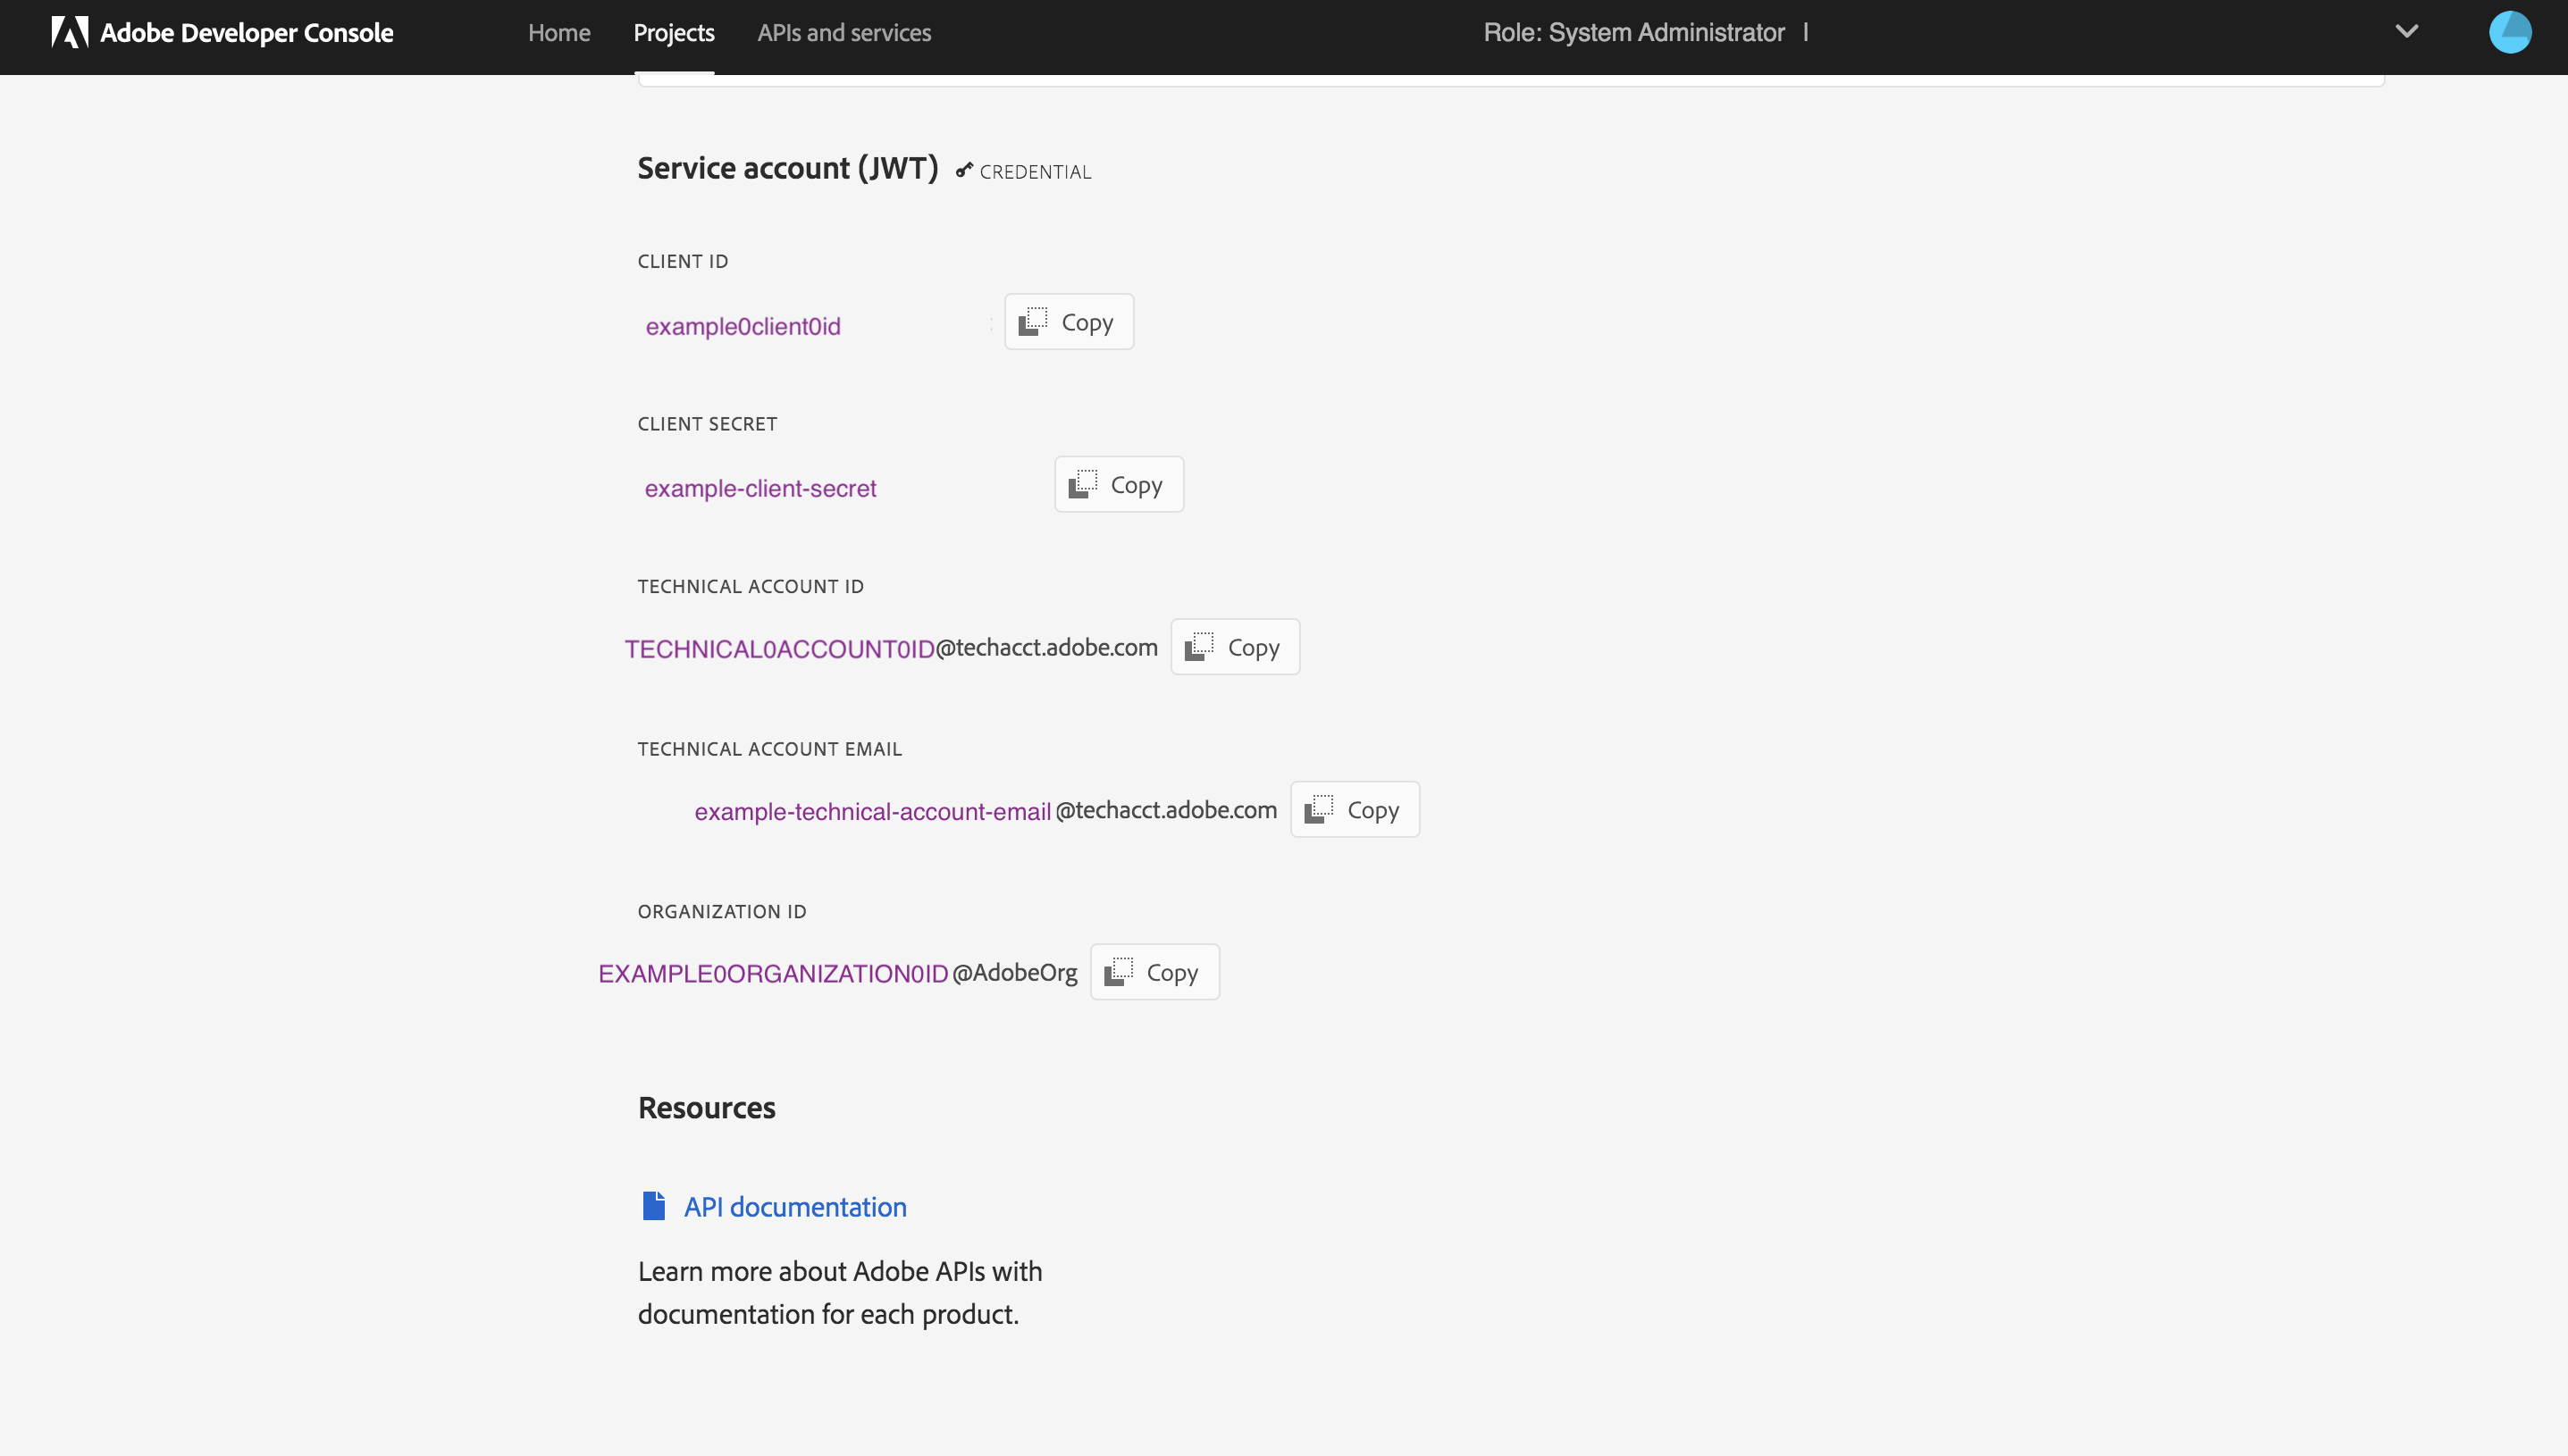
Save client id, client secret, technical account id, organization id for configuration
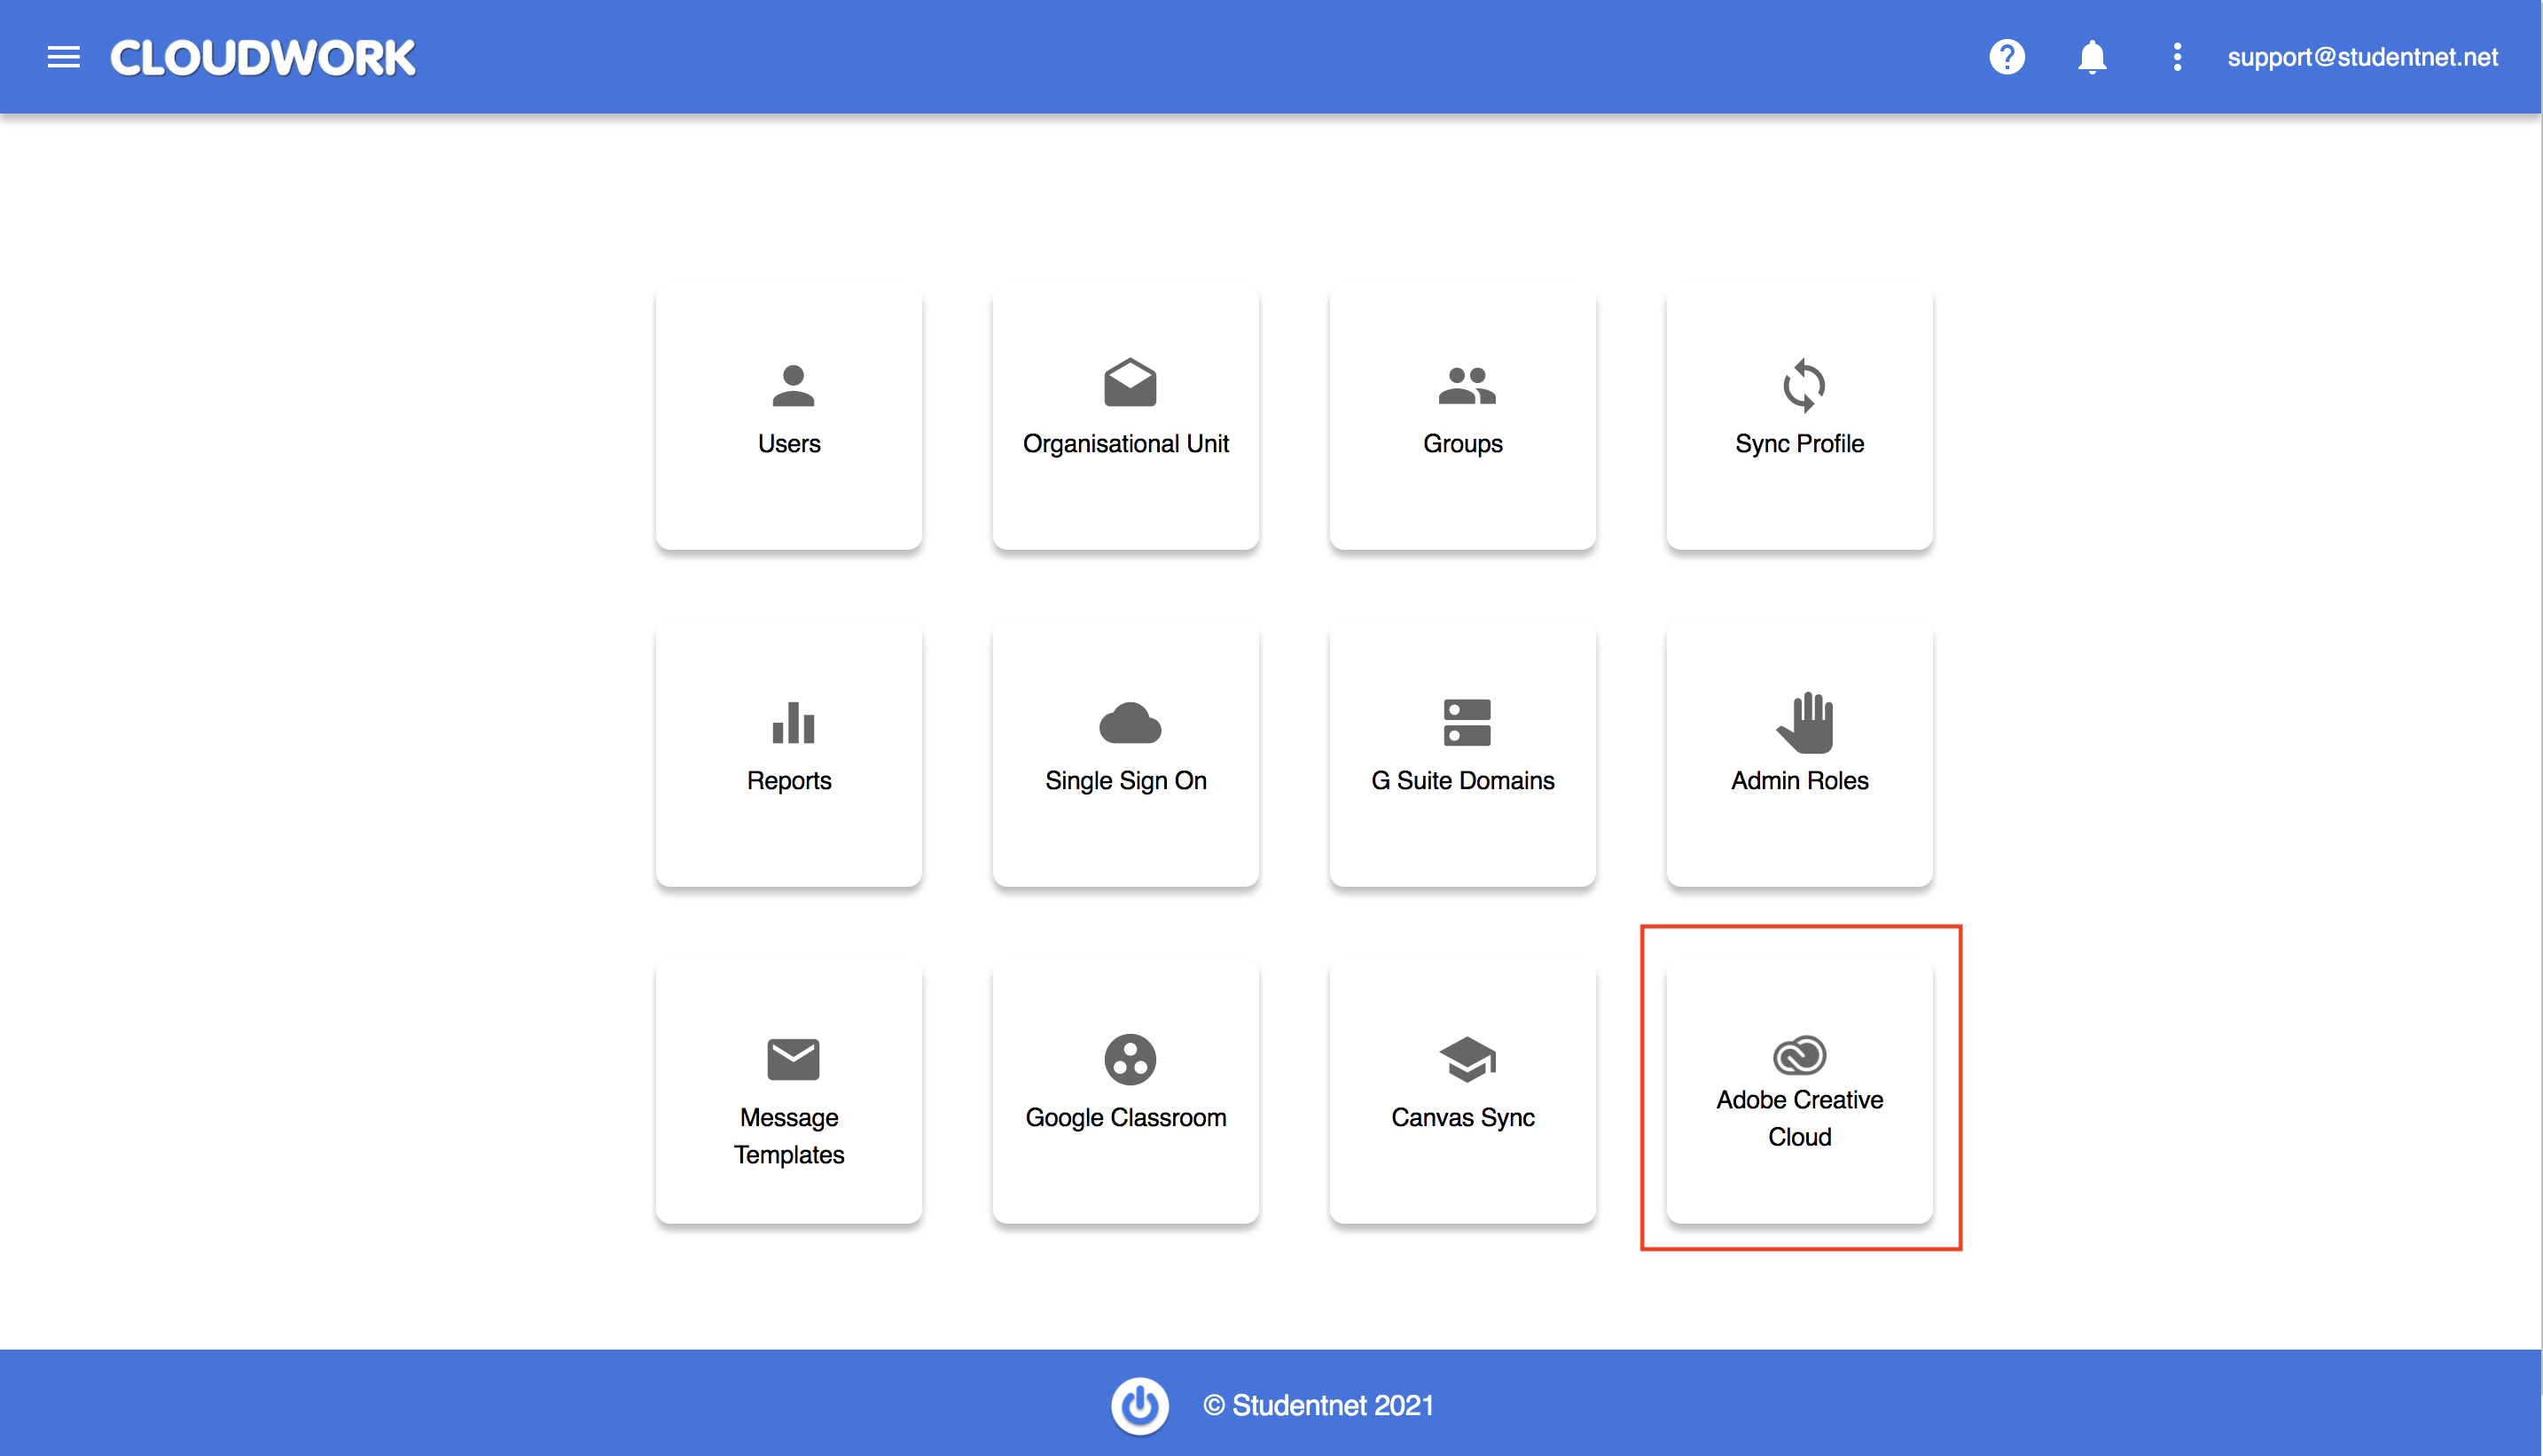
Open Cloudwork, click Adobe Coherent Cloud
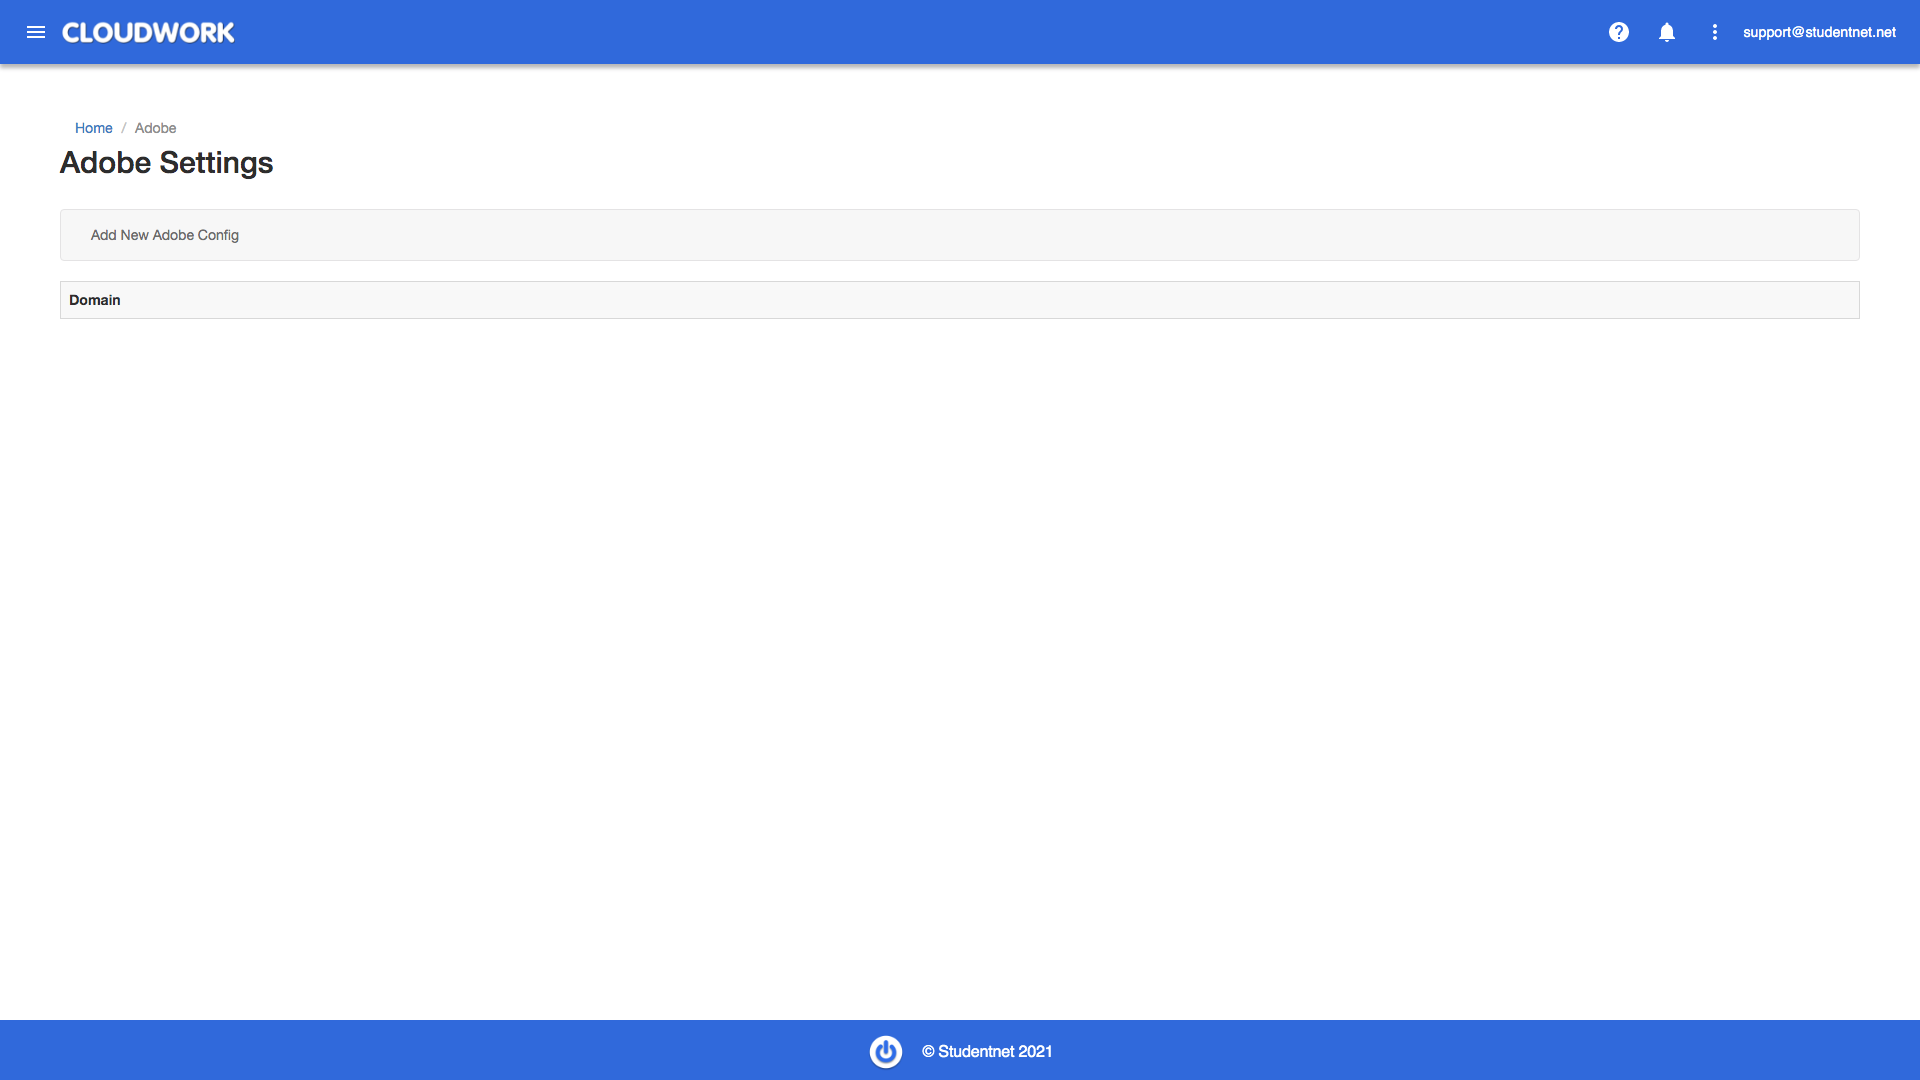
Go to Adobe page
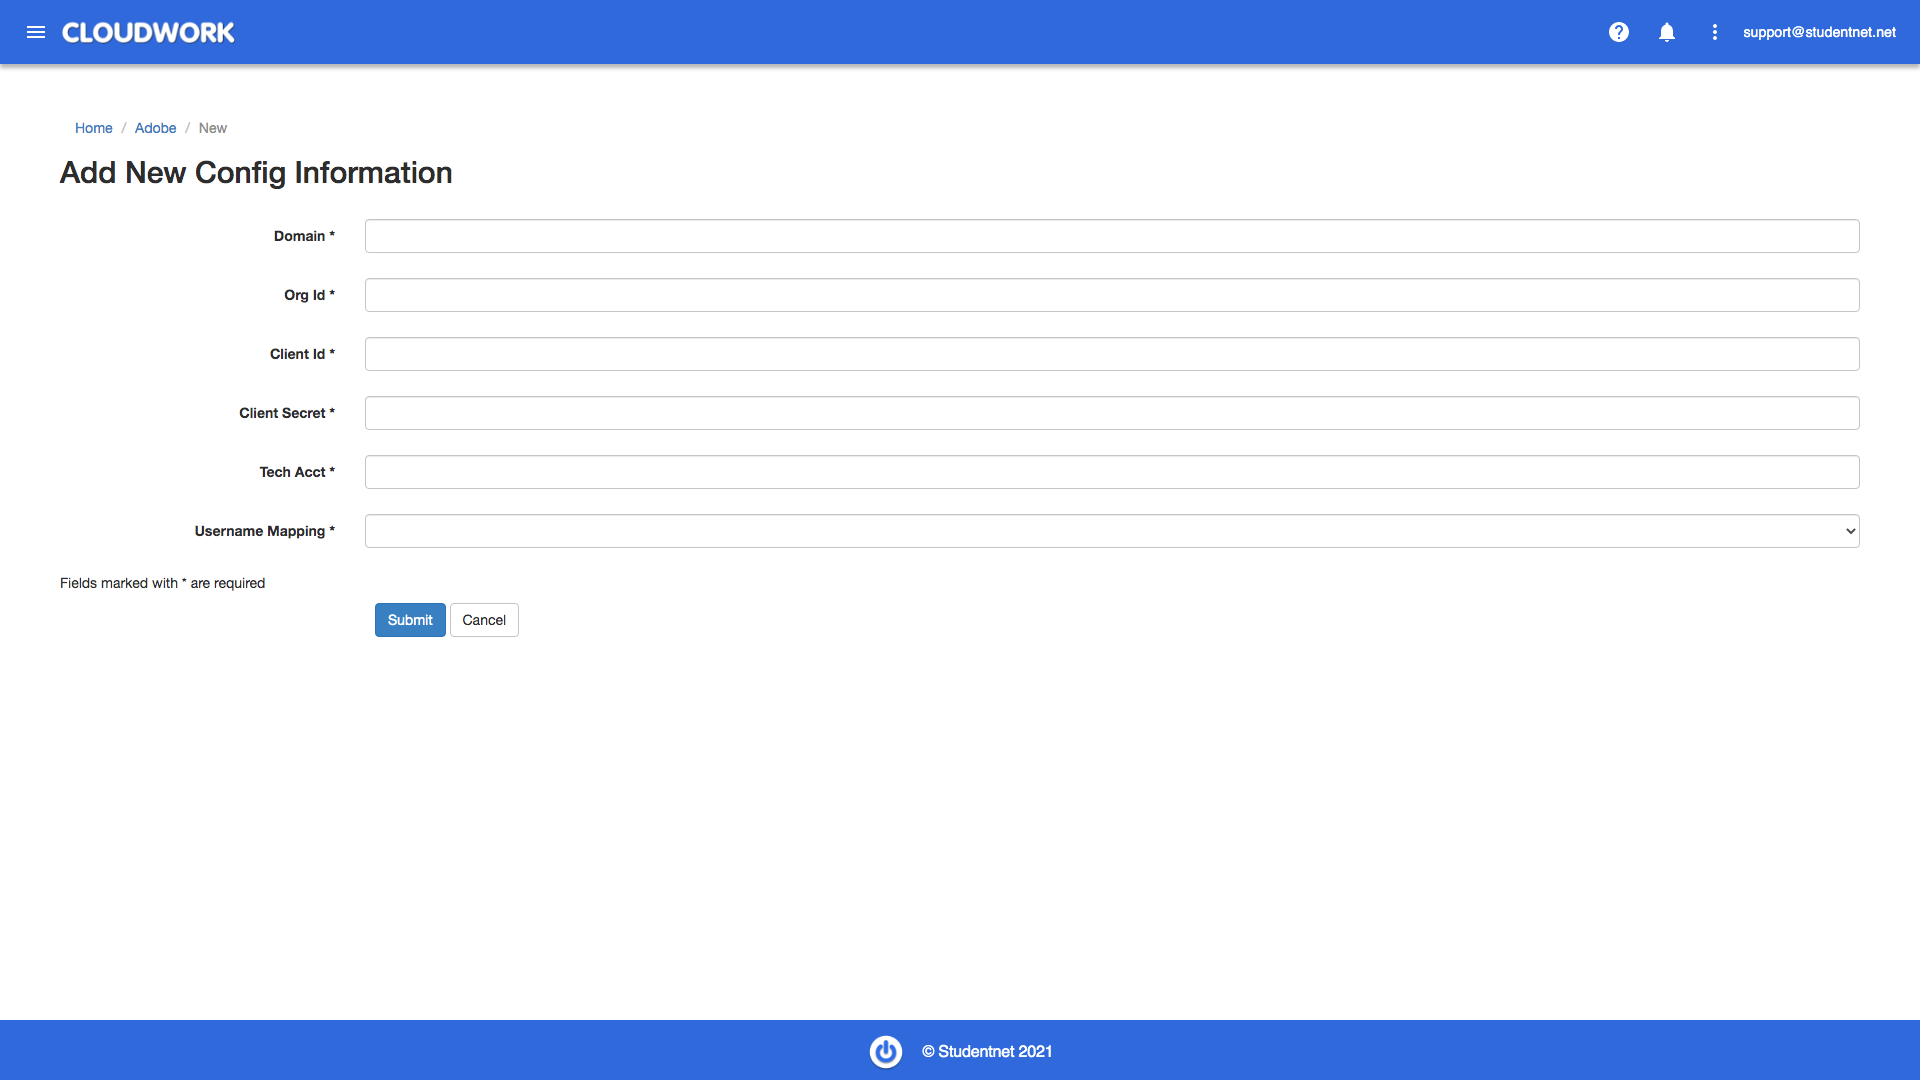
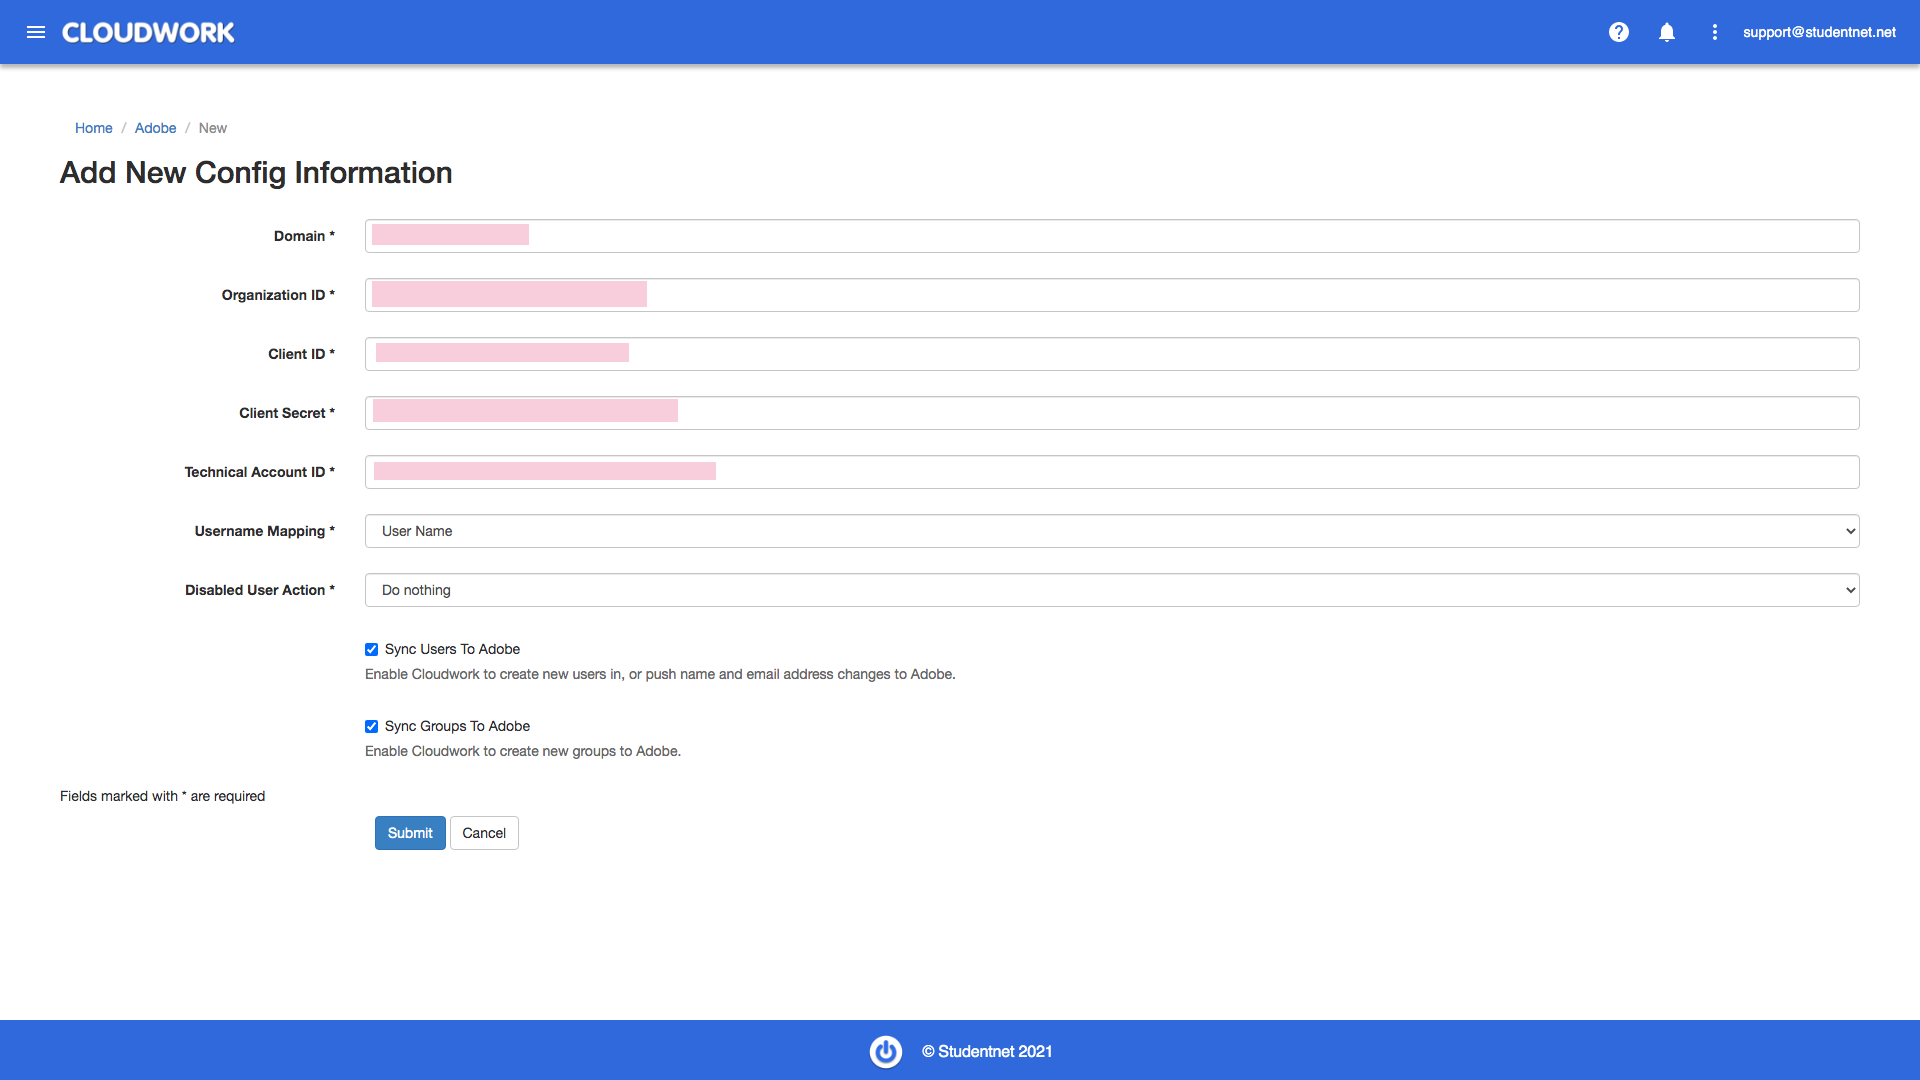
Click Add new Adobe config Fill Org Id, Client Id, Client Secret, Tech Acct, and input the school’s domain
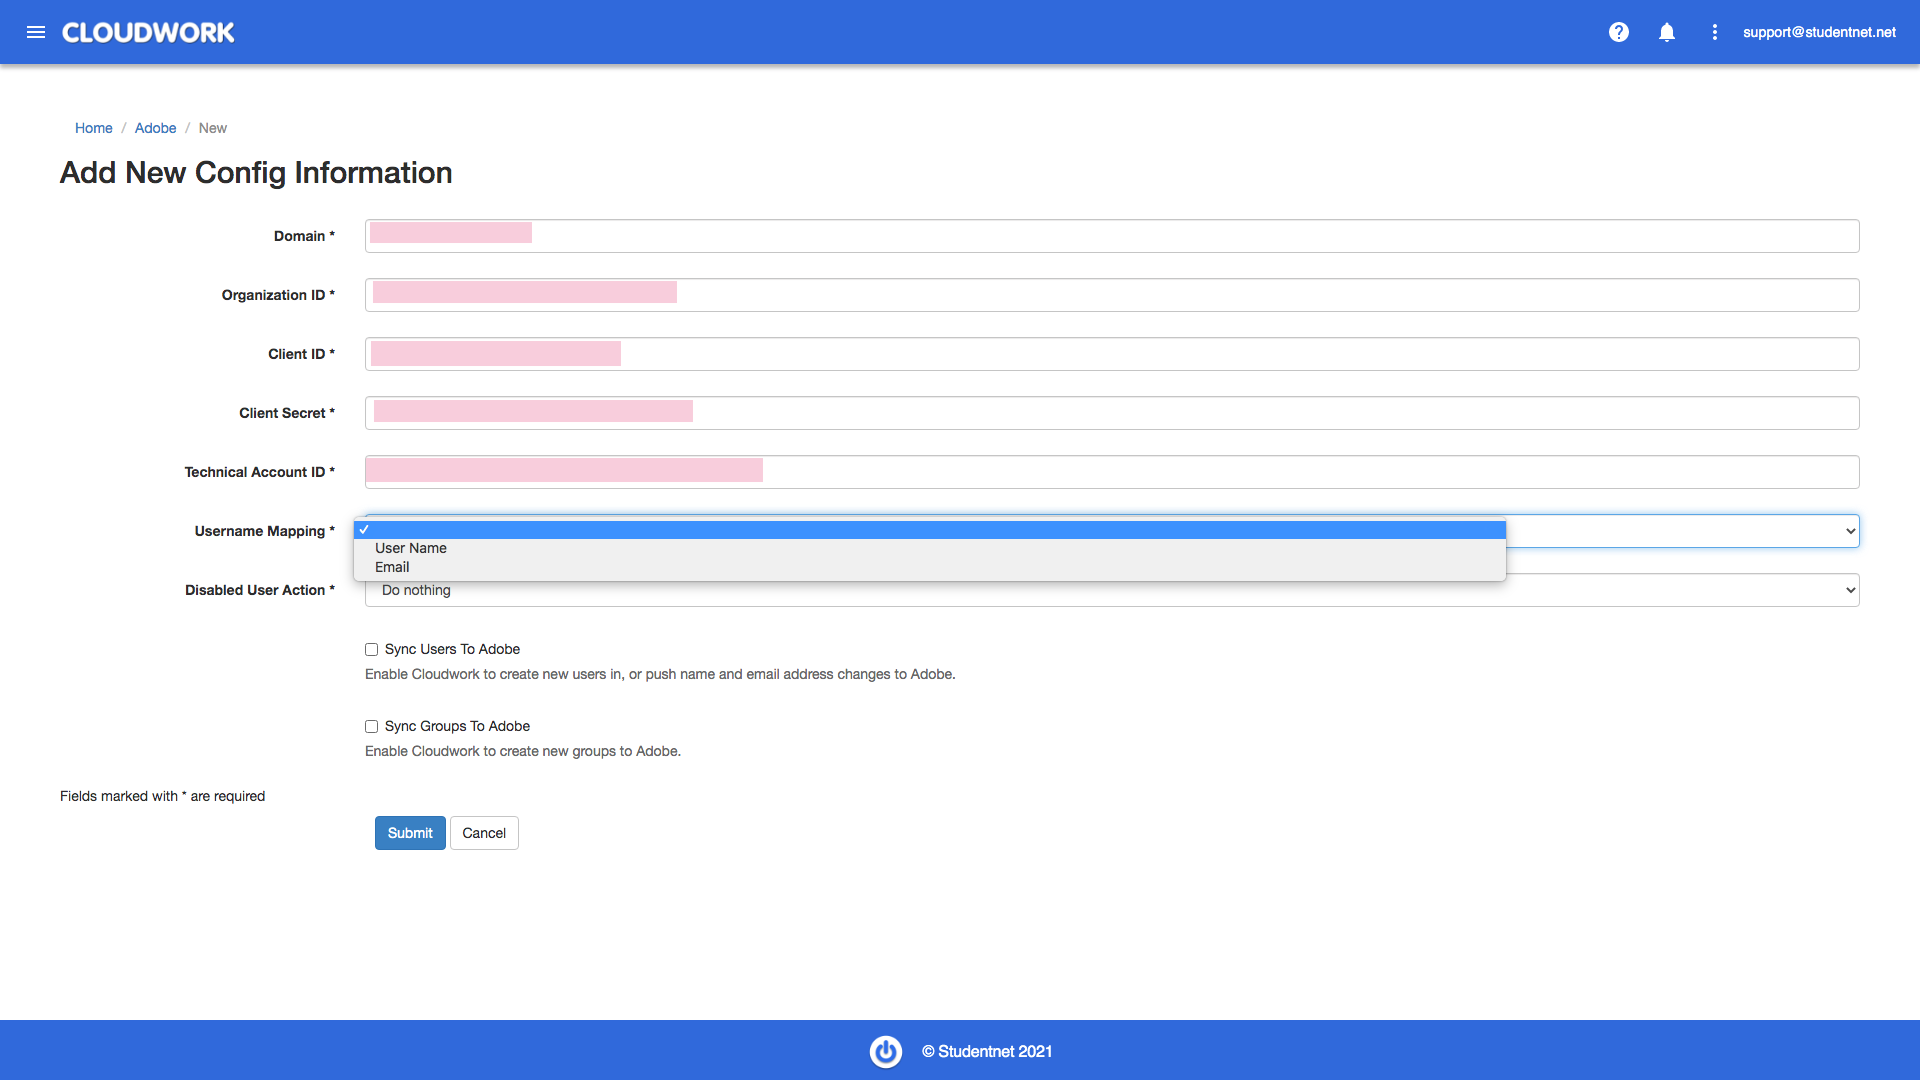
And select username field in Adobe console
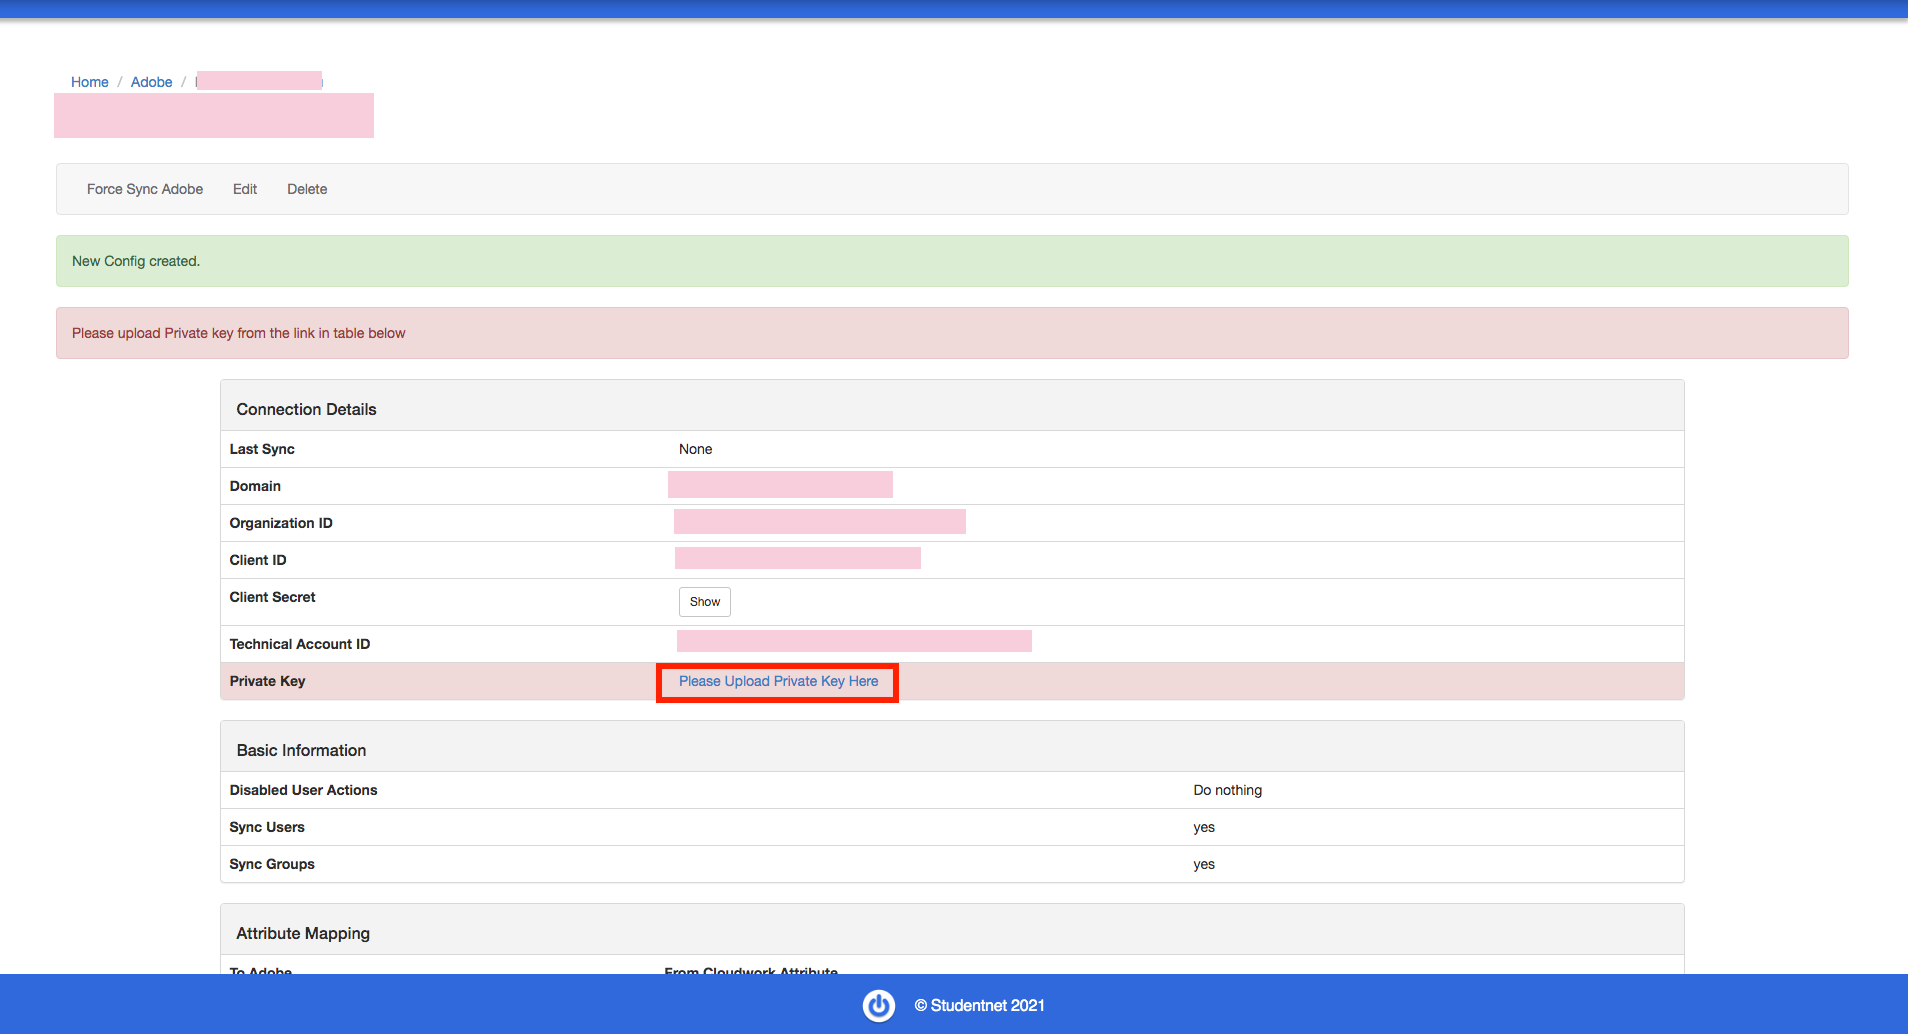
You can see New Config created, then the next step is to upload the private key. Click Please Upload Private Key Here to upload.
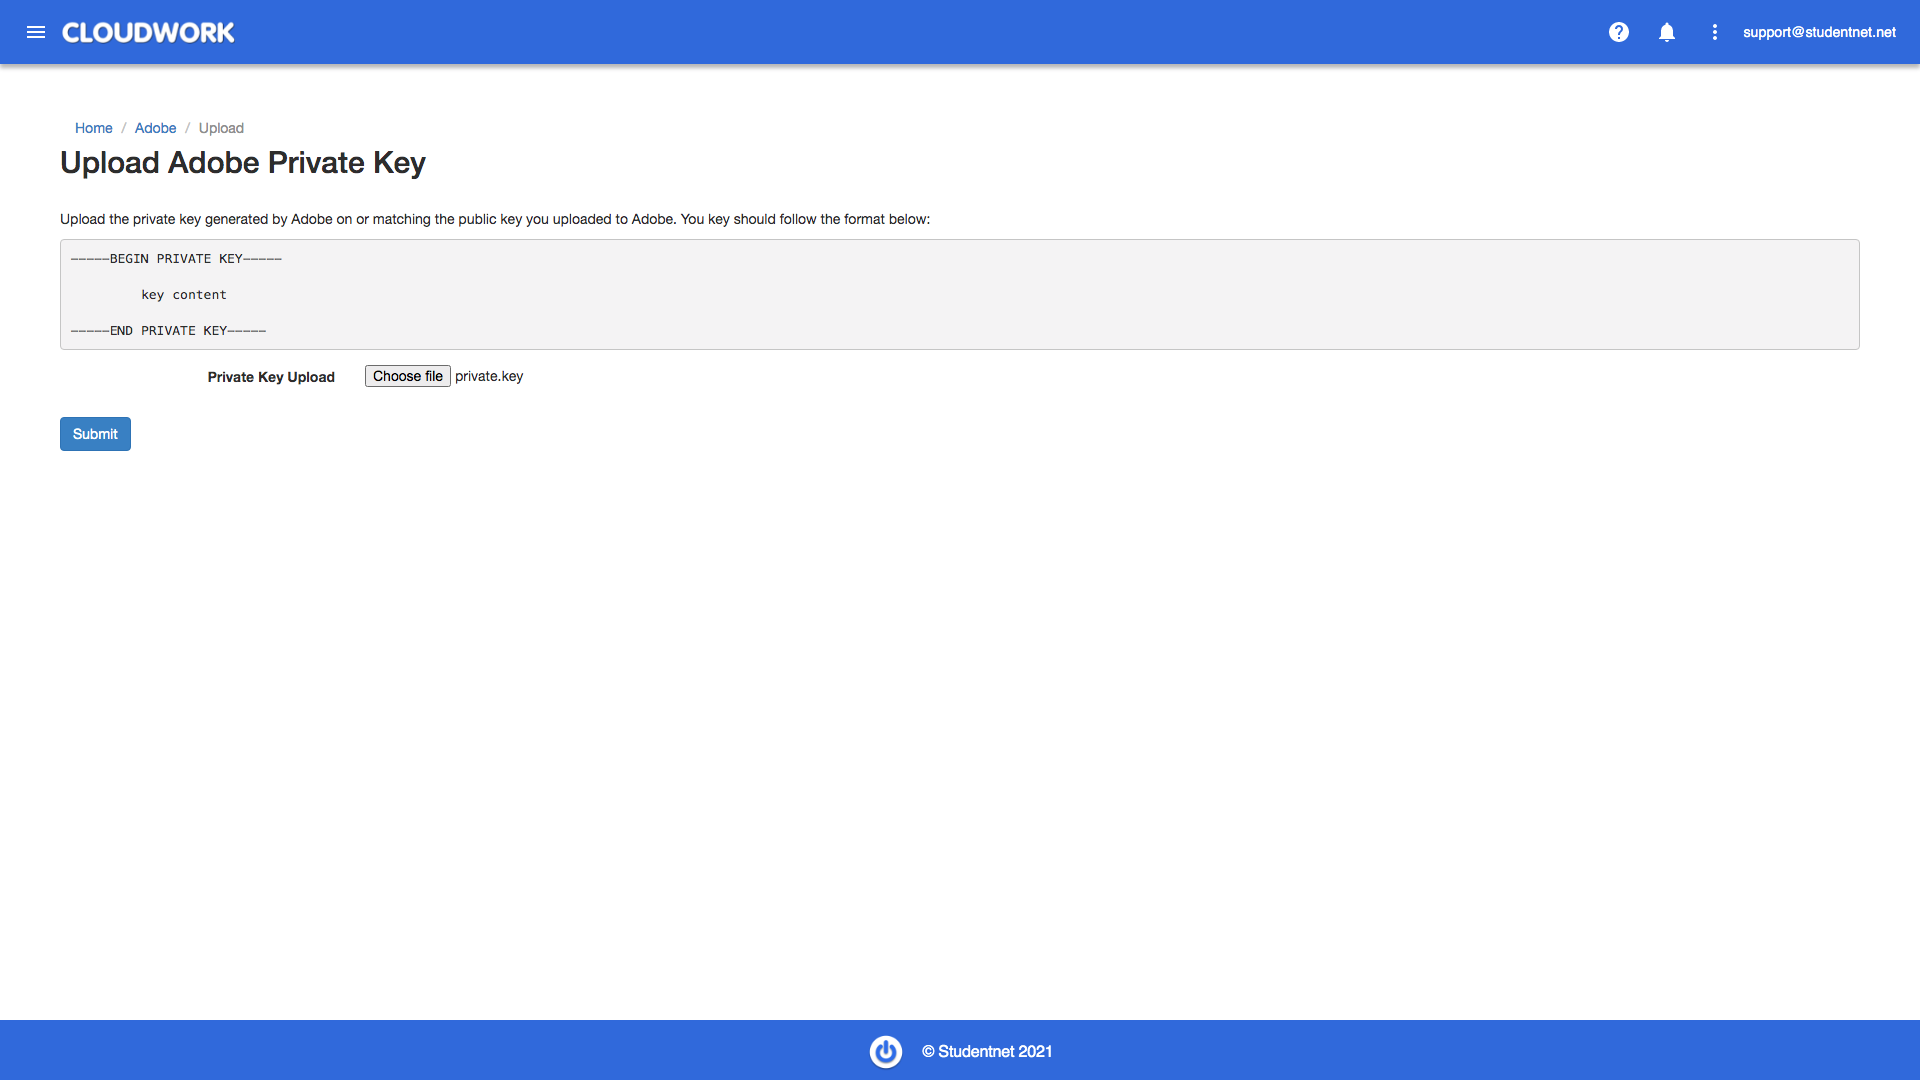
Upload the private key.
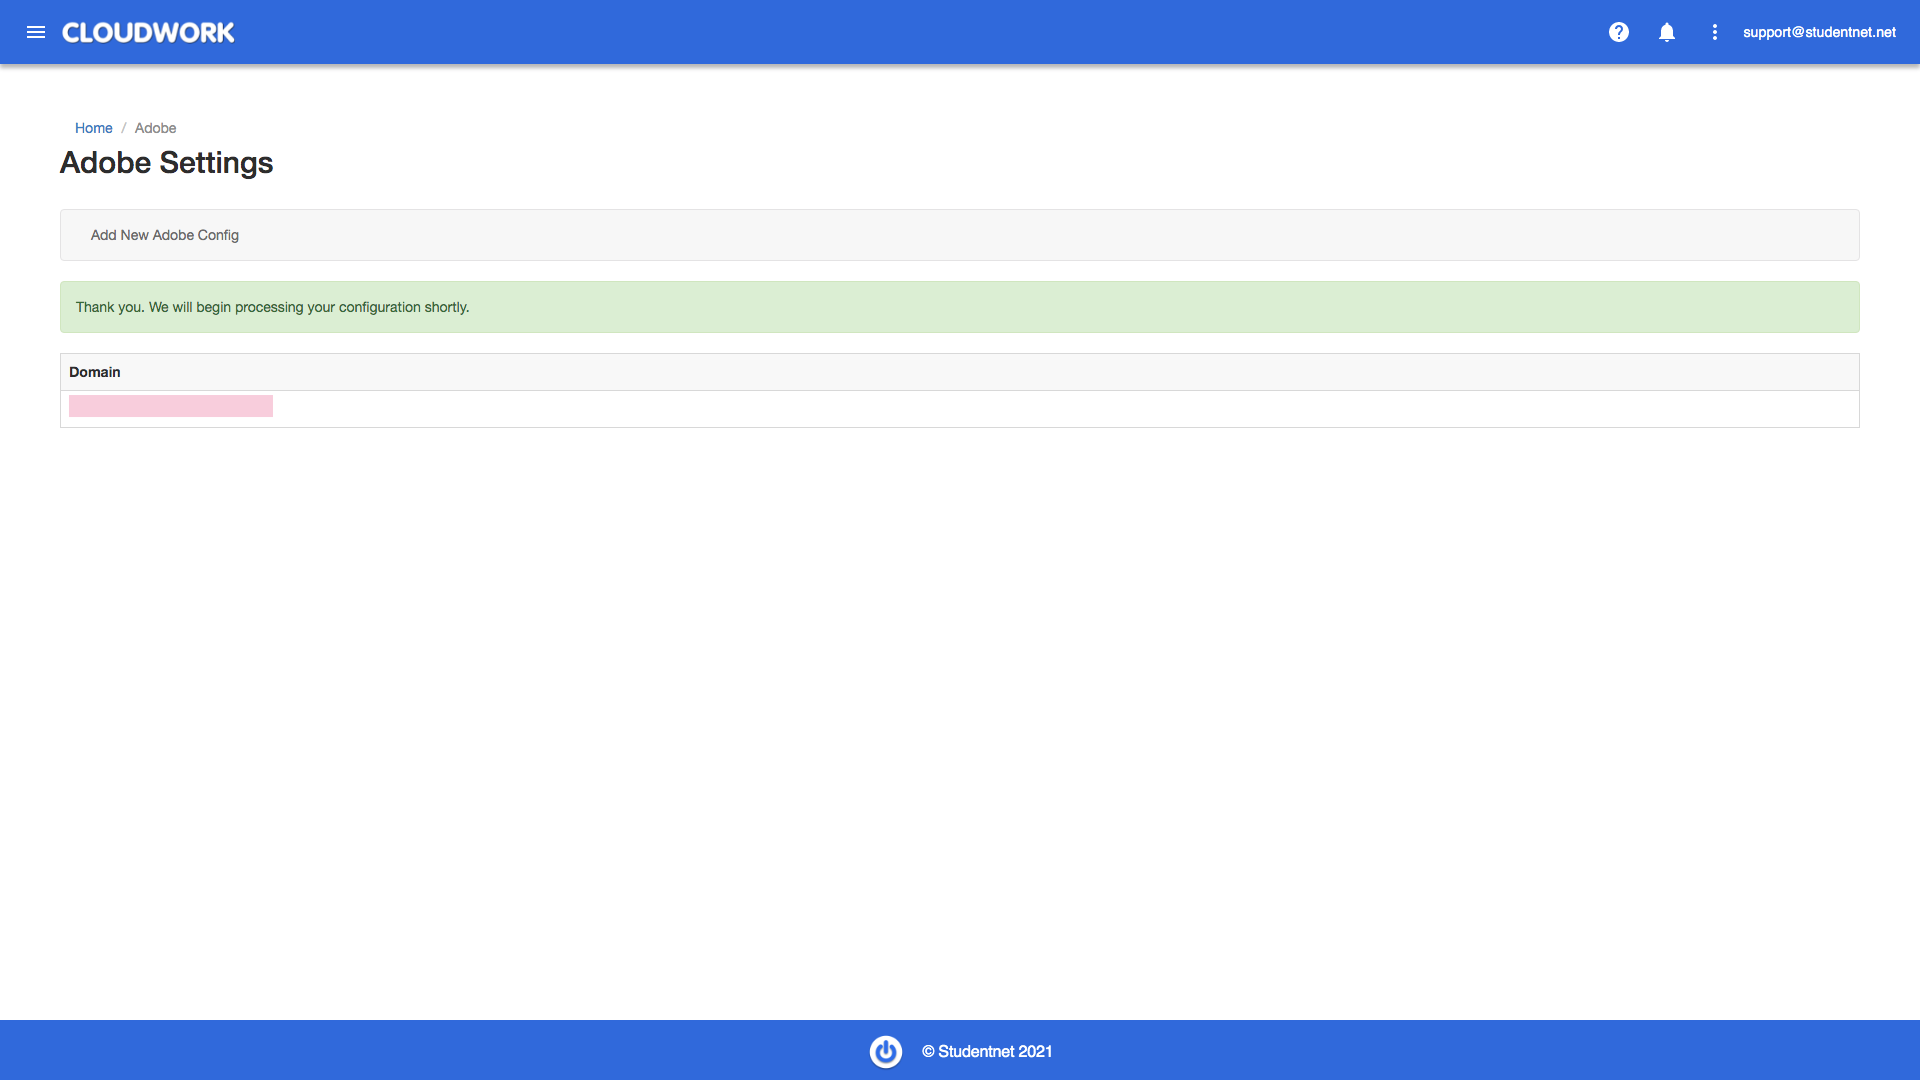
If successful, you will be redirected to the Adobe page and see the green flashing
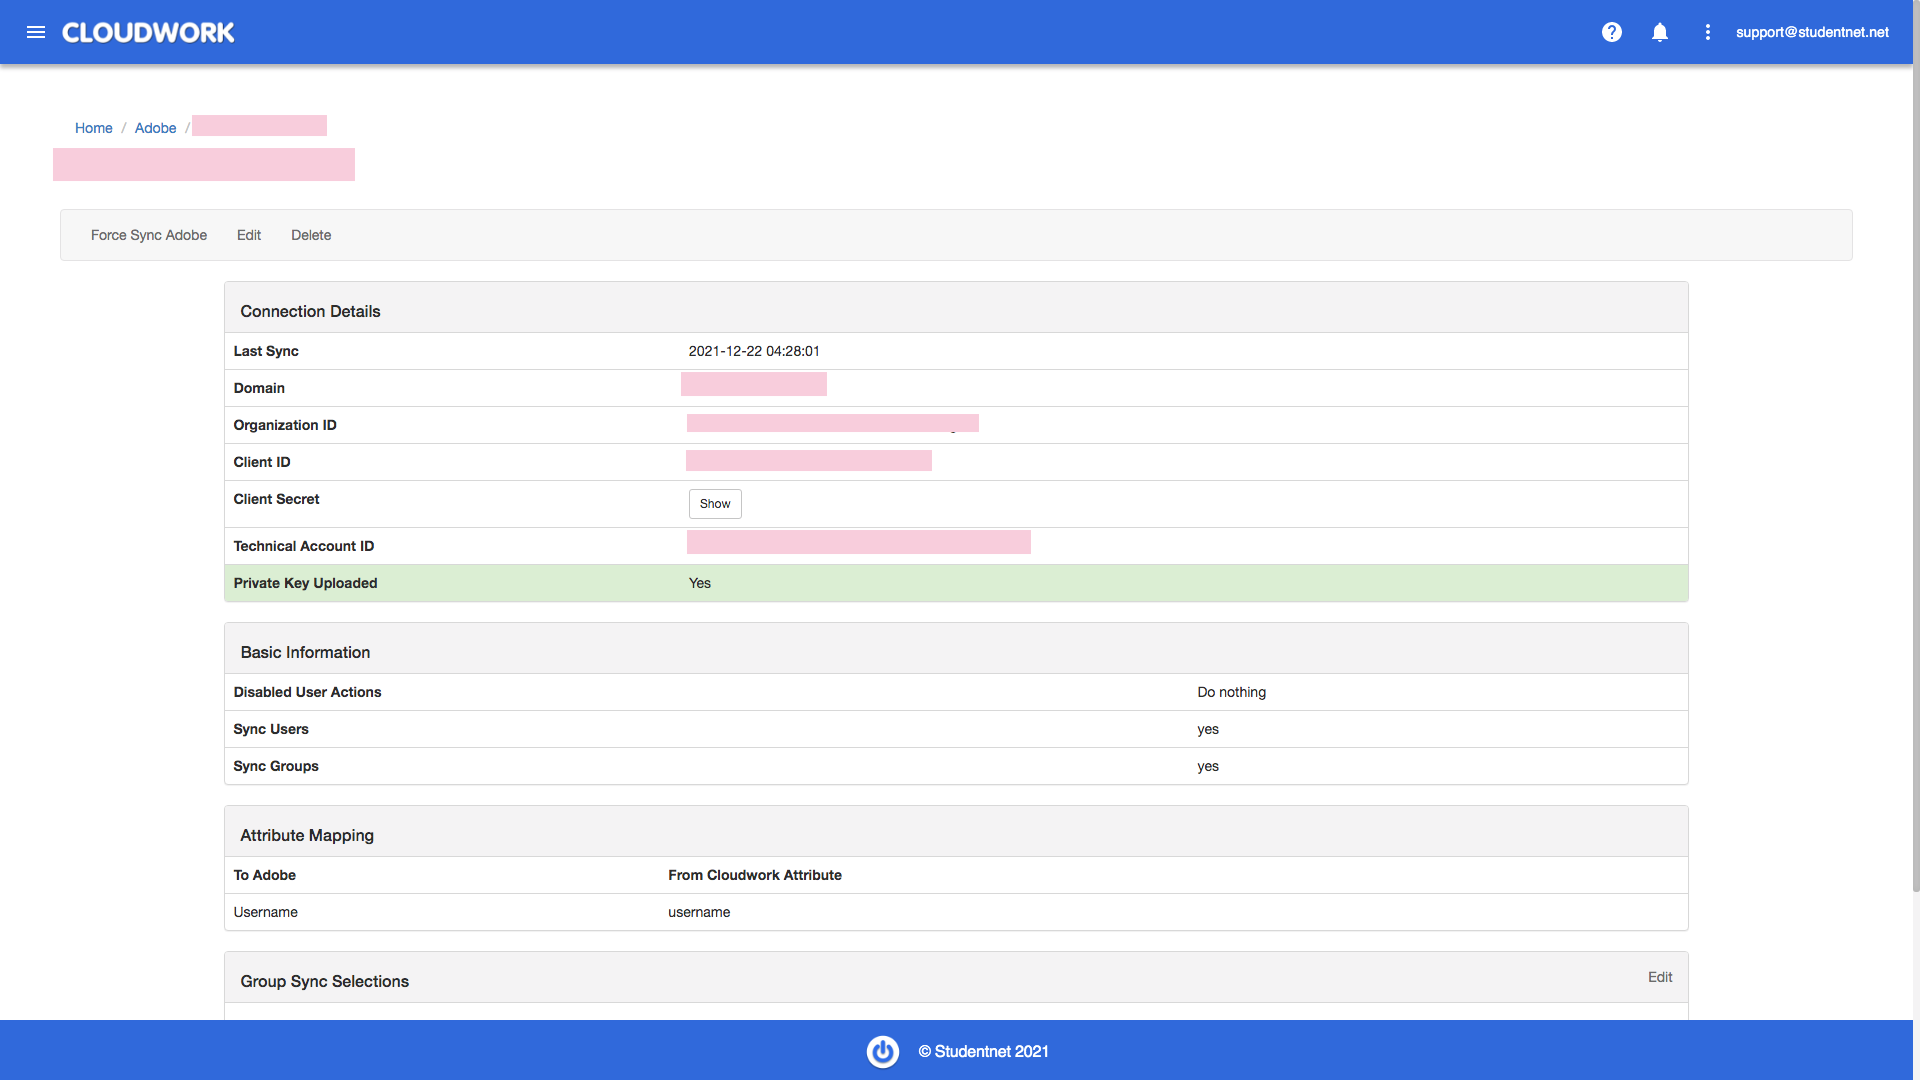
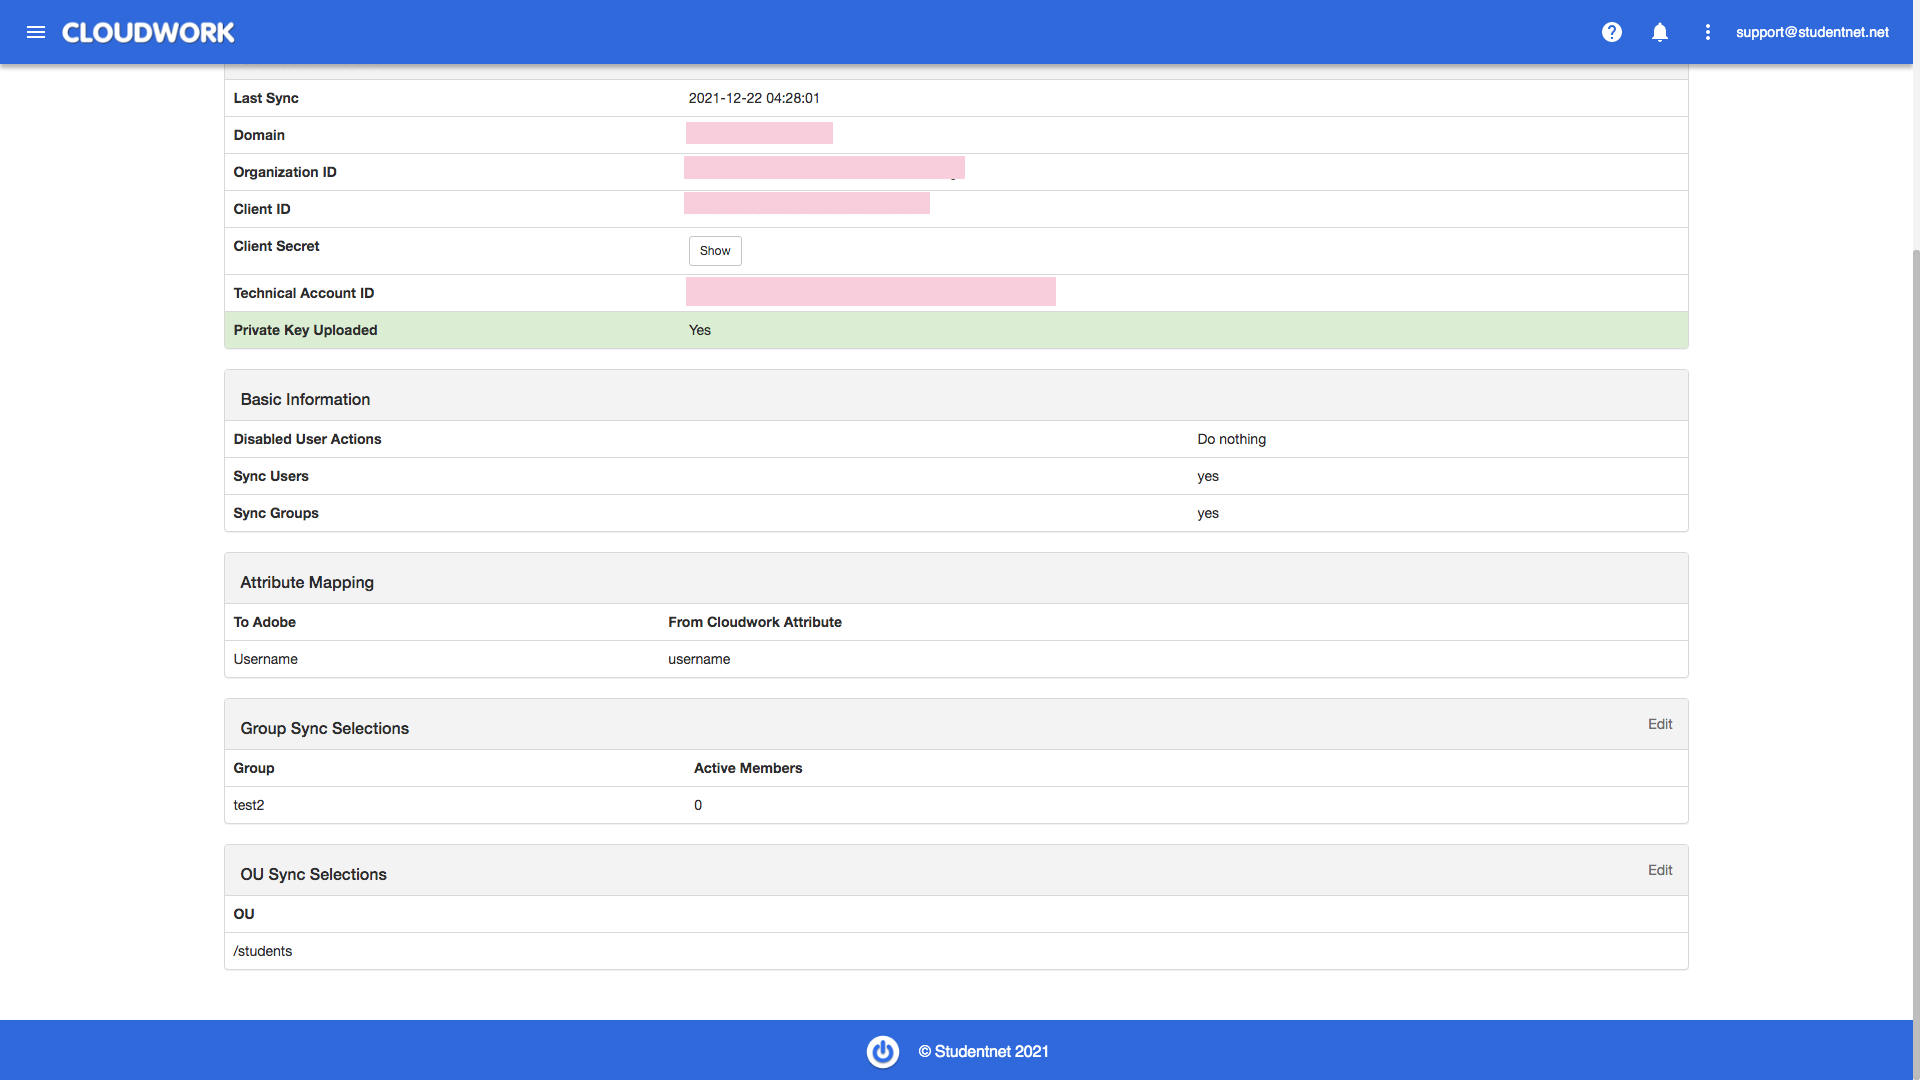
Click on the domain, you will see the private key uploaded has been changed to yes
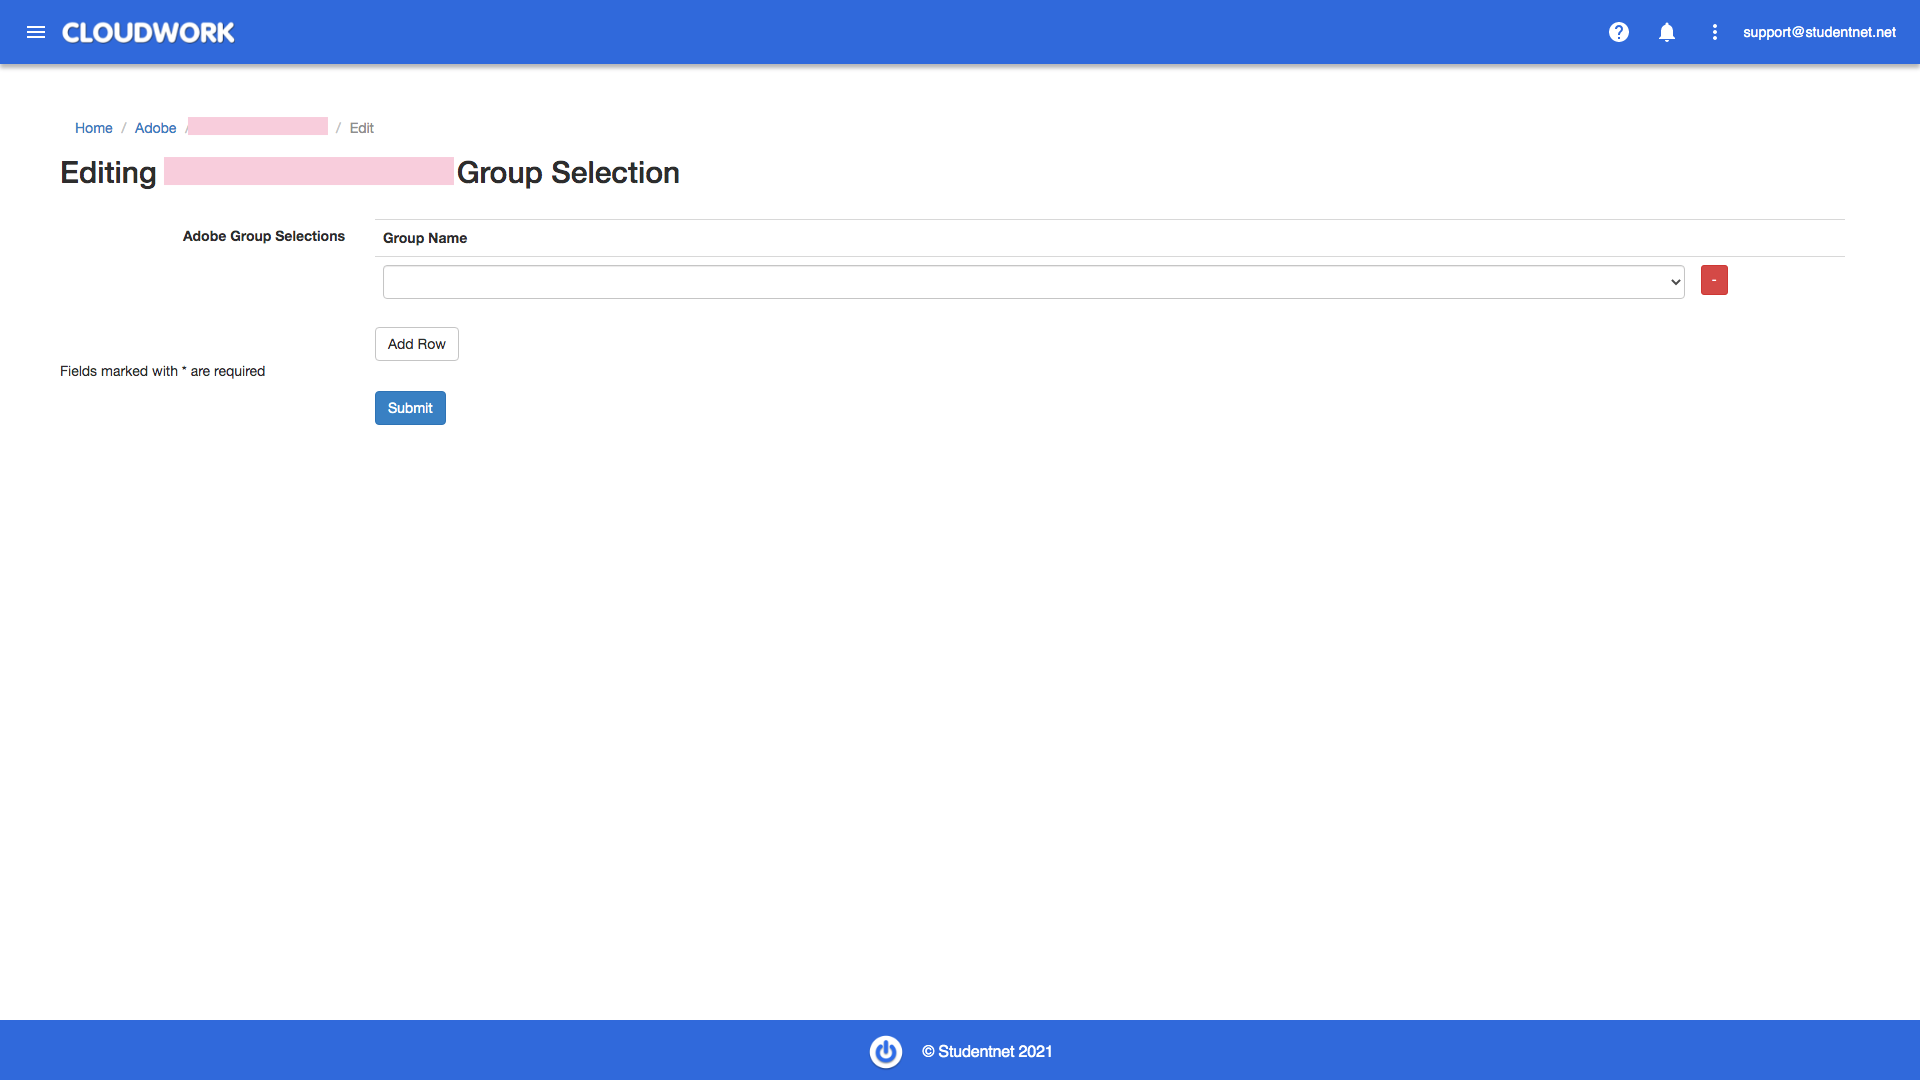
If you want to select groups to be synced to Adobe Console, click Edit on Group Sync Selections table
Select groups and submit
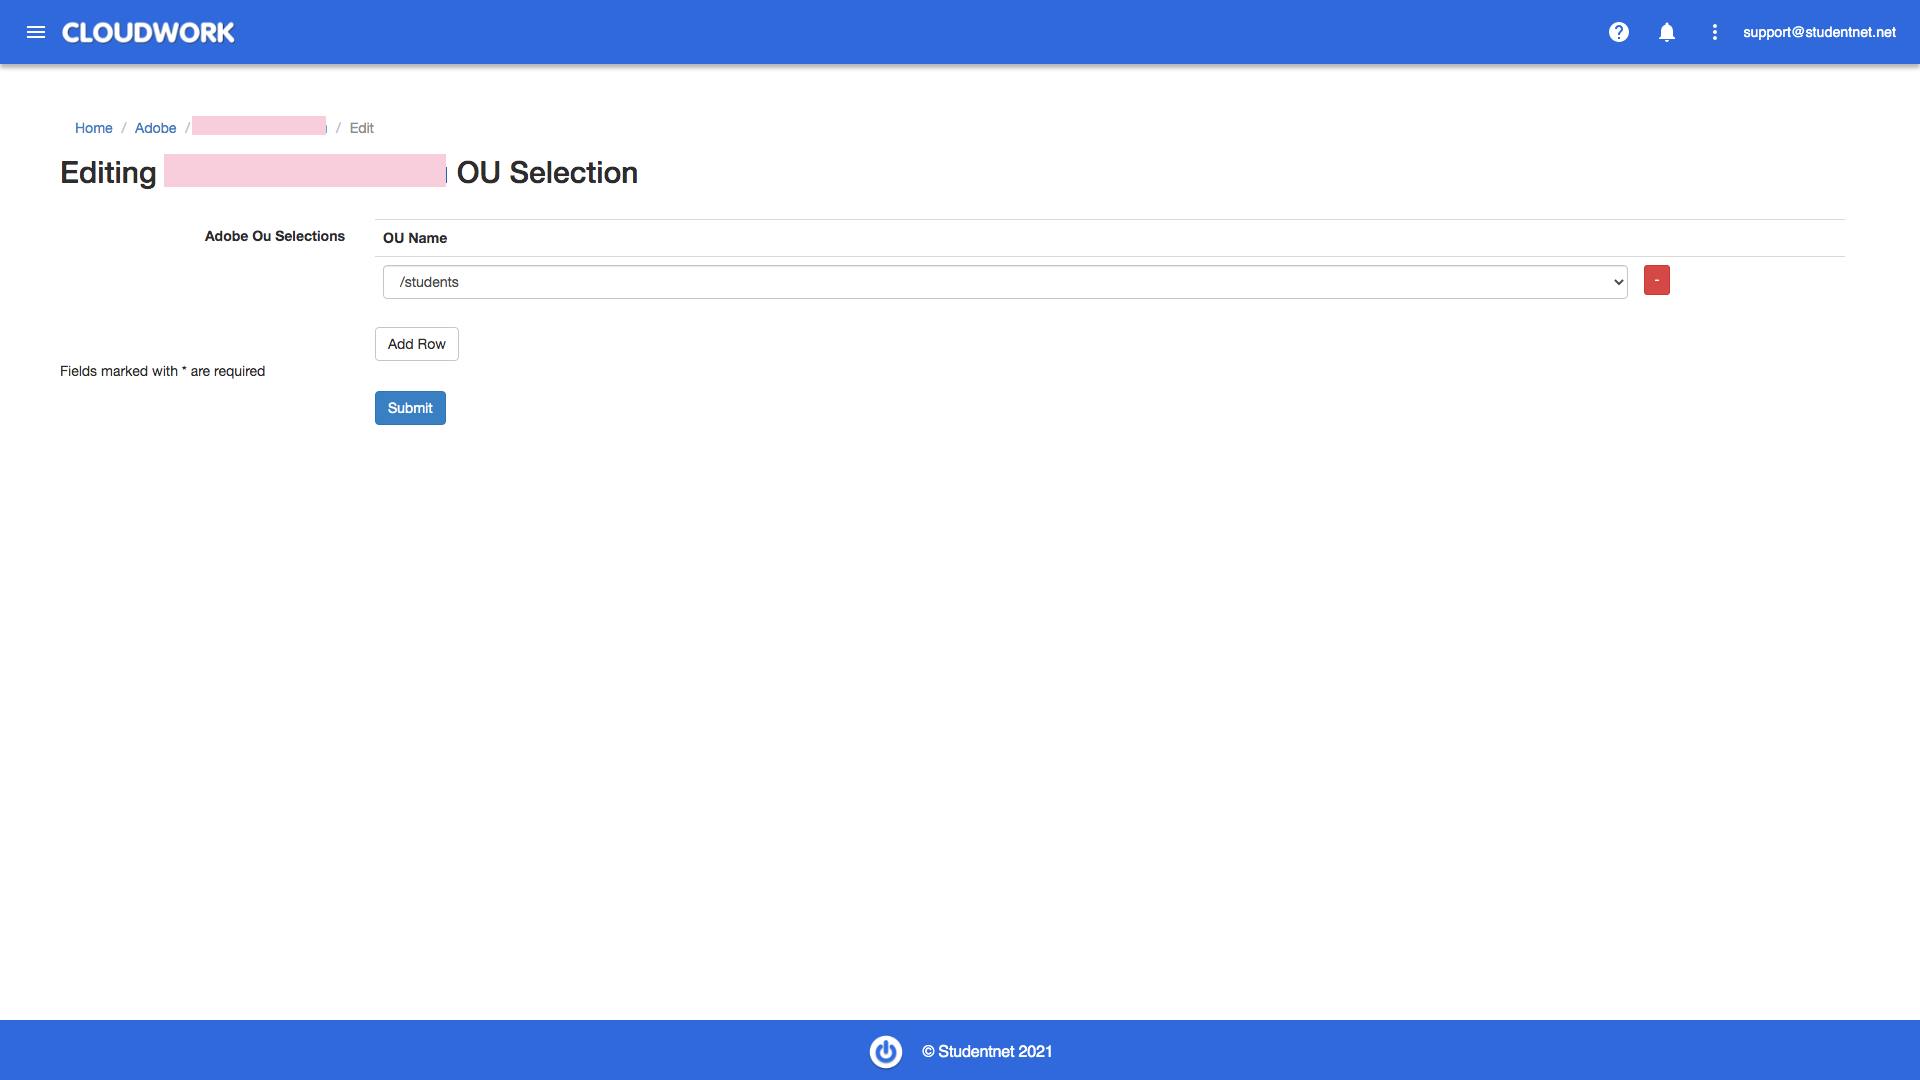
If you want to select OU to be synced to Adobe Console, click Edit on OU Sync Selections table
Select OU and submit
A green flash will indicate the selection succeeds and group names will show in the OU Sync Selections table.
How does Syncing work
If you have allowed the 'Sync User to Adobe' and 'Sync Groups to Adobe': Then by selecting OU or Groups under OU Sync Selection and Group Sync Selection respectively, you can select which OUs and Groups get synced.
- OU syncing: By selecting the OU from Cloudwork's in the Adobe Sync from Cloudwork, users from those OUs will be synced to Adobe.
- Group Syncing: By selecting groups from Cloudwork's in Adobe sync from Cloudwork, users who are already synced to Adobe will be put into User directories in Adobe. Users who are in the groups but not synced to Adobe will not be synced to Adobe.
