Difference between revisions of "Microsoft Office 365 with Intune"
Jump to navigation
Jump to search
| (One intermediate revision by the same user not shown) | |||
| Line 9: | Line 9: | ||
#Click '''Submit''' | #Click '''Submit''' | ||
#Click '''Services''' | #Click '''Services''' | ||
| − | #On the list of Services click '''Intune''' | + | #On the list of Services click '''WsFed'''>'''Intune''' |
#In '''SAML Config''' click '''Edit''' | #In '''SAML Config''' click '''Edit''' | ||
#Under '''NameID Value''' select '''GUID (base64 encoded binary)''' | #Under '''NameID Value''' select '''GUID (base64 encoded binary)''' | ||
Latest revision as of 00:10, 25 September 2025
Intune
- Login to Cloudwork Dashboard
- Navigate to Single Sign On>Add New Service>Custom WSFed Service
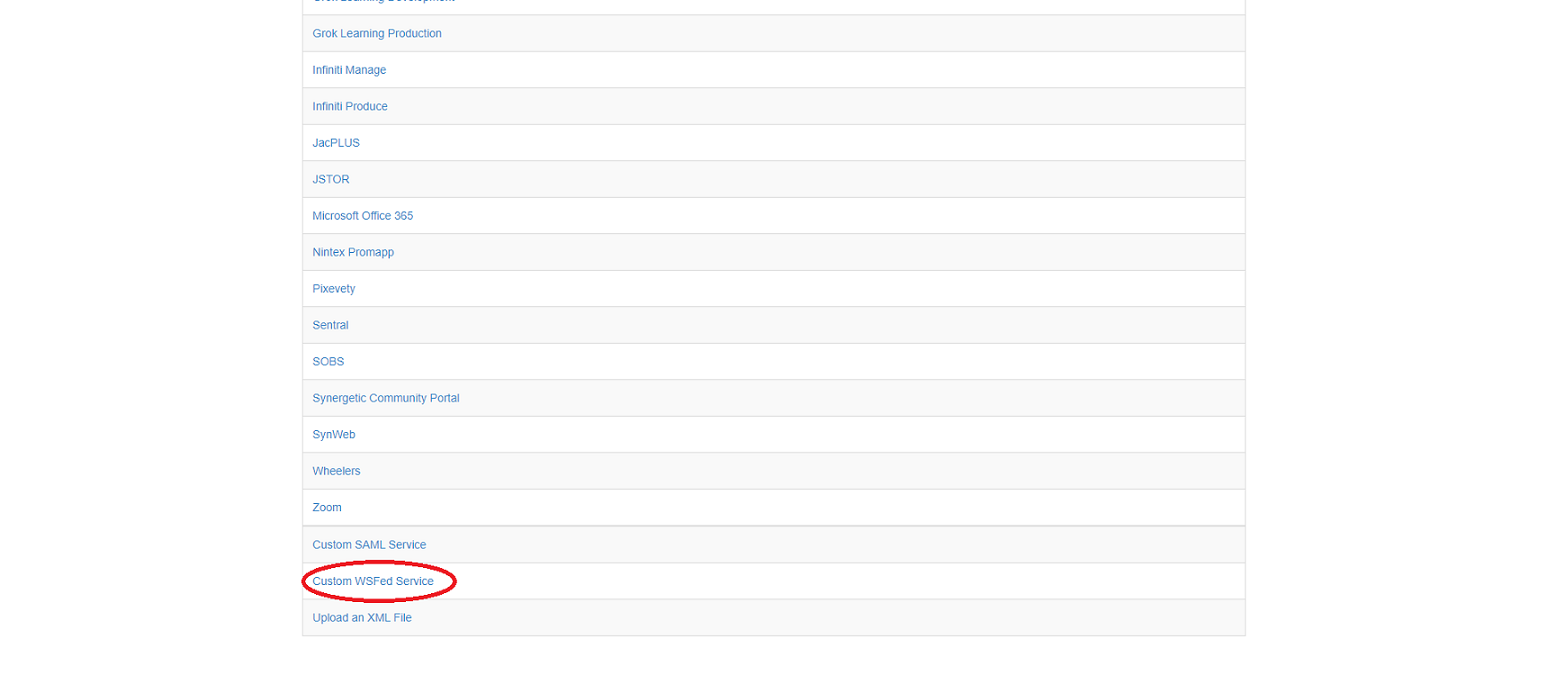 Service List
 - Add the following value into the corresponding fields:
- Name: Intune
- Entity ID: urn:federation:MicrosoftOnline
- PRP: https://login.microsoftonline.com/login.srf
 Example of Intune
- Click Submit
- Click Services
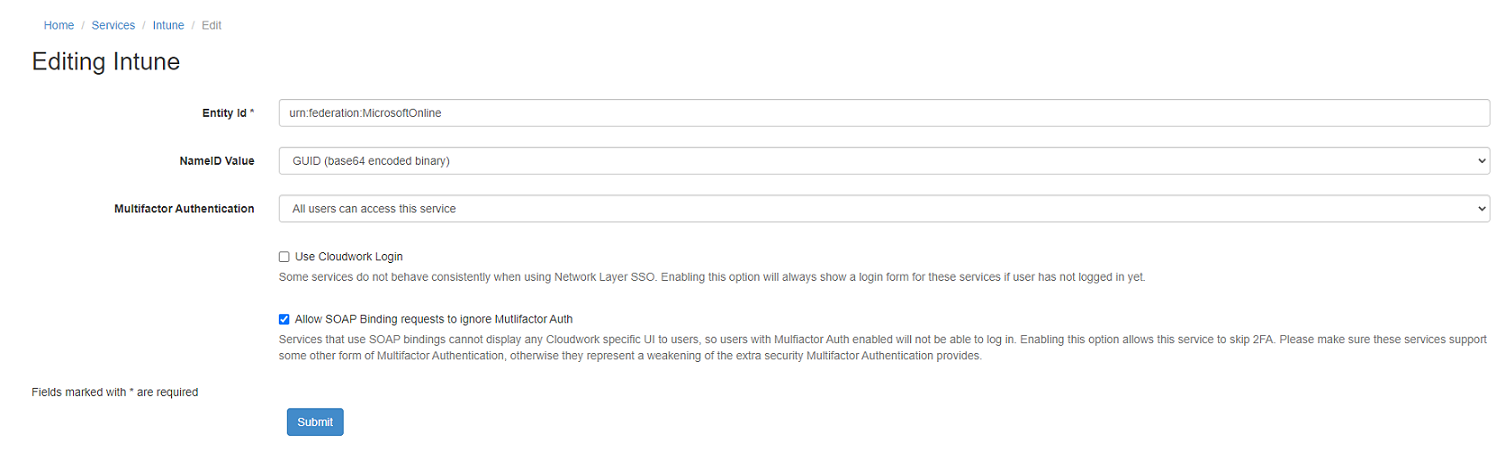
- On the list of Services click WsFed>Intune
- In SAML Config click Edit
- Under NameID Value select GUID (base64 encoded binary)
- Tick the checkbox Allow SOAP Binding requests to ignore Mutlifactor Auth
 Example of Intune SAML Config
 - Click Submit
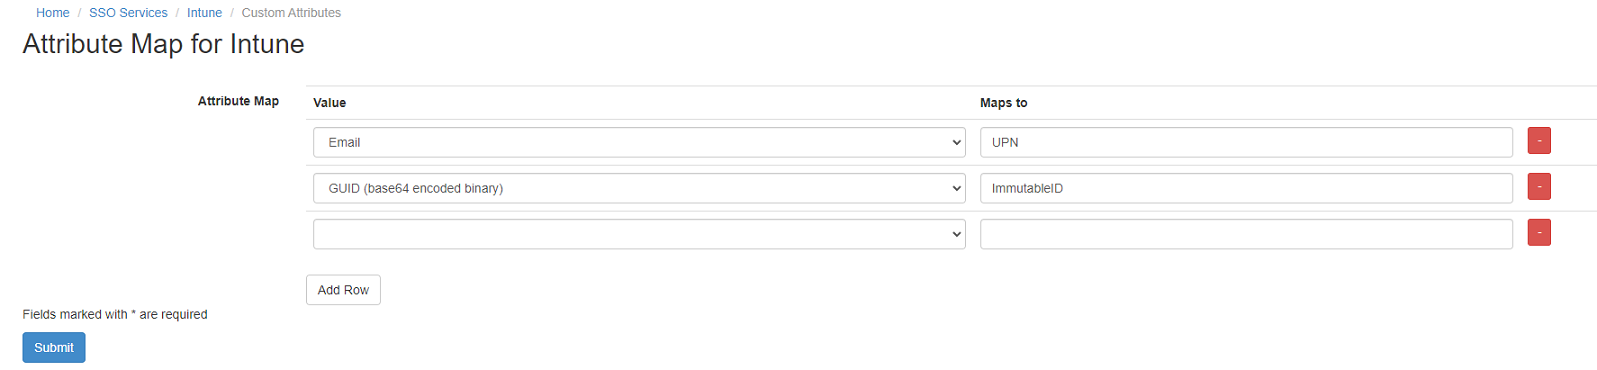
- In Attribute Map click Edit
- Configure Attribute Map as follows:
- Email: UPN
- GUID (base64 encoded binary): ImmutableID
 Example of Intune Attribute Map
- Click Submit
- Send Studentnet a support ticket(here) saying you have completed SSO with Intune and need Studentnet to complete the final step.


