Difference between revisions of "Maestro"
Jump to navigation
Jump to search
(Created page with "==SSO setup on Cloudwork Side== #Email Maestro requesting your school's Maestro login URL #Login to the '''Cloudwork Dashboard'''>'''Single Sign On'''>'''Manage OpenID Connect...") |
|||
| Line 6: | Line 6: | ||
#In '''Redirect URIs''' enter your Maestro’s login URL from Step 1: | #In '''Redirect URIs''' enter your Maestro’s login URL from Step 1: | ||
#Click Submit | #Click Submit | ||
| − | #Make a note of the '''Client ID''' | + | #Make a note of the '''Client ID''' |
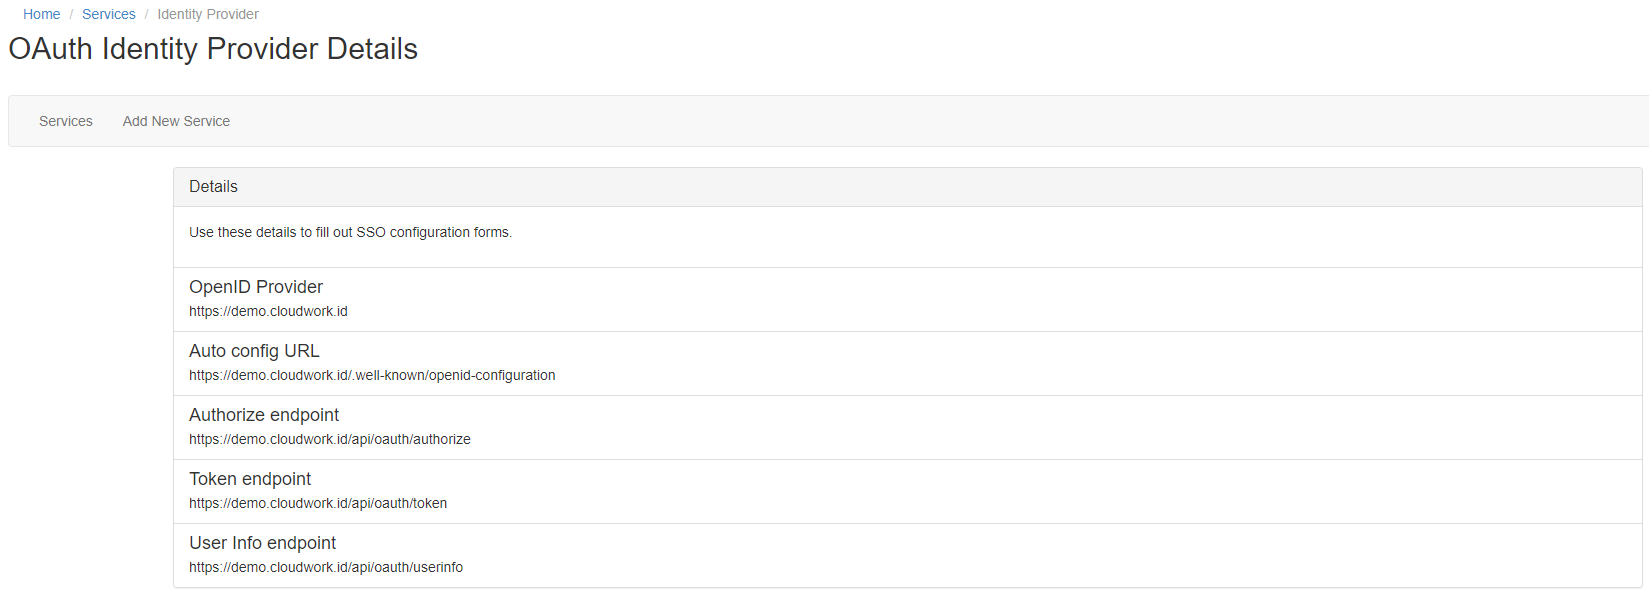
Navigate to '''Cloudwork Dashboard'''>'''Single Sign On'''>'''Manage OpenID Connect Apps'''>'''Identity Provider''' and make note of the '''OpenID Provider'''<br>[[File:Oauth_idp_details.PNG|150px|centre|frame|Example of OAuth IdP Details]] | Navigate to '''Cloudwork Dashboard'''>'''Single Sign On'''>'''Manage OpenID Connect Apps'''>'''Identity Provider''' and make note of the '''OpenID Provider'''<br>[[File:Oauth_idp_details.PNG|150px|centre|frame|Example of OAuth IdP Details]] | ||
Revision as of 06:13, 9 April 2025
SSO setup on Cloudwork Side
- Email Maestro requesting your school's Maestro login URL
- Login to the Cloudwork Dashboard>Single Sign On>Manage OpenID Connect Apps>Add New Service
- In Name enter Maestro
- In Client Type select Public Client
- In Redirect URIs enter your Maestro’s login URL from Step 1:
- Click Submit
- Make a note of the Client ID
Navigate to Cloudwork Dashboard>Single Sign On>Manage OpenID Connect Apps>Identity Provider and make note of the OpenID Provider

Example of OAuth IdP Details
Email Template
Hi Support,
<School Name> is wanting to enable SSO with Cloudwork and Maestro.
Please provide the school's Maestro login URL
SSO Setup on Maestro Side

