GoTo Connect
Jump to navigation
Jump to search
Single Sign On Setup on Cloudwork's Side
- In the Cloudwork Dashboard>Single Sign On>Add New Service>Custom SAML Service
- Fill in the field as follows:
- Name: GoTo Connect
- EntityID: https://authentication.logmeininc.com/saml/sp
- Assertion Consumer Service: https://authentication.logmeininc.com/saml/acs
- Single Logout Service: https://authentication.logmeininc.com/saml/SingleLogout
- NameID Value: Select Username
- NameID Format: Select urn:oasis:names:tc:SAML:1.1:nameid-format:emailAddress
- Click Submit
- You will need to download the SAML signing certificate from GoTo Connect from here: https://support.goto.com/connect/help/saml-signing-certificate-for-enterprise-sign-in
- In the Cloudwork Dashboard>Single Sign On>GoTo Connect>SAML Config>Edit
- Confirm the following options are enabled and set:
- Signature Algorithm: Select SHA256
- Sign Assertion is enabled
- Sign Response is enabled
- Still in the SAML config add the signing certificate you downloaded from GoTo Connect in step 4.
- You will need to copy the value the file and paste under Certificates>Content
- Also check the checkbox Used for Signing in the same row as the certificate.
- Click Submit
Single Sign On Setup on GoTo Connect side
- Login to the Cloudwork dashboard>Single Sign On>Identity Provider
- Under XML file click Download
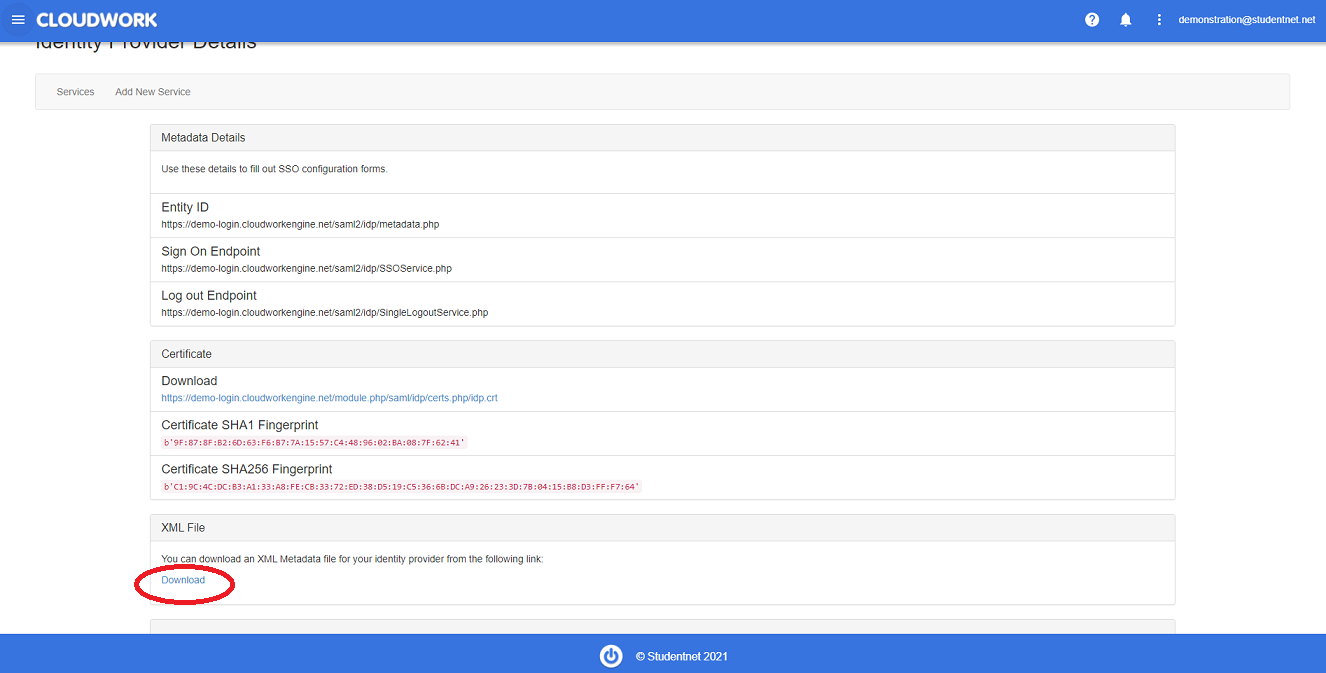 Location of XML File Download
 - In the GoTo Connect Organization Center
- Under Identity Provider, select upload a SAML Metadata file under How would you like to configure your SAML IDP
- Upload the XML file from step 2
- Click Save
