Difference between revisions of "Organisational units"
Jump to navigation
Jump to search
Jrobertson (talk | contribs) |
Jrobertson (talk | contribs) |
||
| Line 2: | Line 2: | ||
This can be illustrated by an example structure in the image below. | This can be illustrated by an example structure in the image below. | ||
| − | + | [[File:ou_side_menu.png|600px]] ''Figure 6 - Organisational Unit Side Menu'' | |
You can create OU’s to for manually created users to live in. Most OU’s will be created by the automated synchronisation process. | You can create OU’s to for manually created users to live in. Most OU’s will be created by the automated synchronisation process. | ||
| Line 14: | Line 14: | ||
Once in the “add new” screen it will look something like the below. | Once in the “add new” screen it will look something like the below. | ||
| − | + | [[File:new_ou.png|1100px]] ''Figure 7 - New Organisational Unit Form'' | |
*Name - This is the name of the OU that will be displayed. | *Name - This is the name of the OU that will be displayed. | ||
Revision as of 00:11, 21 November 2017
Organisational Units (OU’s) are used to keep distinct groups inside the same institution into separate containers so they can be more easily administered. This can be illustrated by an example structure in the image below.
 Figure 6 - Organisational Unit Side Menu
You can create OU’s to for manually created users to live in. Most OU’s will be created by the automated synchronisation process.
Clicking on any OU in the side menu will give you a list of the users that are contained inside that OU.
Creating a new Organisational Unit
To create a new OU simply click on the Organisational Unit link on the sidebar. This will give you a new link in the top menu to Add New.
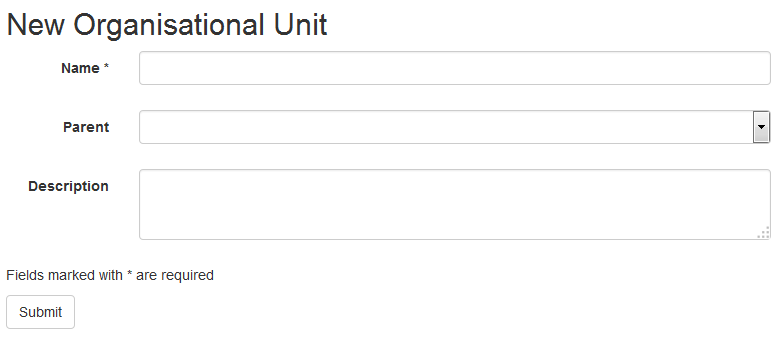
Once in the “add new” screen it will look something like the below.
 Figure 7 - New Organisational Unit Form
- Name - This is the name of the OU that will be displayed.
- Parent - This will determine which OU this new OU will live within. For example in Figure 6 above the Administration OU’s Parent is the Staff OU.
- Description - This is a description for reference of the user to be able to know what the OU is being used for.