Difference between revisions of "EdSmart"
Jump to navigation
Jump to search
| (One intermediate revision by the same user not shown) | |||
| Line 4: | Line 4: | ||
#Navigate to '''Single Sign On'''>'''Identity Provider'''>'''XML file'''>'''Download'''<br>[[File:Xml_download.PNG|300px|centre|frame|Location of XML File Download]] | #Navigate to '''Single Sign On'''>'''Identity Provider'''>'''XML file'''>'''Download'''<br>[[File:Xml_download.PNG|300px|centre|frame|Location of XML File Download]] | ||
#Download your school's XML File | #Download your school's XML File | ||
| − | #Email | + | #Email Edsmart('''help@edsmart.com''') with Test User credentials and attaching the XML File from step 3 |
===Email Template=== | ===Email Template=== | ||
| Line 36: | Line 36: | ||
#*'''Role''': '''role''' | #*'''Role''': '''role''' | ||
#Click '''Submit''' | #Click '''Submit''' | ||
| + | #Email back Edsmart('''help@edsmart.com''') informing them the SSO setup with Cloudwork has been completed and testing is ready to commence. | ||
| + | |||
| + | ===Email Template=== | ||
| + | <blockquote> | ||
| + | Hi Edsmart,<br> | ||
| + | |||
| + | Our school <school's name> has completed SSO setup with Cloudwork.<br> | ||
| + | Please begin testing and let us know the results.<br> | ||
| + | </blockquote> | ||
===Adding the Login URL=== | ===Adding the Login URL=== | ||
| Line 42: | Line 51: | ||
#Login to Cloudwork Dashboard | #Login to Cloudwork Dashboard | ||
#Navigate to '''Single Sign On'''>'''Services'''>'''Edsmart''' | #Navigate to '''Single Sign On'''>'''Services'''>'''Edsmart''' | ||
| − | Navigate to '''Service Detail''' and click '''Edit''' | + | #Navigate to '''Service Detail''' and click '''Edit''' |
#In '''Login Url''' enter in the '''Login URL''' you received from EdSmart | #In '''Login Url''' enter in the '''Login URL''' you received from EdSmart | ||
#Click '''Submit''' | #Click '''Submit''' | ||
[[Category:Single Sign On Services]] | [[Category:Single Sign On Services]] | ||
Latest revision as of 23:42, 6 October 2021
Contents
SSO Setup Edsmart
- Login to Cloudwork Dashboard
- Navigate to Single Sign On>Identity Provider>XML file>Download
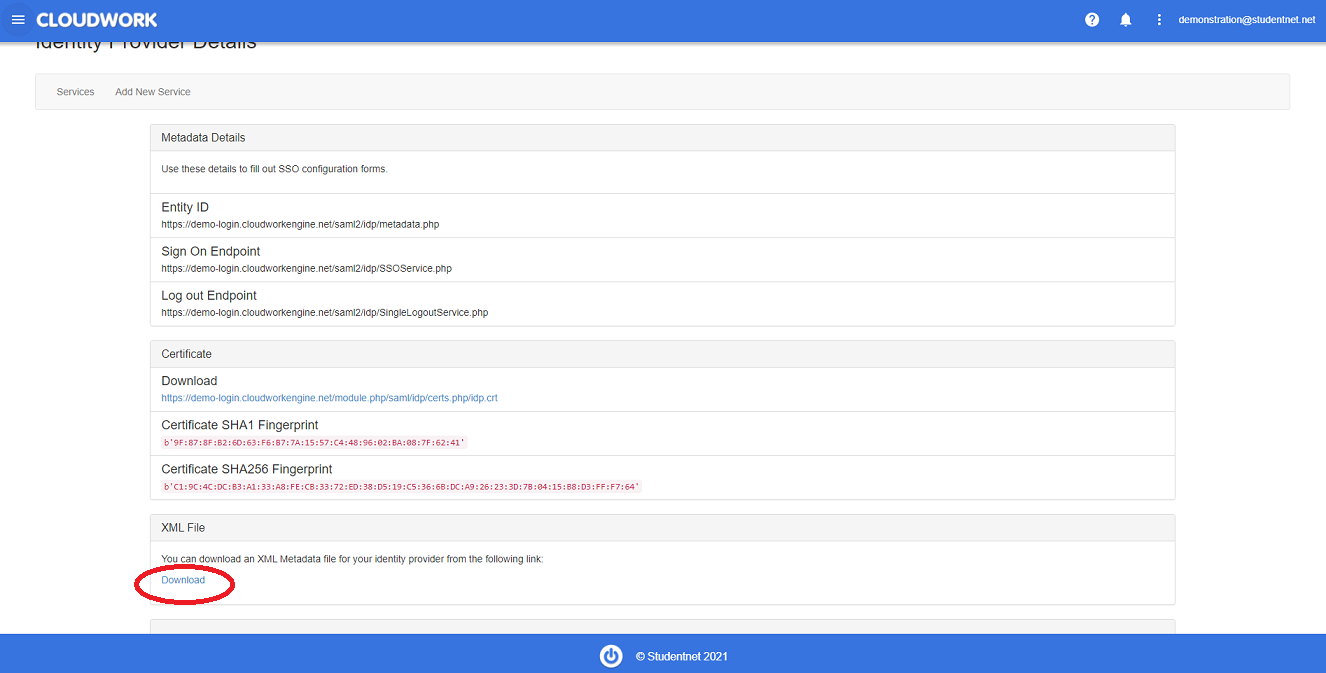 Location of XML File Download
 - Download your school's XML File
- Email Edsmart(help@edsmart.com) with Test User credentials and attaching the XML File from step 3

Email Template
Hi Edsmart,
Our school <school's name> is wanting to enable SSO with Cloudwork.
Attached is our school’s SAML2 metadata
Below are the credentials for a test user
Username: <test user’s username>
Password: <test user’s password>
SSO Setup Cloudwork
After receiving a reply from EdSmart
- Download XML File from email link
- Login to Cloudwork Dashboard
- Navigate to Single Sign On>Add New Service>Upload an XML File
- Fill out the form:
- In Name enter Edsmart
- In Choose an XML File select the file that was downloaded in step 1
- Click Submit
- Navigate to Single Sign On>Services>Edsmart
- Navigate to Attribute Map and click Edit
- Configure Attribute Map as follows:
- User Name: UserID
- Email: mail
- First Name: givenName
- Last Name: sn
- Role: role
- Click Submit
- Email back Edsmart(help@edsmart.com) informing them the SSO setup with Cloudwork has been completed and testing is ready to commence.
Email Template
Hi Edsmart,
Our school <school's name> has completed SSO setup with Cloudwork.
Please begin testing and let us know the results.
Adding the Login URL
EdSmart will send a Login URL via email, when you receive the Login URL
- Login to Cloudwork Dashboard
- Navigate to Single Sign On>Services>Edsmart
- Navigate to Service Detail and click Edit
- In Login Url enter in the Login URL you received from EdSmart
- Click Submit