Operoo
Contents
Caremonkey to Operoo
Caremonkey has rebranded themselves to be named Operoo
Updating SSO settings from Caremonkey to Operoo
Due to the rebranding from Caremonkey to Operoo, settings for Caremonkey SSO setup in Cloudwork need to be updated to match Operoo.
If you have Caremonkey SSO installed please follow these instructions to update the service to Operoo
If you have not installed Caremonkey SSO, skip these instructions and move on to Setting up Operoo SAML Integration for Parents
- Login to Cloudwork Dashboard>Single Sign On
- Click on the Caremonkey service>Service Details>Edit
- For the Login URL, change the caremonkey part of the url to operoo
- click Submit
- Navigate to SAML Config>Edit
- In Entity Id, change the caremonkey part to operoo
- in Assertion Consumer Service>Location
- Change the caremonkey part of the ACS URL to operoo
- Click submit
Setting up Operoo SAML Integration for Parents
How to set up Single Sign On (SSO)
Operoo Information
To set up Operoo you need the SchoolId and ContactType from Operoo :
SchoolId will be a number e.g. 1234 ContactType wll be a string e.g. StudentContact or GroupCarer
Cloudwork Set Up
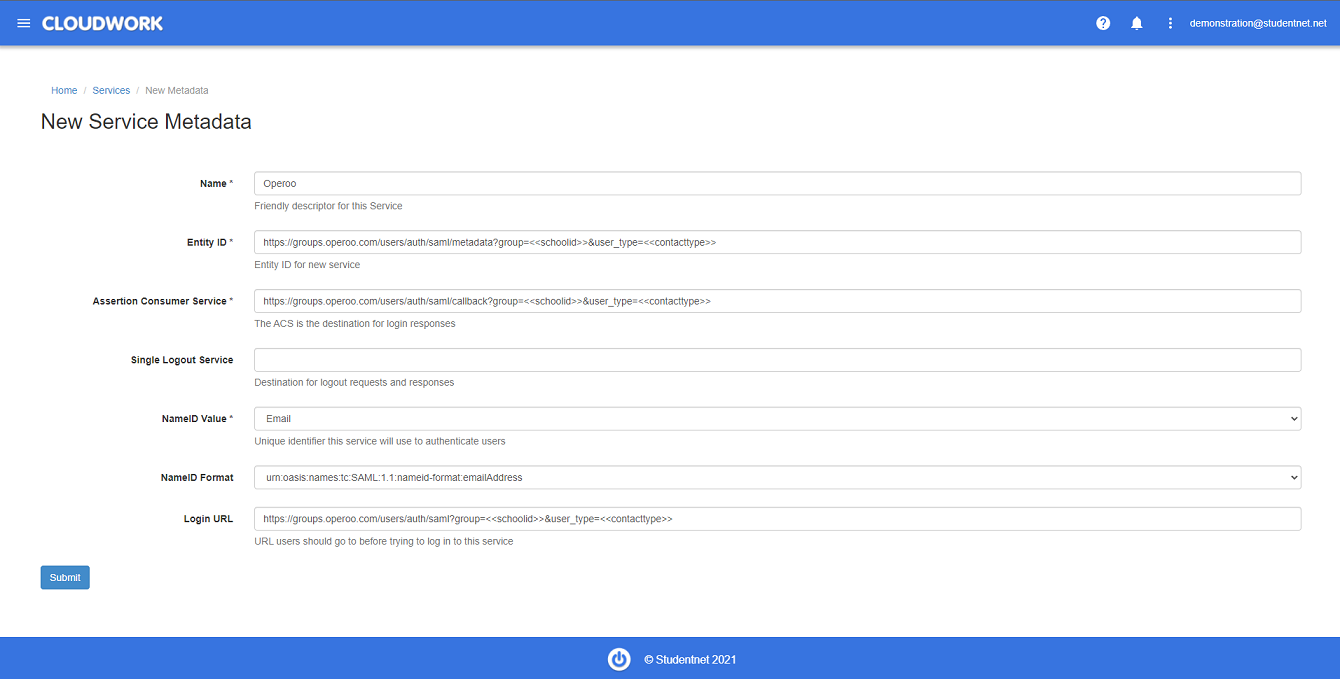
To set up Operoo in the Cloudwork Dashboard go to Single Sign On>Add New Service>Custom SAML Service. The details for you to add are listed here:
- Name: Operoo
- Entity ID: https://groups.operoo.com/users/auth/saml/metadata?group=<<schoolid>>&user_type=<<contacttype>>
- Assertion Consumer Service: https://groups.operoo.com/users/auth/saml/callback?group=<<schoolid>>&user_type=<<contacttype>>
- NameID Value: To be agreed upon with Operoo, usually SIS_ID or Email
- NameID format: EmailAddress
- Login URL: https://groups.operoo.com/users/auth/saml?group=<<schoolid>>&user_type=<<contacttype>>
Notes
Organisations may enable the Operoo SAML Integration for Staff Members but please be aware that the Staff Members own their accounts and not the Organisation. Staff Members can still login to Operoo directly, even if their accounts are disabled from the Organisation's SSO. However, a Operoo Administrator can remove a Staff Member's access to any groups anytime.
