Groups
'Groups' in Cloudwork can represent Security or Distribution groups that exist in your directory or School Management System (SMS).
They can also be manually created groups for sending emails, use by service providers or any number of other purposes.
Adding Groups
Groups can be added in the normal process of synchronising users in Sync Profiles or they can be added manually inside the dashboard.
To add a new group manually, click Groups in the Cloudwork dashboard menu, then on the Groups List that displays click Add New.
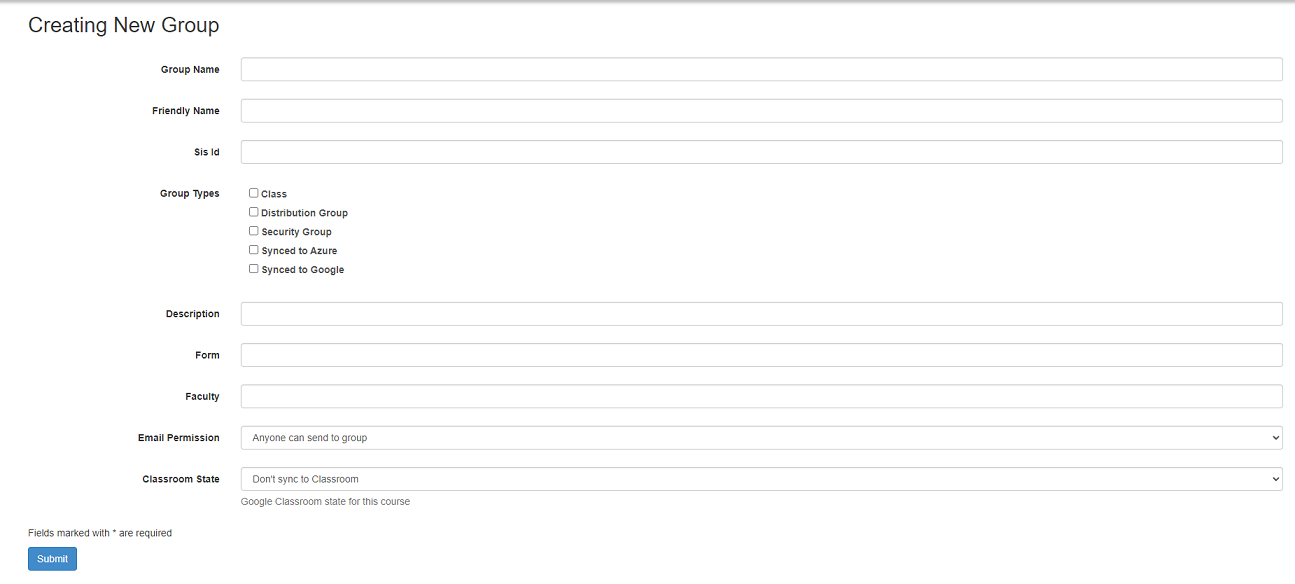
The following form displays:
- Group Name - Full name of the group. If this is intended to be an email distribution group this needs to be a full email address.
- Friendly Name - The name that will be displayed when using the group.
- Description - A description that will only be visible to this dashboard for reference by administrators
- Email Permission - Permissions that apply to email groups as to who can send email to them. The options available are:
- Anyone can send to group
- Anyone within the domain can send to the group
- Only group members can post
- Only Teachers can post
Bulk Group Upload
The other option for creating groups manually is through the bulk upload facility You can create a CSV file with the user account information using spreadsheet programs like Microsoft Excel or OpenOffice Calc.
Your CSV file should contain the following headings: Group Email Address, Member Email Address, Group Name
e.g. Group Email Address, Member Email Address, Group Name
class-1@example.edu.au, a.student@example.edu.au, Class Number 1
class-2@example.edu.au, joeblogs@example.edu.au, Class Number 2
class-2@example.edu.au, a.student@example.edu.au, Class Number 2
The following groups will be created or added to:
   Class Number 1: a.student@example.edu.au
   Class Number 2: a.student@example.edu.au
                   joeblogs@example.edu.au
You can also replace the Member Email Address column with Member User Name
e.g. Group Email Address, Member User Name, Group Name
class-1@example.edu.au, astudent, Class Number 1
class-2@example.edu.au, jblogs, Class Number 2
class-2@example.edu.au, astudent, Class Number 2
The following groups will be created or added to:
   Class Number 1: astudent
   Class Number 2: astudent
                   jblogs
Bulk Send Welcome Message
After bulk uploading a group, we can send a Welcome Message to all users that are apart of that group.
- Navigate to Message Template
- Click on the Welcome Message Template.
- Click Send
- Under Attributes Select Groups
- Under Match enter group name
- Click continue
- Check users displayed are the users of the new group
- If the users shown are the intended users for receiving the Welcome Message click Continue to send the Welcome Message.
