Difference between revisions of "Authentication Settings"
Jump to navigation
Jump to search
| Line 4: | Line 4: | ||
To get to the Authentication settings: | To get to the Authentication settings: | ||
| − | # In the | + | # In the Cloudwork dashboard, click the menu bar>settings>Authentication Settings |
| + | |||
| + | [[File:Menu.png|300px]] | ||
[[File:Authentication setting snapshot.PNG]] | [[File:Authentication setting snapshot.PNG]] | ||
Revision as of 04:32, 8 April 2021
Authentication Settings
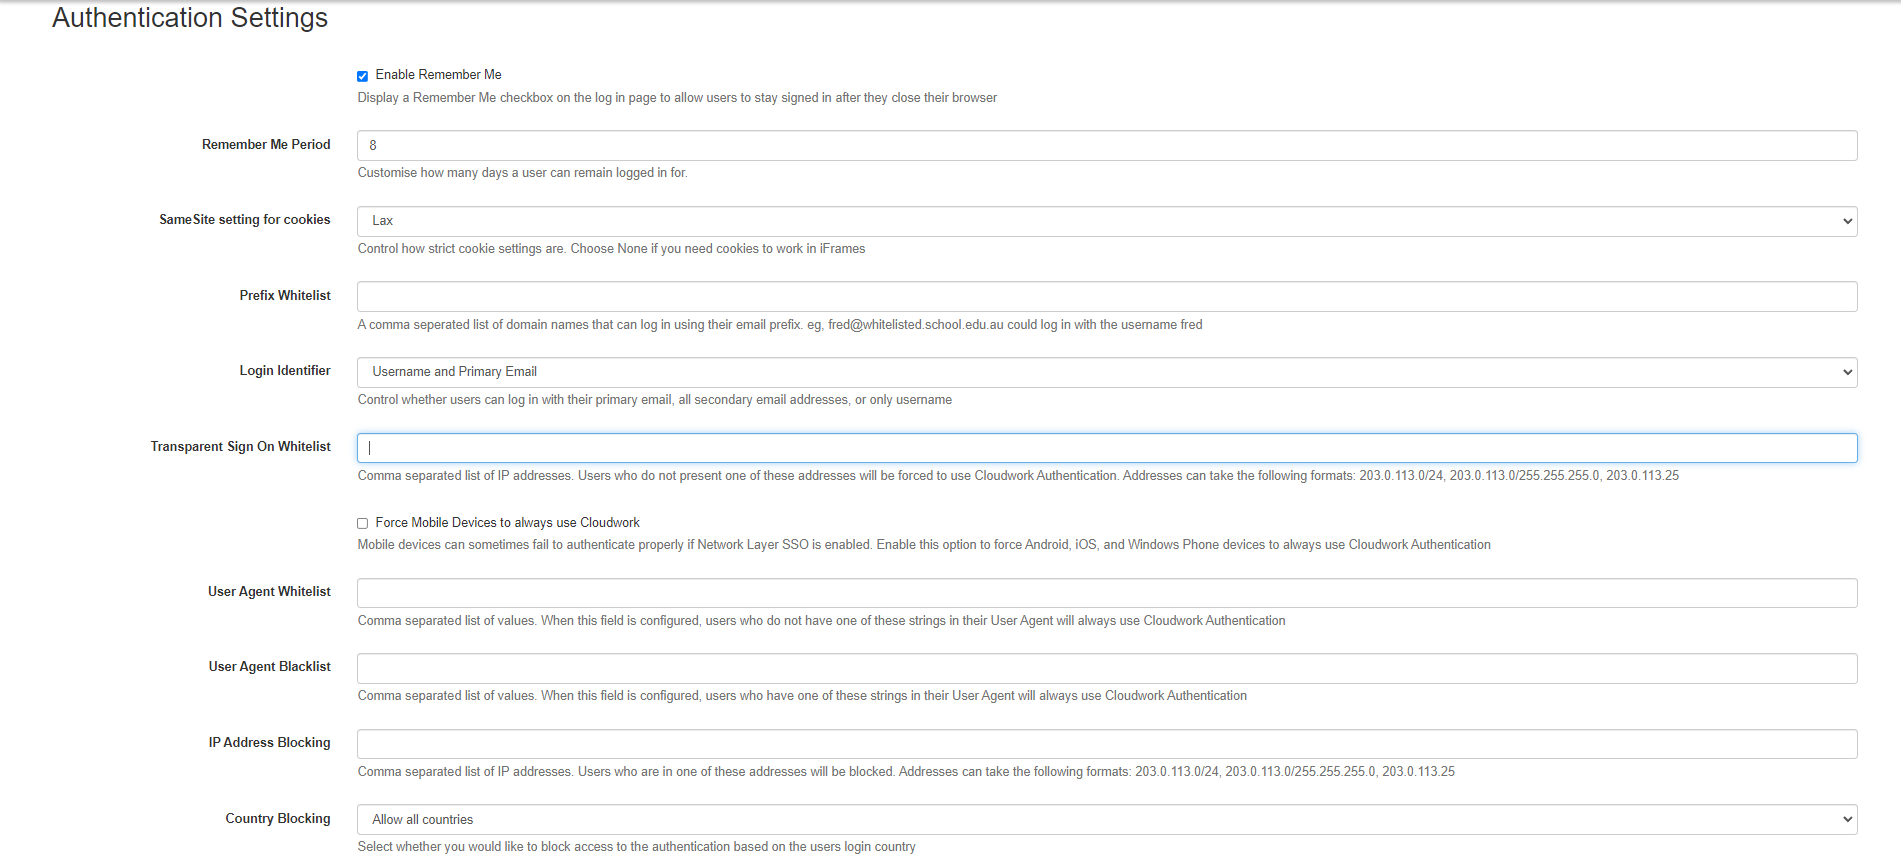
Authentication Settings handle settings on how users log in.
To get to the Authentication settings:
- In the Cloudwork dashboard, click the menu bar>settings>Authentication Settings
- Enable Remember Me: Display a Remember Me checkbox on the log in page to allow users to stay signed in after they close their browser
- Remeber Me Period: Customise how many days a user can remain logged in for before requiring to sign in again.
- Prefix Whitelist: Domain Names entered in this field, will accept users logging in with their email instead of username
- IP Address Whitelist IP addresses listed in this field, will be forced to login Cloudwork Authentication, instead of ADFS
- User Agent Whitelist Users listed in this field will not have to use Cloudwork Authentication. This is handy to only allow certain users to login via certain browsers
- User Agent Blacklist: Users listed in this field will have to use Cloudwork Authentication. This is handy to only disallow certain users to login via certain browsers

