Difference between revisions of "Freshdesk"
Jump to navigation
Jump to search
| Line 1: | Line 1: | ||
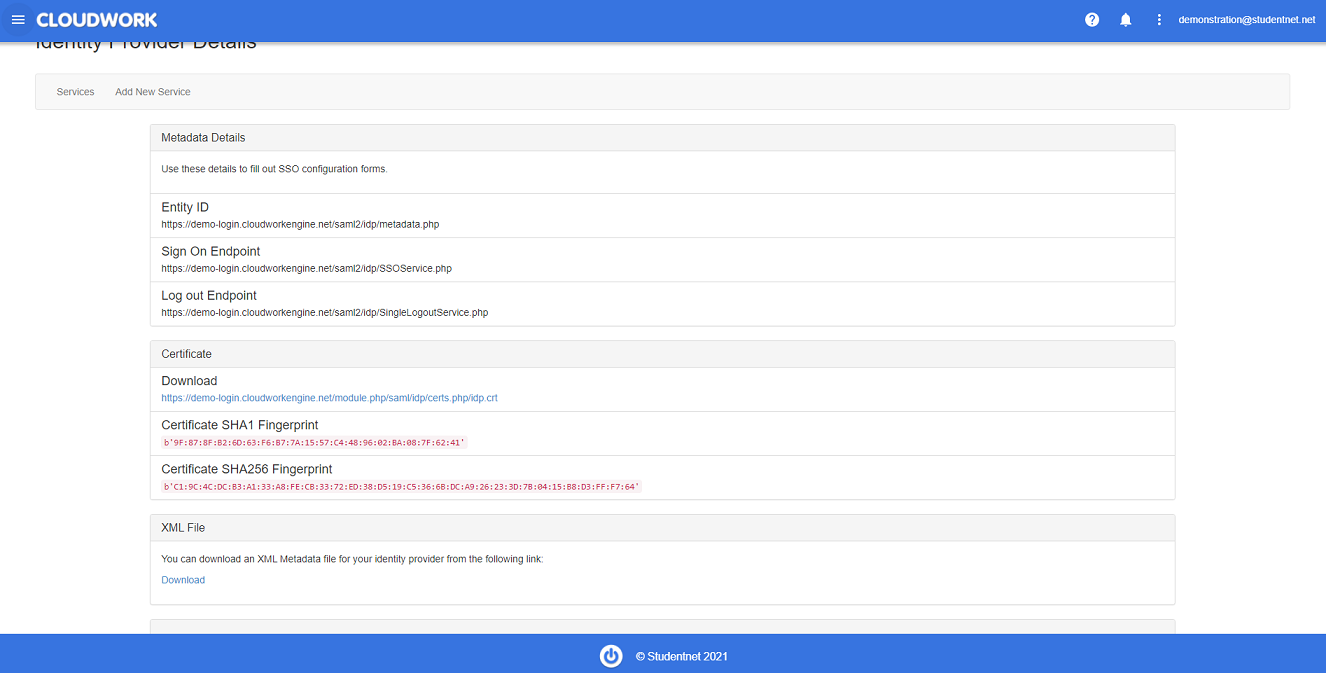
| − | #To configure SSO in Freshdesk, log in to your Cloudwork Dashboard and navigate to '''Single Sign On''' > '''Identity Provider''' as provide the information that freshdesk asks for. | + | #To configure SSO in Freshdesk, log in to your Cloudwork Dashboard and navigate to '''Single Sign On''' > '''Identity Provider''' as provide the information that freshdesk asks for.<br>[[File:idp_info.PNG|centre|frame|Example Identify Provider Information]] |
#To finish setting up SSO for FreshDesk, you need to log in to the '''Cloudwork Dashboard'''>'''Single Sign On''' > '''Add New Service''' > '''Freshdesk''' | #To finish setting up SSO for FreshDesk, you need to log in to the '''Cloudwork Dashboard'''>'''Single Sign On''' > '''Add New Service''' > '''Freshdesk''' | ||
#Enter your fresh deskdomain | #Enter your fresh deskdomain | ||
Revision as of 04:55, 12 October 2021
- To configure SSO in Freshdesk, log in to your Cloudwork Dashboard and navigate to Single Sign On > Identity Provider as provide the information that freshdesk asks for.
- To finish setting up SSO for FreshDesk, you need to log in to the Cloudwork Dashboard>Single Sign On > Add New Service > Freshdesk
- Enter your fresh deskdomain
Freshdesk only needs a user email address to log in, however you can pass extra information along as well. If you would like to do so, find your new Fresh Desk service entry in Cloudwork, scroll down to Attribute Map and click "Edit".
- First Name: givenname
- Last Name: surname
- Phone: phone
- Company: company
- Other attributes not listed here: custom_field_<name_of_field_in_freshdesk>
