Difference between revisions of "Story Box Library"
Jump to navigation
Jump to search
(Created page with "==Story Box== #Login to Story Box as the Account Holder at :https://storyboxlibrary.com.au/login #Navigate to '''Other Account Actions''' >'''Configure SSO details''' #Fill o...") |
|||
| Line 1: | Line 1: | ||
==Story Box== | ==Story Box== | ||
| + | ==SSO Setup with Story Box== | ||
#Login to Story Box as the Account Holder at :https://storyboxlibrary.com.au/login | #Login to Story Box as the Account Holder at :https://storyboxlibrary.com.au/login | ||
#Navigate to '''Other Account Actions''' >'''Configure SSO details''' | #Navigate to '''Other Account Actions''' >'''Configure SSO details''' | ||
| Line 11: | Line 12: | ||
| − | + | ==SSO setup with Cloudwork== | |
#Login to the '''Cloudwork Dashboard'''>'''Single Sign On'''>'''Add New Service'''>'''Upload an XML File''' | #Login to the '''Cloudwork Dashboard'''>'''Single Sign On'''>'''Add New Service'''>'''Upload an XML File''' | ||
#Enter '''Story Box''' into the name | #Enter '''Story Box''' into the name | ||
Revision as of 04:24, 23 February 2022
Story Box
SSO Setup with Story Box
- Login to Story Box as the Account Holder at :https://storyboxlibrary.com.au/login
- Navigate to Other Account Actions >Configure SSO details
- Fill out SSO domain and certificate field
- SSO Domain: Located in the Cloudwork dashboard, navigate to Single Sign On>Identity Provider>Entity ID
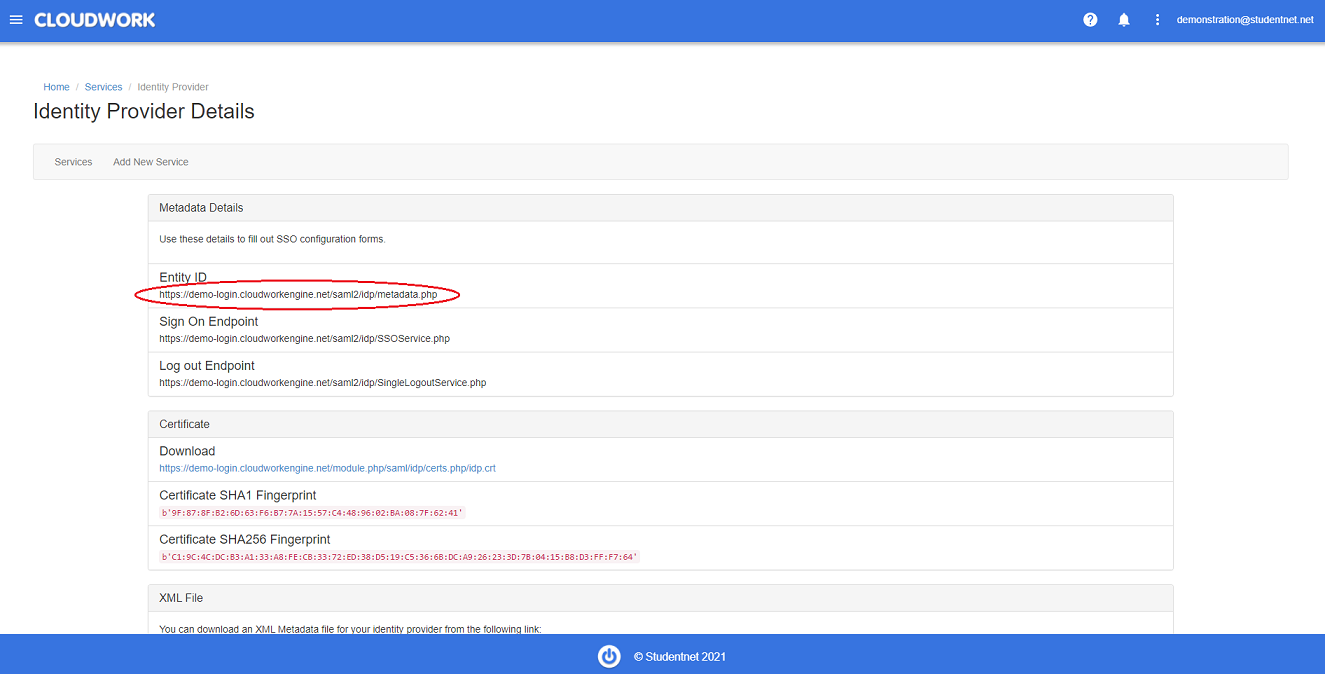 Example of Entity ID
 - Copy the information in Entity ID as this will be sent to JSTOR
- Certificate field: Take the contents of the X509 certificate
- SSO Domain: Located in the Cloudwork dashboard, navigate to Single Sign On>Identity Provider>Entity ID
- Click Update
- Download the XML metadata that appears

SSO setup with Cloudwork
- Login to the Cloudwork Dashboard>Single Sign On>Add New Service>Upload an XML File
- Enter Story Box into the name
- Choose the XML file you downloaded from Story Box
- Upload the file
- Click submit