Difference between revisions of "Jamf Connect"
| Line 37: | Line 37: | ||
Our school <schoolname> is wanting to setup a connection between Cloudwork and JAMF Connect.<br> | Our school <schoolname> is wanting to setup a connection between Cloudwork and JAMF Connect.<br> | ||
| − | We have completed the setup on Cloudwork's end | + | We have completed the setup on Cloudwork's end<br> |
Could you also provide what information you will require from us to complete the process at your end?<br> | Could you also provide what information you will require from us to complete the process at your end?<br> | ||
Revision as of 07:03, 25 July 2022
JAMF Connect
JAMF Connect is used to allow users when logging into a Mac device to be prompted with Cloudwork's Identity Provider login, instead of the usual Mac login screen.
This is so you can create a better user experience by giving users a familiar login screen every time the user signs into a SSO Service.
As a part of Cloudwork's support for JAMF Connect: When setting up an OAuth App in the Cloudwork Dashboard, under Allowed Grant Types, Password can now be selected.
Password must be selected as an Allowed Grant Type when setting up JAMF Connect, this is to allow both the username and password to authenticate and authorise the user.
Setting up with Cloudwork
- Email JAMF Connect telling them you want to complete a setup between Cloudwork and JAMF Connect, asking them for the Redirect URIs and what information JAMF Connect needs to complete steps at their end.
- Login to the Cloudwork Dashboard>Single Sign On>Manage OpenID Connect Apps>Add New Service
- In Name enter JAMF Connect
- In Client Type select Public Client
- In Redirect URIs enter the Redirect URIs:
- https://127.0.0.1/jamfconnect for MacOS
- jamfunlock://callback/auth for IOS to allow biometric authentication
- For Allowed Grant Types enable the checkbox Password
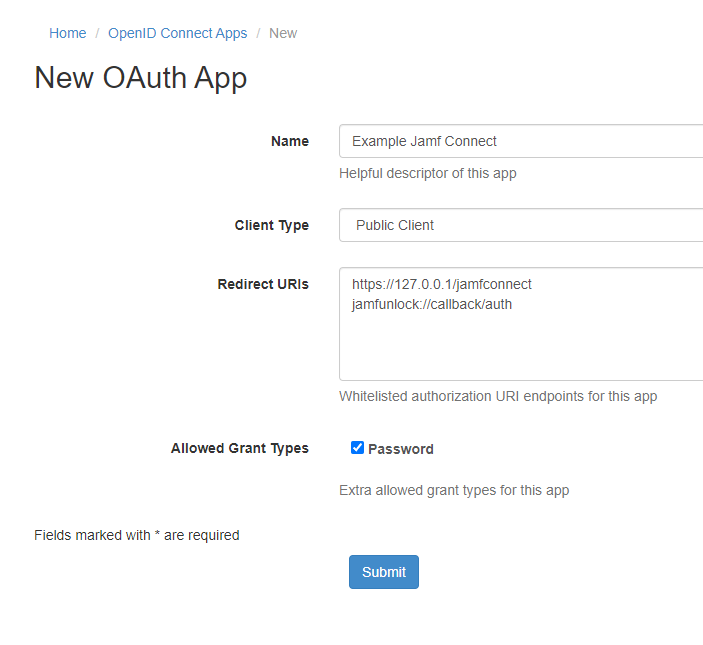 Example JAMF Connect
 - Click Submit, you will then be redirected and see the service information.
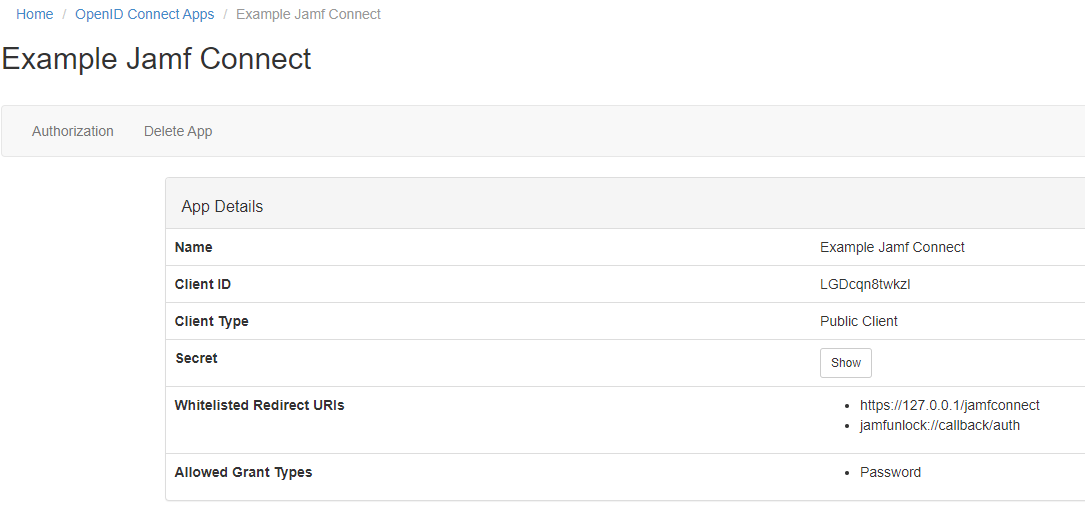 Example of Service Information
 - Make a note of the Client ID, Secret(press show to reveal Secret) and Whitelisted Redirect URIs
- Navigate to Cloudwork Dashboard>Single Sign On>Manage OpenID Connect Apps>Identity Provider and make note of the Auto config URL
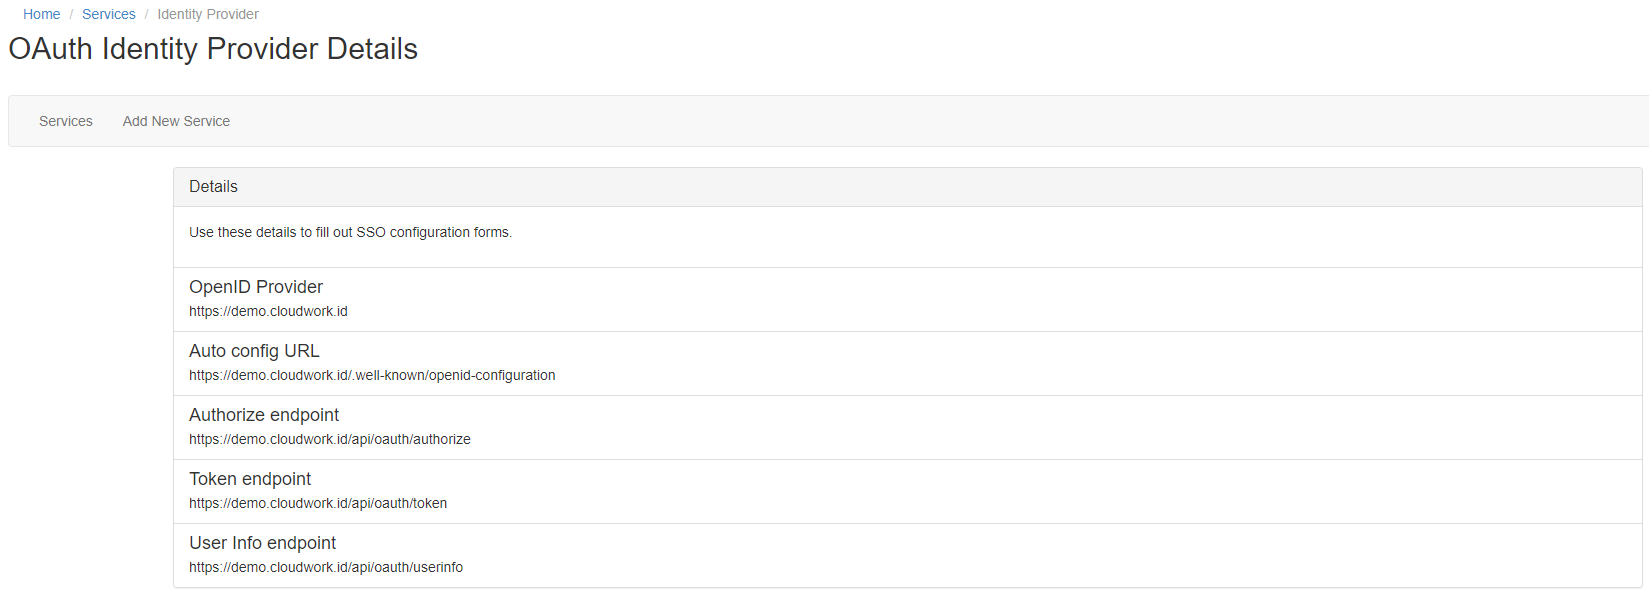 Example of OAuth IdP Details


Setup with JAMF Connect
- Login to JAMF Connect
- Fill out the Form as follows:
- Identity Provider: Select Custom
- OIDC Client ID: Enter the previously noted Client ID
- ROPG Client ID: Enter the previously noted Client ID
- Client Secret: Enter the previously noted Secret
- OIDC Redirect URI: Enter the previously noted Whitelisted Redirect URIs
- Discovery URL: Enter the previously noted Auto config URL

Email Template
Hi JAMF Connect,
Our school <schoolname> is wanting to setup a connection between Cloudwork and JAMF Connect.
We have completed the setup on Cloudwork's end
Could you also provide what information you will require from us to complete the process at your end?